Trails
Reviews
Tips
Community
Deals
Latest
Support
Trails
Find trails
Best bike trails
Destinations
Add a new trail
Reviews
Mountain bike reviews
Components
Tires
Clothing & shoes
Helmets
Accessories
Product news
Community
MTB Clubs
Races & Events
Bike Shops
Tips
Skills
Fitness & Training
Health & Nutrition
Beginners
Repair
Latest Articles
Podcast
Deals
Support Singletracks
Sign in
Create an account
About us
Newsletter signup
Reviews
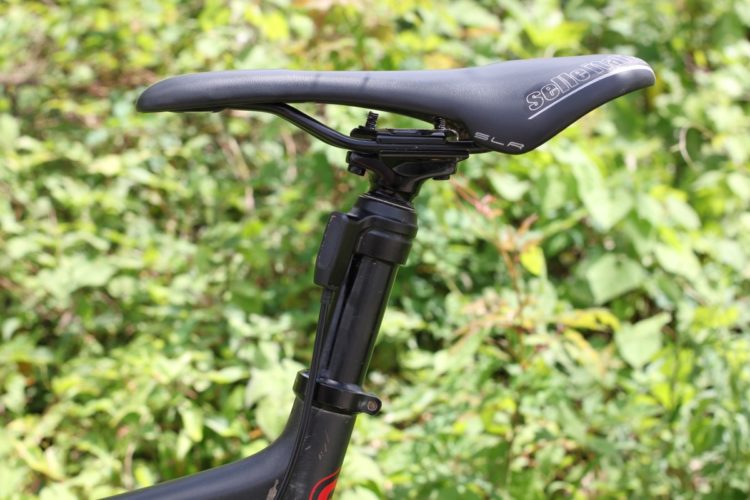
Saddles
$21 Carbon Mountain Bike Saddle Weighs 85g, But Is It Even Worth That Low, Low Price?
2
Repair
How To Install the OneUp Components EDC Tool System
2
Mountain Bikes and Gear
Mondraker Dune Carbon RR Review
Dropper Posts
Fox Transfer Dropper Post Review
6
Mountain Bikes and Gear
Spank Industries' Green Filler Is the Carbon Killer: Review of the Oozy Trail 760 Vibrocore Bar
5
Mountain Bikes and Gear
Soggy Shoes Begone: The DryGuy Force Dry DX
Mountain Bikes and Gear
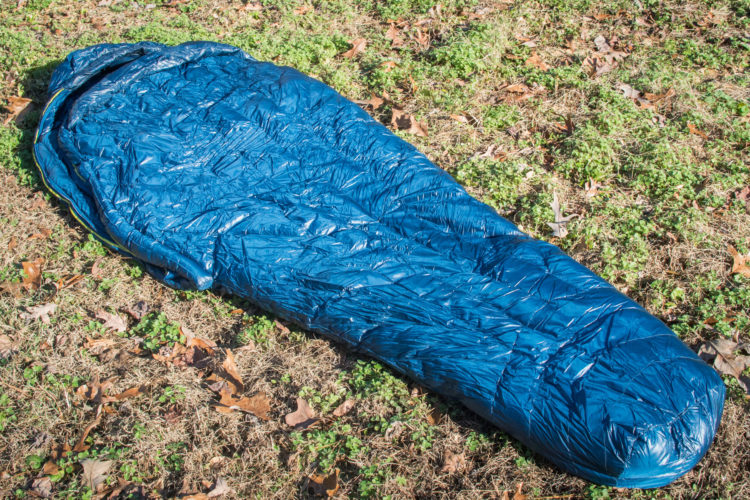
Packing Heat: Big Agnes Flume UL 30
Tops & Jerseys
Sweet Protection Badlands Merino Jersey Review
Body Armor
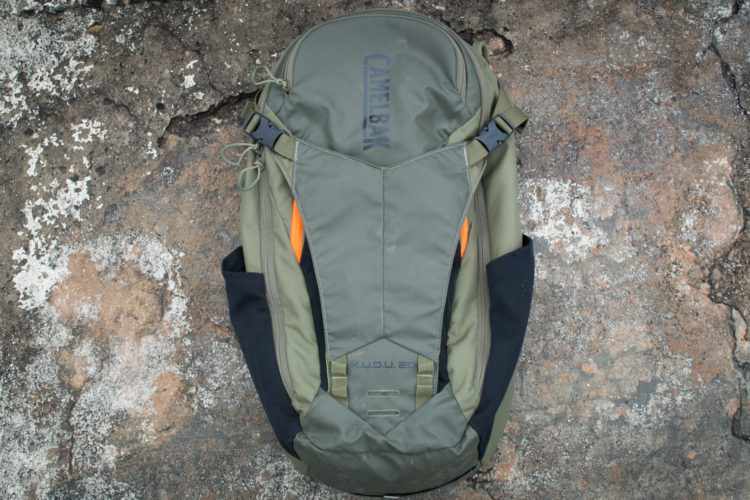
Camelbak K.U.D.U. Hydration Pack Review
Mountain Bikes and Gear
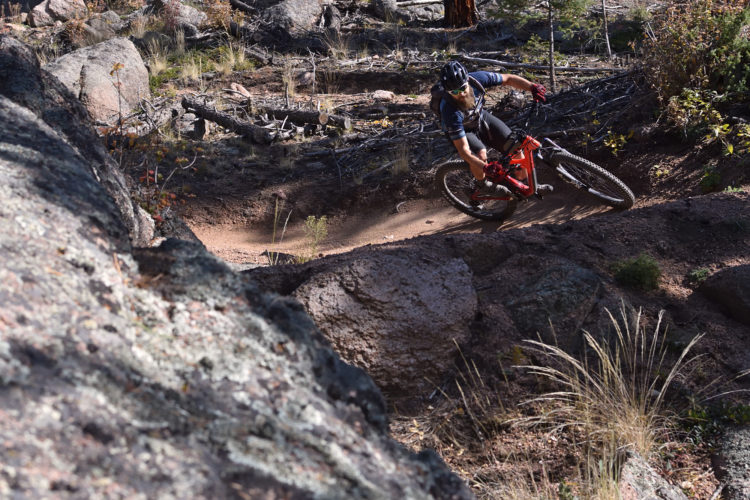
The Cannondale Jekyll Loves to Hustle and Flow - Long Term Review
Mountain Bikes and Gear
Velocio Powerwool LS Base Layer Review
Wheels
Quality MTB Wheels at a Reasonable Price: Spank Oozy Trail 345 Wheelset Review
3
Brakes
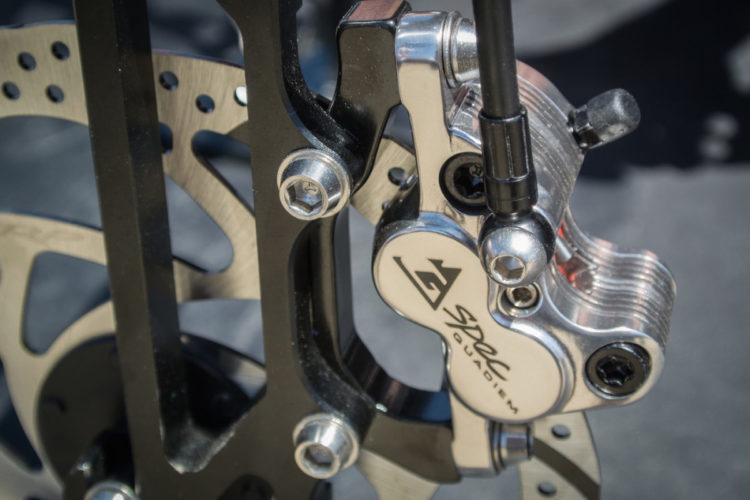
Brakes for the Fastest Man in the World: TRP G-Spec Quadiem Review
Dropper Posts
Review: The BikeYoke Revive Dropper Post Is Exceptional
4
Knee Pads
Fly Racing Lite Knee Pads Review
2
Mountain Bikes and Gear
Ibis Mojo HD4 Review: The Apex of Mountain Bike Evolution
10
Mountain Bikes and Gear
Review: The IMBA Jacket from Showers Pass Is a Win-Win-Win
Mountain Bikes and Gear
Protecting Your Tires, Improving Performance - CushCore Review
4
Mountain Bikes and Gear
A Burly British Brawler
Mountain Bikes and Gear
PowerTap Magnetless Speed or Cadence Sensor Review
Clipless Pedal Shoes
Review: Riding - and Hiking - Beyond the Limits of the Pearl Izumi X-Project P.R.O. Shoe
3
Wheels
Stans Arch MK3 Wheelset Review
2
Mountain Bikes and Gear
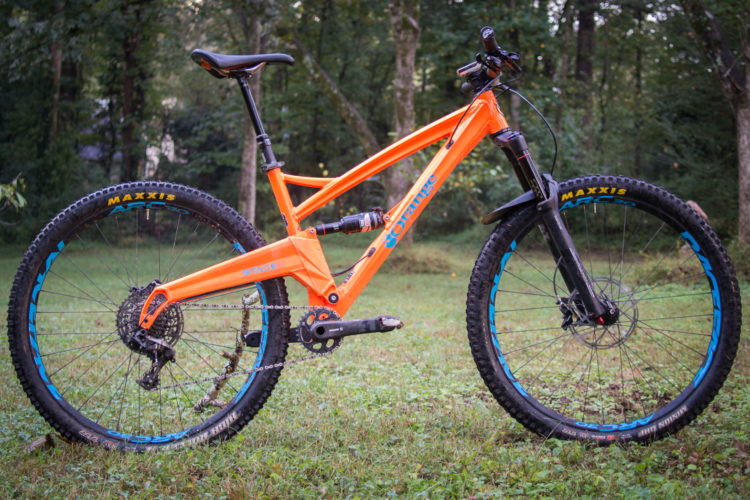
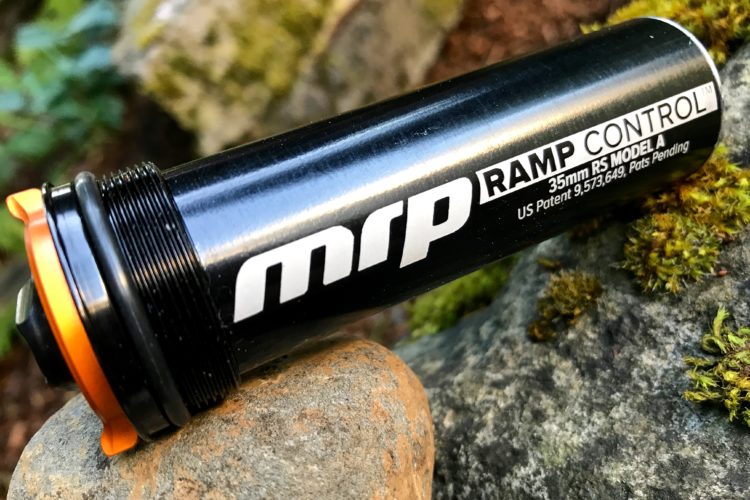
Ramp Up More, Bottom Out Less: MRP Ramp Control Cartridge Review
1
Mountain Bikes and Gear
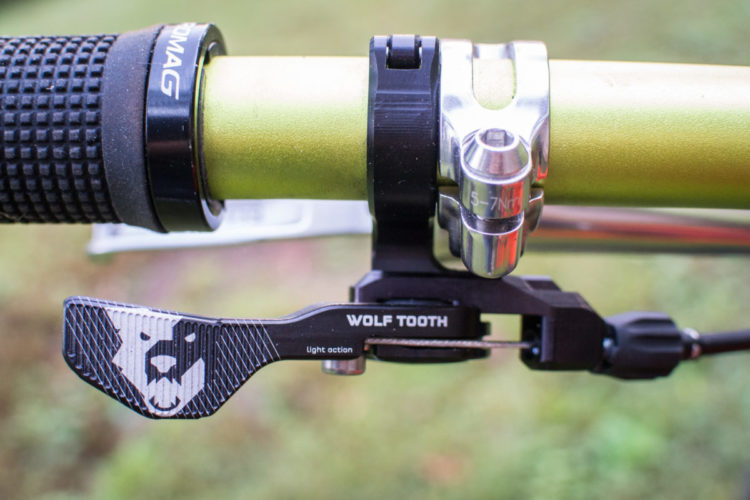
The Best Remote for Your Reverb - Wolf Tooth ReMote Sustain Review
Mountain Bikes and Gear
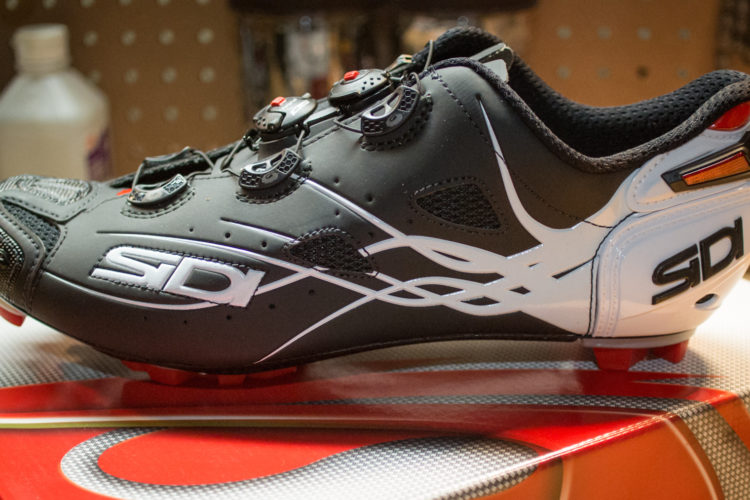
Ferraris for Your Feet: Sidi Tiger Review
Mountain Bikes and Gear
4 Michelin Wild AM Tires Were Sacrificed During this Review
3
Enduro Bikes
Review: Carbon Enduro Bike + Pinion Gearbox = Zerode Taniwha
2
Mountain Bikes and Gear
Watch: GoPro Hero 5 with Image Stabilization - Does it Work for Mountain Biking?
Mountain Bikes and Gear
Marin's New B-17 Full Suspension Plus Bike - Test Ride Review
Mountain Bikes and Gear
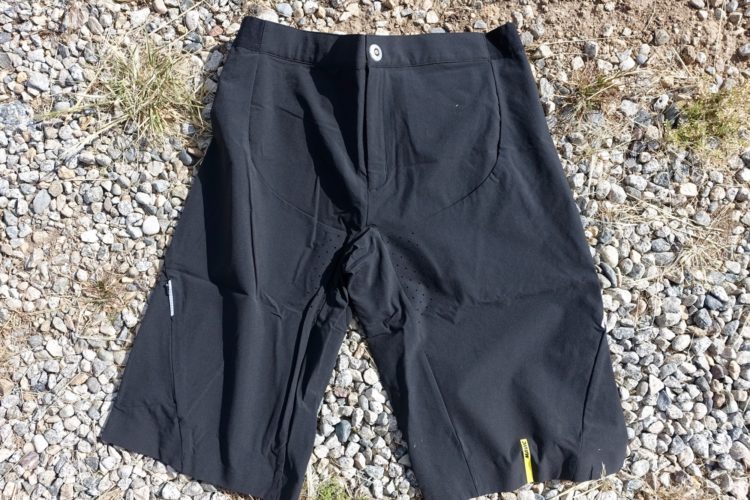
Mavic's XA Pro Shorts Provide Superb Comfort in a Lightweight Package - A Review
3
Mountain Bikes and Gear
Mavic's XA Pro Under Bib Short Provides Superb Ventilation - A Review
Mountain Bikes and Gear
3-in-1 Little Big Bike Easily Converts from Balance Bike to Two-Wheel Pedal Bike
4
Wheels
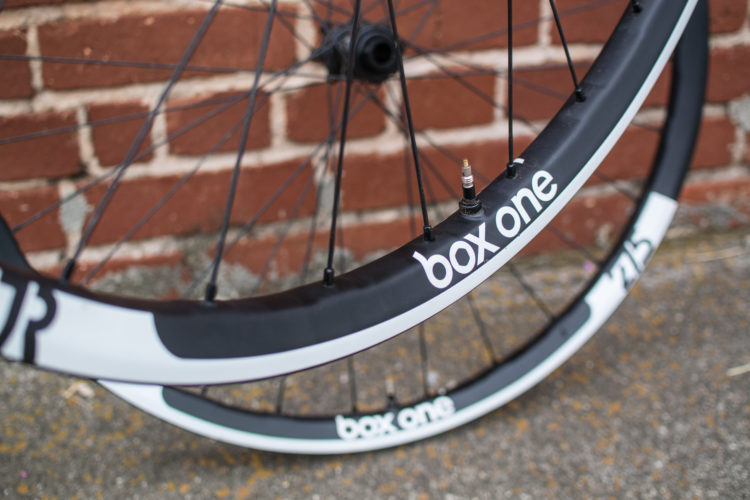
Box Components One Carbon Wheelset Review
Mountain Bikes and Gear
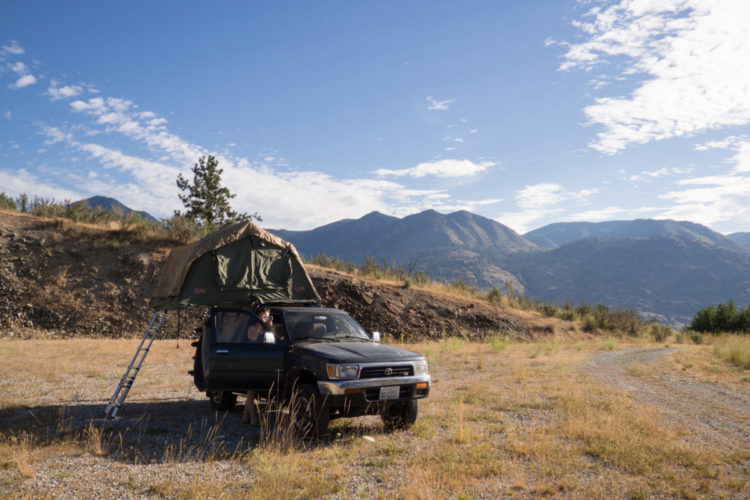
Tepui Kukenam Sky Rooftop Tent Review
4
Mountain Bikes and Gear
2018 Rocky Mountain's Little Big Bike - Altitude Carbon 70 Review
6
Mountain Bikes and Gear
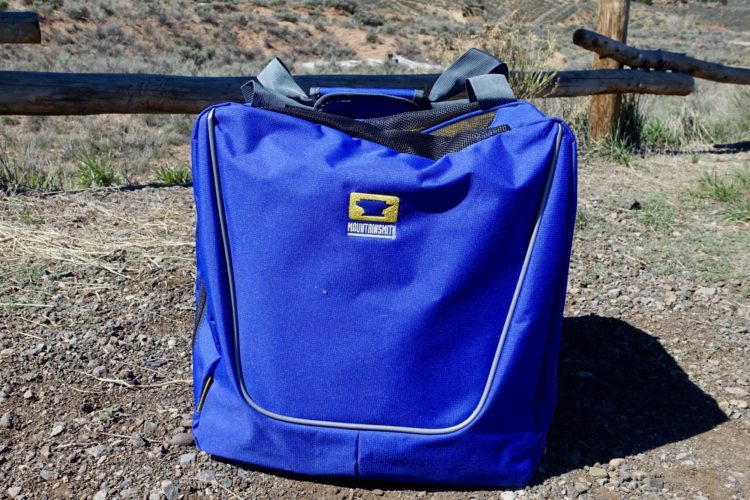
Mountainsmith Bike Cube Gear Bag Review
Mountain Bikes and Gear
Cannondale's All-New Trigger: A Long Term Review
2
Components
PNW Cascade Dropper Post Review: An Easy and Affordable Upgrade with a Huge Payback
5
Mountain Bikes and Gear
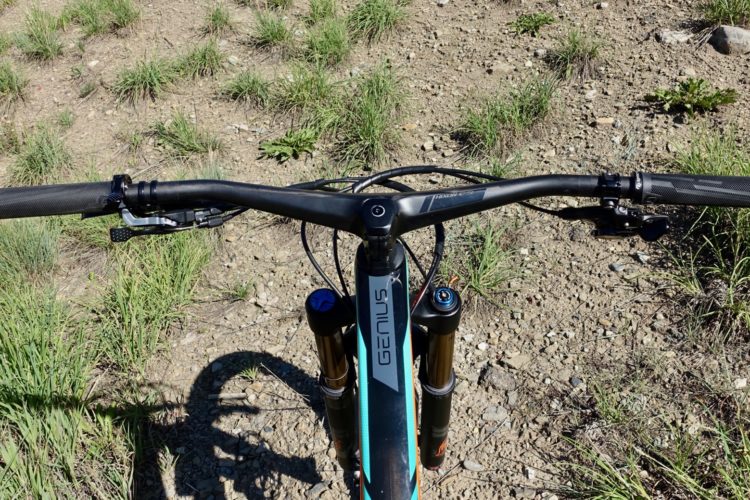
The Perfect Trail Bike? 2018 Scott Genius 700 Tuned Test Ride Review
Mountain Bikes and Gear
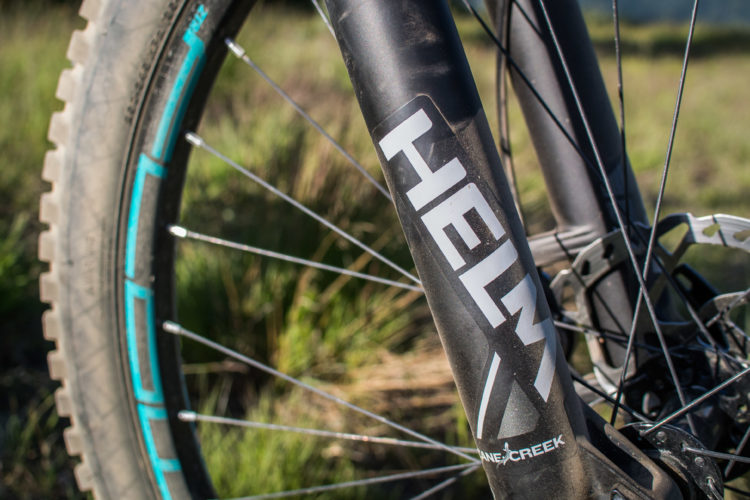
First Ride on Cane Creek's New Helm Coil Fork
Mountain Bikes and Gear
Rocky Mountain Rolls Out 2018 Instinct and Pipeline - First Ride Impressions
1
Mountain Bikes and Gear
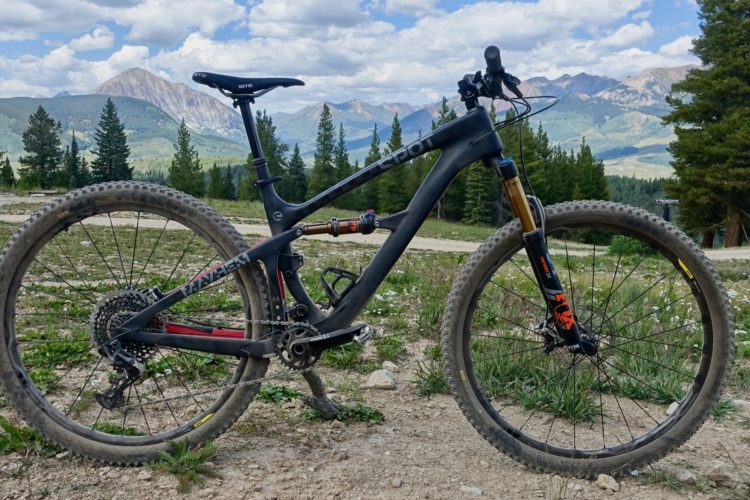
Spot Mayhem 29er Test Ride Review
Mountain Bikes and Gear
Steel Full Suspension Proudfoot Cycles Primed 29er Test Ride Review
Culture
Integrated Carbon Bar/Stem Combo Weighs Just 290g! The New Syncros Hixon iC
1
Community
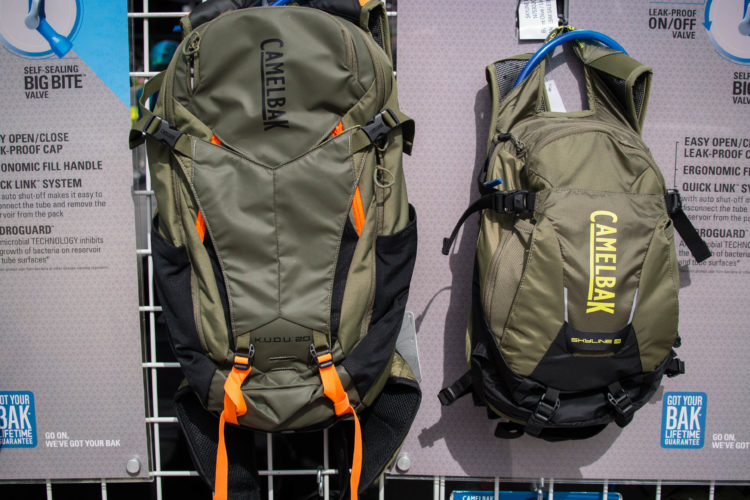
New KUDU Pack from Camelbak for Big Days on the Bike
Mountain Bikes and Gear
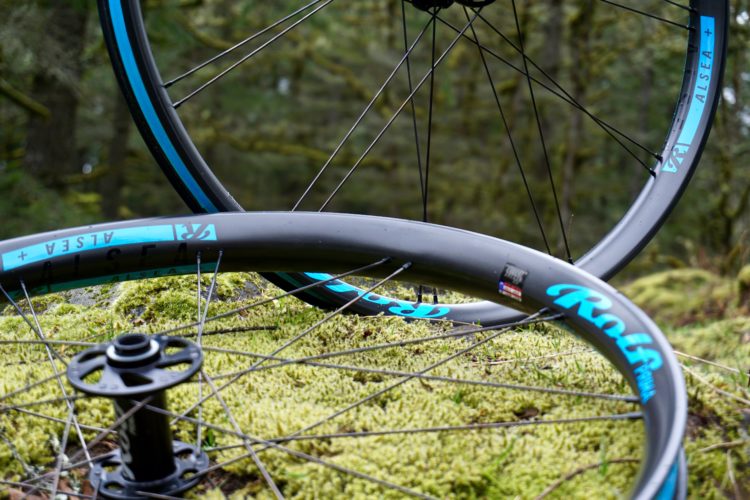
The Alsea Plus Carbon Wheel by Rolf Prima Has Just 24 Spokes - A Review
Mountain Bikes and Gear
Pactimo Terrain Shorts Review
Mountain Bikes and Gear
Pactimo Terrain Jersey Review
«
1
2
3
4
…
15
»

 2
2