
No component of bike setup is without consequence. Set up your shock firm for climbing, and it may suffer on a descent. Run your tires softer for cornering traction and risk the consequence of a flat. Even though cleat placement — where a clipless pedal cleat is placed along the toebox of a clipless shoe — may seem innocuous, there are pros and cons to running the cleat farther back, in the middle, or toward the toe.
There are different schools of thought when it comes to bike cleat position: if you’re a gravity rider, slam your cleat all the way back. Cross-country rider? Take it to the toes.
To learn the ins and outs, and ups and downs of cleat position, we got in touch with Charles Van Atta of the Denver Fit Loft. Van Atta has been mountain biking since the 90s and has been fitting bikes since the 2000s and gave us the lowdown on cleat position for mountain bikers.
Why bike cleat position matters
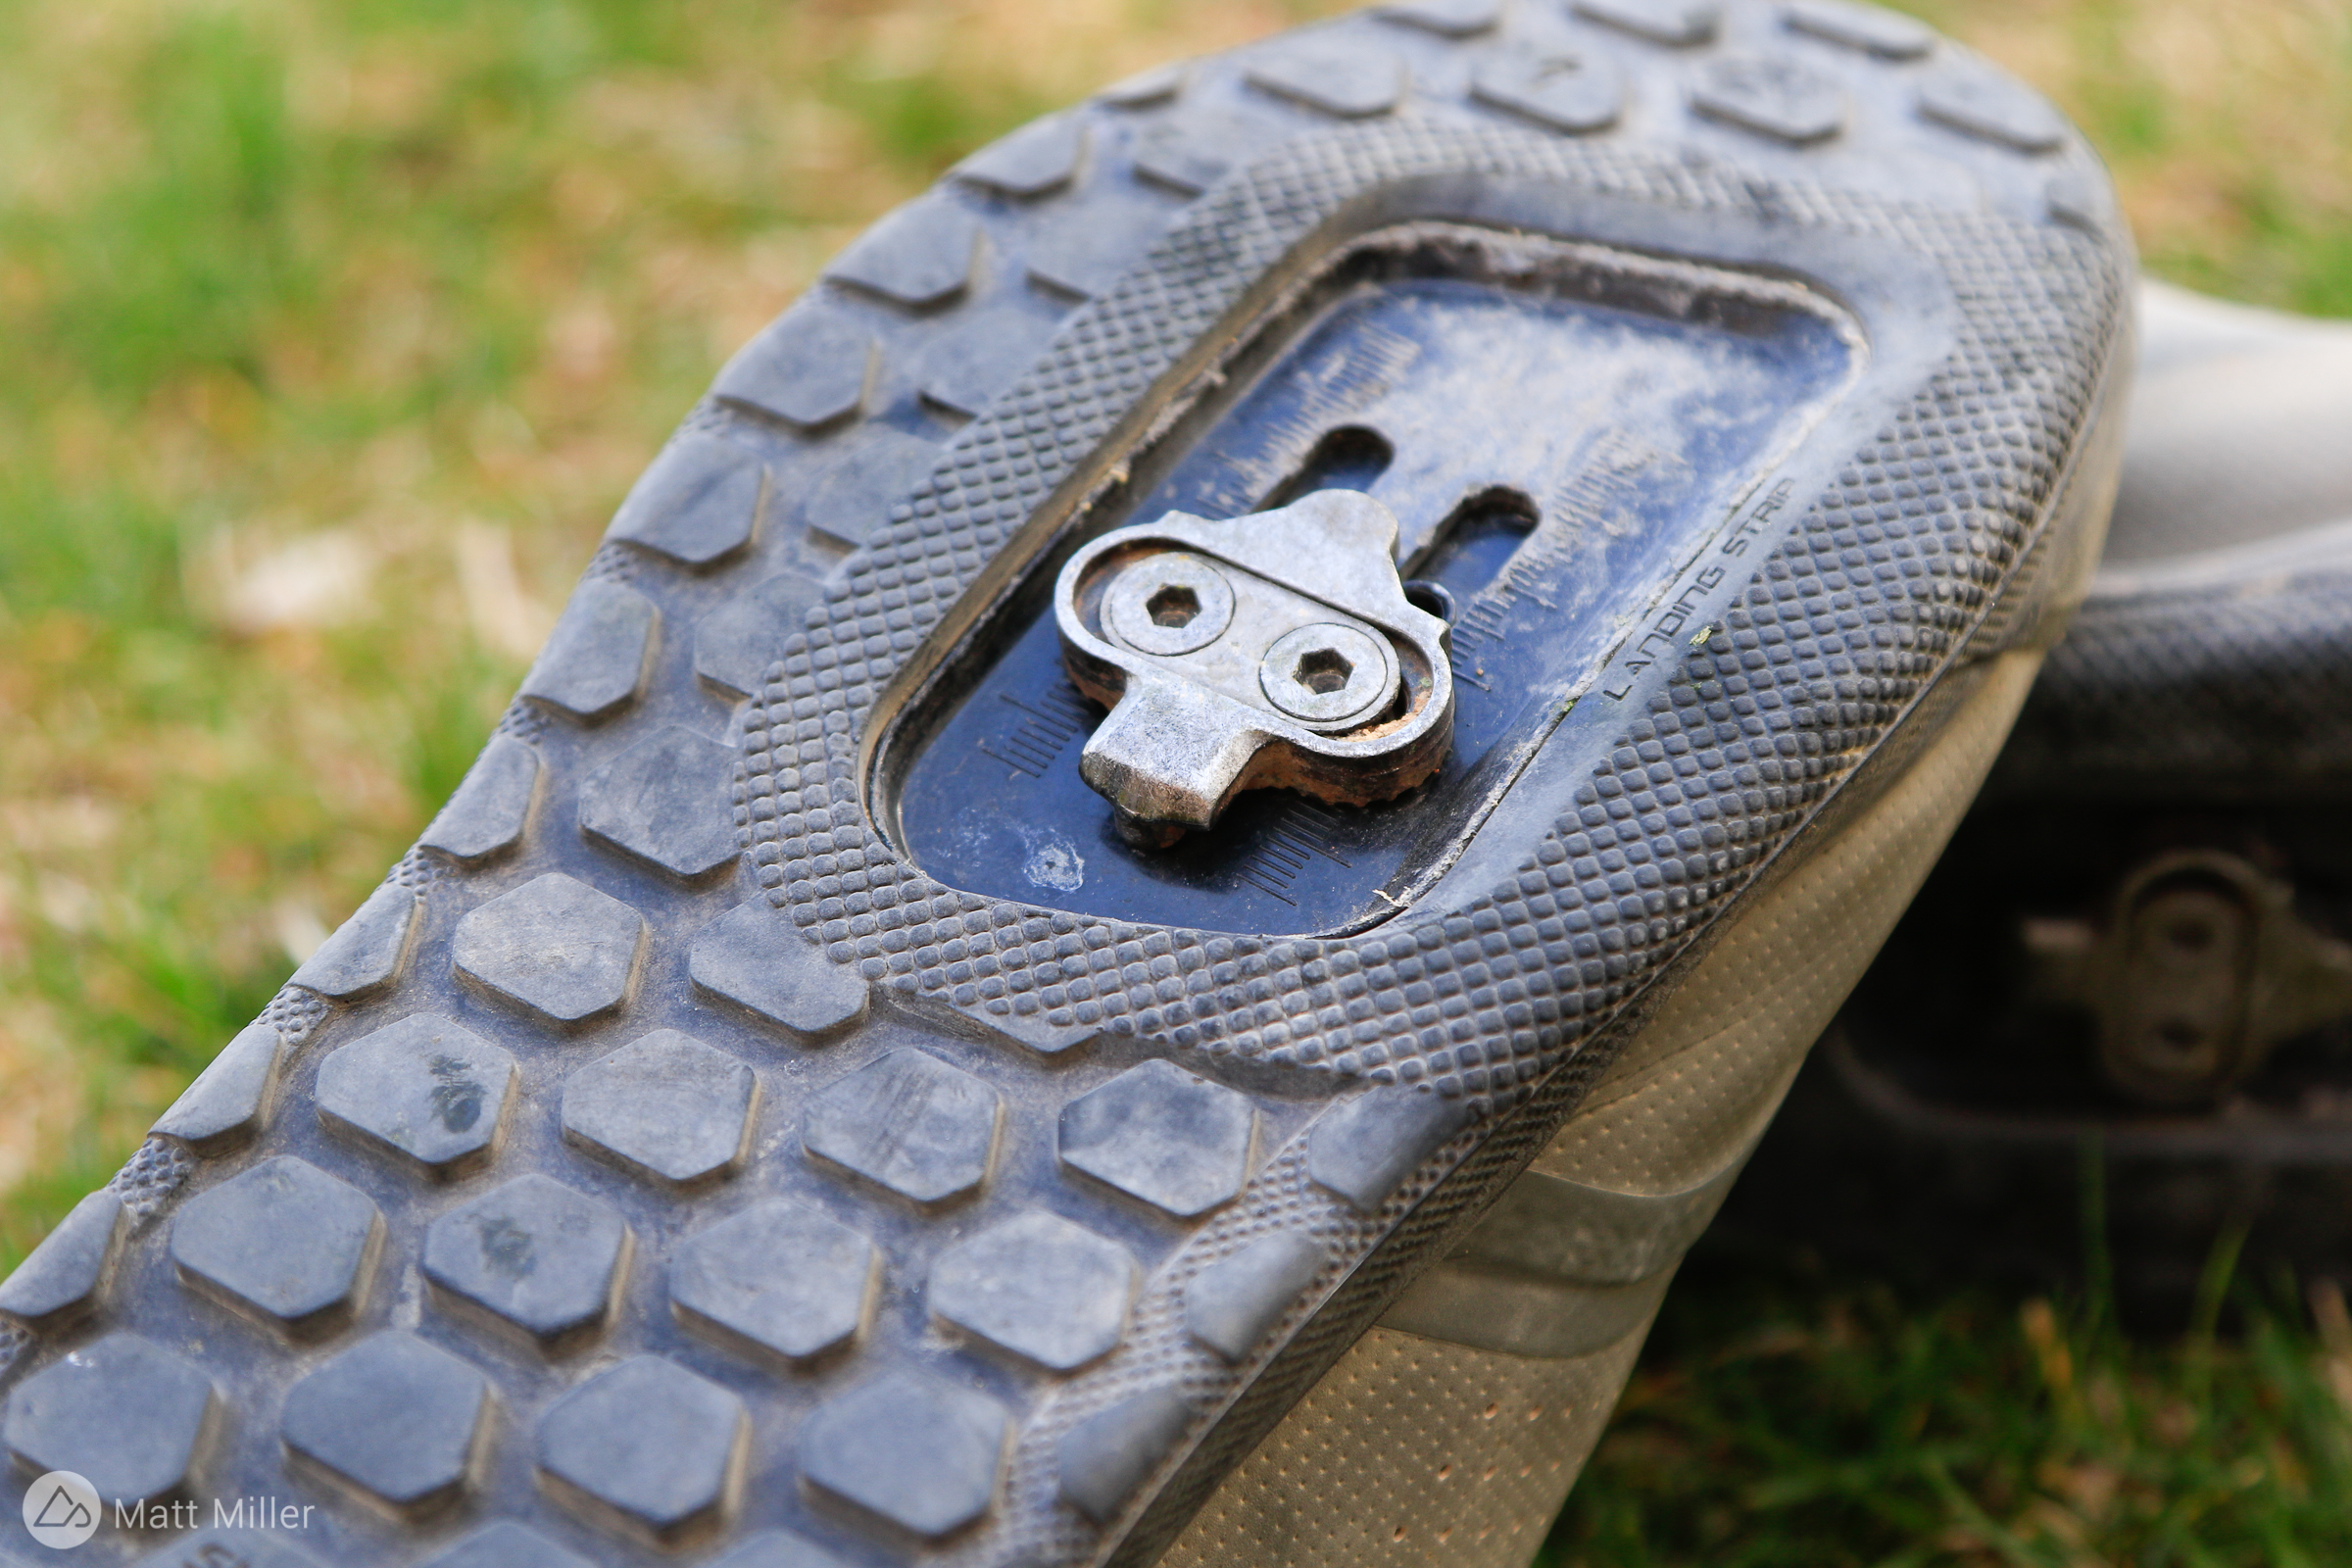
As with many things on the bike, there is a chain of events where a cleat starts. The pedal connects to a cleat, the cleat to a shoe, shoe to ankle, ankle to knee, knee to hip and so on. Van Atta says that the cleat is relevant to both stability and pedaling power and the cleat should usually be positioned between the first and fifth metatarsal, or the mid-foot bones that run from the inner to outer foot.
Often, cross-country riders tend to put their cleats more forward and gravity riders, their cleats farther back. Finding the right cleat position will matter based on what type of rider you are.
“I think the more aggressive the riding, there’s some sense in putting the foot further forward (Or cleat farther back),” says Van Atta. With road bikes this can be challenging since the front tire runs a lot closer to the crank arms and your foot can hit the tire on tight corners, but this isn’t usually a problem on mountain bikes.
“I do see some benefits in putting the cleat further back,” says Van Atta. “You’re going to do less work with your calf, you’re going to put the foot in a position of feeling more stable over the pedal. So I think that’s in keeping with the point of larger platforms in the pedal design that you’re seeing on more aggressively ridden bikes. And it’s probably a lot more similar to the way people will stand.”
Remember, there are tradeoffs with everything though.
“One caveat there is certainly for cyclists in general, when you keep [the cleat] toward your toes, it’s often a little bit easier to kind of sprint up and add speed to the bike by using high cadence,” says Van Atta. “So if it’s somebody who’s say, putting in race efforts where they’re using a lot of high cadence pedaling, they may find that moving that cleat back actually hampers those efforts to some degree so that might mitigate how how far back they push [the cleat].” He doesn’t recommend pushing the cleat back farther than the 5th metatarsal head.
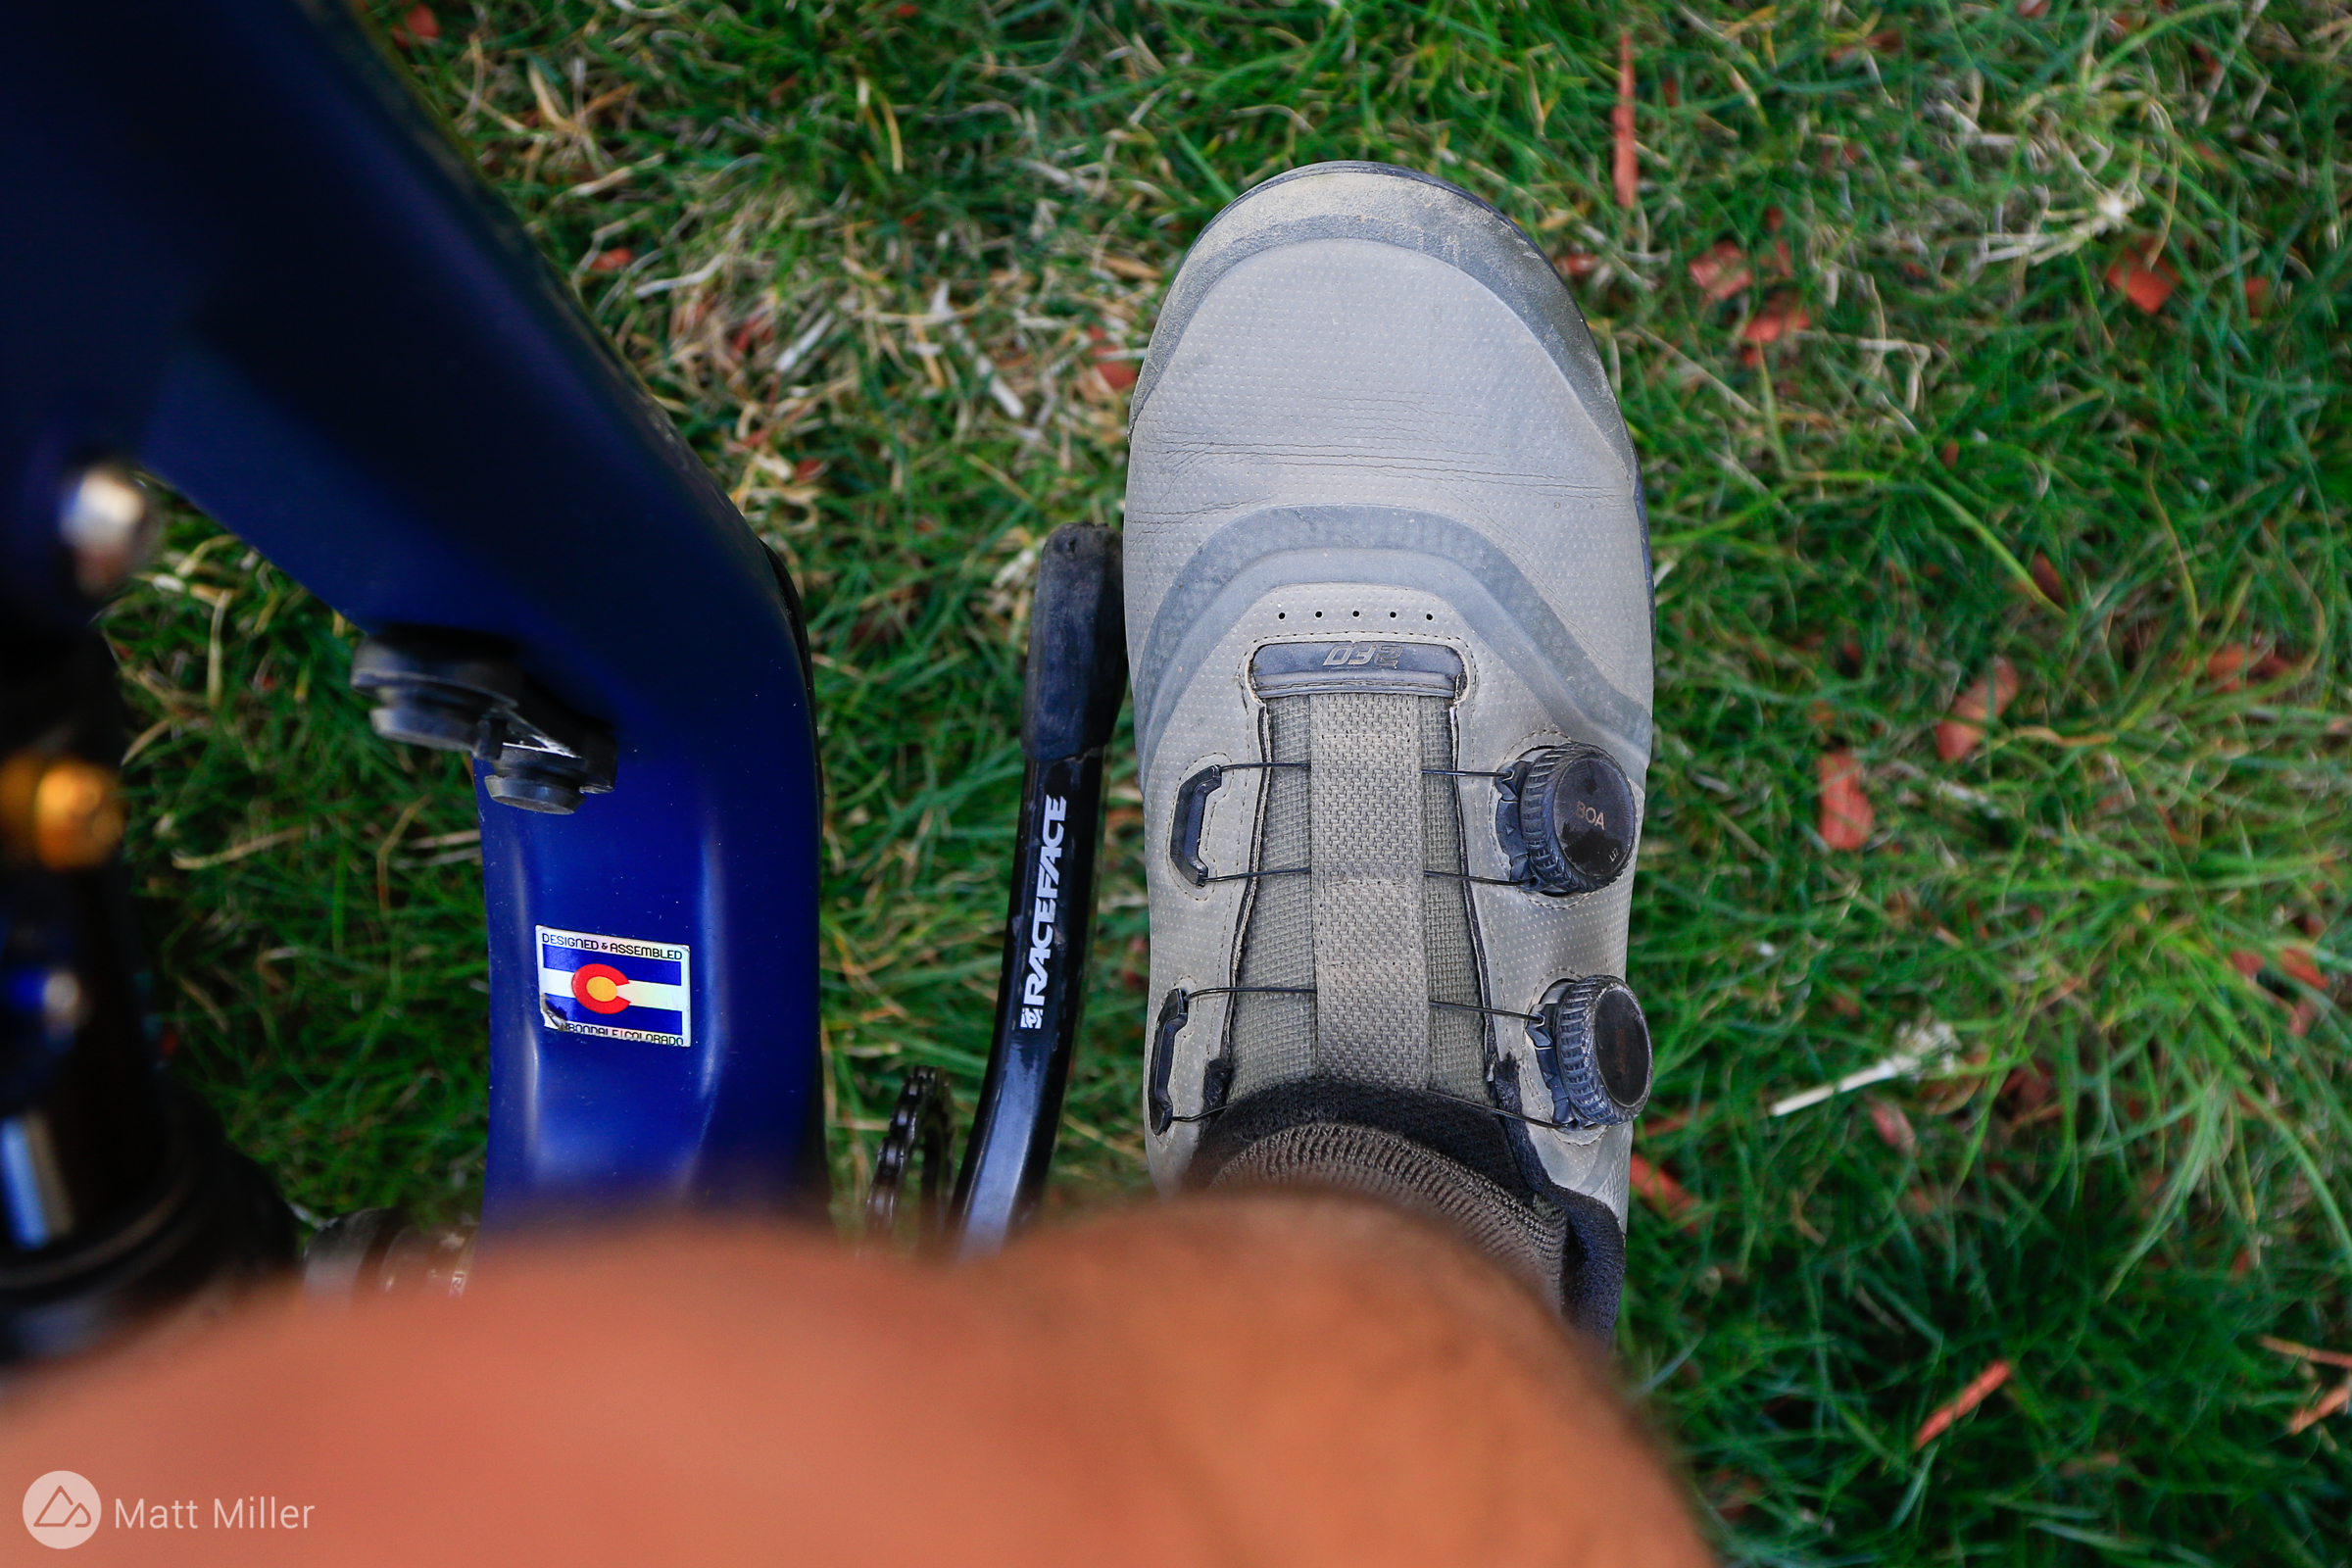
Though Van Atta understands why many people prefer flat pedals and shoes, as a fitter he’s able to better customize the rider’s position on their bike for their body. If a rider comes in who needs to be mindful of their knees and ankles, they can get more out of their fit if they’re running clipless pedals.
The consequences of bad cleat position
Van Atta points out that in some of the early clipless systems didn’t have any float, which allows the shoe and heel to rotate and move around a bit. The shoe was essentially locked in place and this created knee problems for many people.
Modern mountain bike cleats tend to have somewhere between 5°-15° of float which make them safer, but it’s still important to get the position right because a bad cleat position can cause joint pain. Van Atta adds that moving cleats farther back in the shoe can help with toe or foot numbness, and stability as mentioned above.
More float can develop over time as cleats wear out. And though some float can help your ankles and knees more naturally align, too much float can result in a loss of efficiency or power. Van Atta says that the more you define the float, the better power you’ll likely get in return.
“So I would say for health reasons, some float is appropriate. But limited float tends to feel good.”
Cleat position matters for new riders too. One of the most common reasons people worry about moving to clipless from flats is that they won’t be able to disengage from their pedal quickly enough when they stop on the trail or crash. Van Atta argues that getting the cleat alignment and position is imperative for new riders so they can get out of the pedals more quickly, or even get in them.
“When you have your cleat alignment right, getting in and getting out feels a lot more natural,” he says.
For taller or bigger riders, this may not be as apparent, but for shorter riders who may not have as much power or leverage, it can become an issue.
Occasionally, even with proper alignment, the shoe can be hard to engage or disengage with the pedal. Van Atta adds that riders may consider adding a shim between the cleat and the sole. If the cleat is too sunken in or too close to the sole, riders may not have the room to engage or disengage properly “and that can make you feel trapped,” he says.
When alignment and position are dialed, he recommends clipping in and out as if you’re swinging a bat.
“You don’t swing until you make contact and then stop the bat or tennis racket.” You swing past the ball. Riders can think about disengaging this way, and swinging their heel until after the cleat is released.
Proper cleat set up

Bike fitting takes a specially trained eye to recognize proper body mechanics. Van Atta offered a few tips for proper bike cleat placement for those who may not make into a fitter.
First up is alignment. He usually has people march in place, and then stop marching, and take notice of which direction their foot is pointing.
“If they have their left foot pointed straight ahead and their right foot toed out, that’s usually an indication that’s what their feet are going to look like, when they’re on the bike — they’re probably going to try to turn that right foot out a little bit, and they may have their left a lot closer to straight ahead,” he said. This isn’t always a direct application, but it helps set the cleat angle.
Take notice of the amount of friction engaging the shoe with the pedal. That may call for a spacer or shim to push the cleat out a tad from the sole.
Lastly, think about whether you’re a cross-country, trail, or gravity rider, and whether you’re trying to balance power input or descending stability, which will tell you how far forward or back the cleat should be. Give it a try and let us know what kind of differences you noticed.


6 Comments
May 6, 2022
Still clip in on the road/gravel bike though, except bikepacking I'll use flats.
May 6, 2022
Aug 2, 2022
May 5, 2022
May 5, 2022
May 6, 2022