Picture this: it’s winter, you’re out for a ride on a wet, miserable day, roosting puddles, sporadically wiping the water and mud off your face, having the time of your life. You can hear the gritty mud grinding away at your brake pads and rotors, on your chainring, wearing away at your chain every revolution, eating your bearings. To hell with it! It’s winter, and winter riding can be the most fun. You hose your bike down and throw it in your garage, and when you go to grab it for your next ride, your cranks feel strangely difficult to turn, accompanied by a low grumbling sound.
It’s time to take a look the bottom bracket, that much maligned component, often wrongly accused of being the source of some noise or other. Truth is, it’s one of many things on your bike that could be causing a noise, but today we’re going to assume the bottom bracket is the culprit and look at how we can replace it, and even schedule in some preventative maintenance.

What is a bottom bracket?
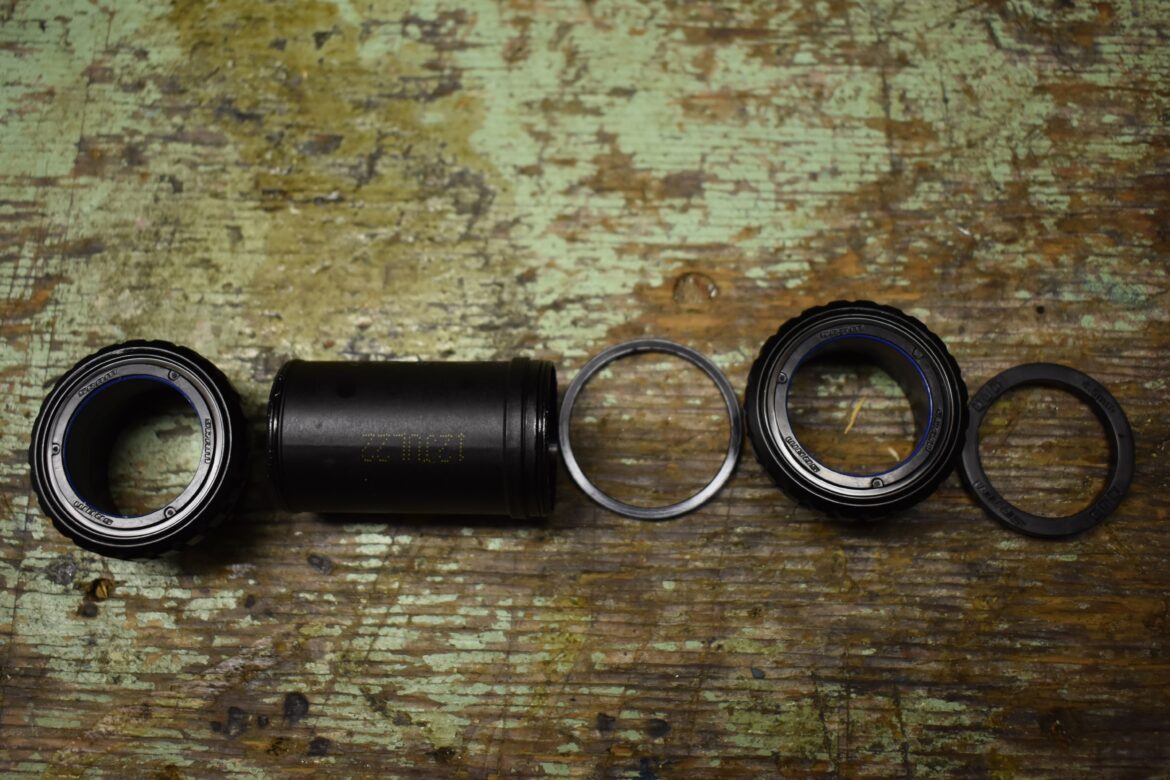
First, it makes sense to explain what a bottom bracket actually is. The bottom bracket, or BB for short, is the set of bearings that your cranks rotate on, allowing you to transfer power from your legs, into your cranks, through the chain to the back wheel, resulting in forward motion. Usually comprised of two large bearings, protected by a rubber or plastic cover, sitting either inboard or outboard of the BB shell, the crank spindle passes through the center of the bottom bracket. Typically threaded or pressed into the bottom bracket shell on your frame, the BB takes a lot of load and abuse, especially since it’s the lowest point in the system and bears the brunt of most spray and mud from the front wheel.
For the purposes of this article, we will be focusing on the most commonly found bottom bracket standards on a modern mountain bike: the BSA threaded BB in its various forms, mostly external-cup BBs. The procedure is relatively similar for most bottom brackets, but do be sure to check your crank or BB manufacturer’s tech docs for if you’re not 100% sure.

How do I know if my BB is bad?
Testing a BB to see if it’s bad is thankfully really easy now that the majority of us are running 1x drivetrains. Pedal the bike into the hardest (smallest) gear, disengage the clutch on the derailleur and simply lift the chain off the chainring and over the crank arm so that it’s fully removed from the chainring. If you run a chain guide such as a OneUp, you may need to rotate the upper guide out of the way first. If you run a front derailleur, it may be helpful to remove the quick link from the chain.
Once the chain is fully removed from the chainring, this means we can isolate the BB, since a worn chain or chainring can produce similar grumbling/rumbling sounds to a bad BB. With the chain off, spin the cranks with your finger to feel for bad bearings or similar. If the BB is good, it should spin smoothly. If it’s bad you’ll likely feel or hear a rumbling sound – that’s worn out bearings. With one hand on the frame and a hard and fast spin of the crank you’ll really feel this through the frame, and likely hear it too. Other signs the BB is bad is that it’s stiff to turn, which means seized bearings, or that it spins too fast and has play, which means very very bad bearings. To check for play, grab the end of the crank arm and try to rock the crank laterally at 90 degrees to the BB. The crank should not move in this direction, so if there’s play or looseness, there’s something wrong.


Remove the cranks
Now that we’re pretty certain our BB is bad, we should remove the cranks to check for sure and to give the bearings some love. First, check which cranks you have and how to remove them. The two most common types are Shimano 24mm cranks with pinch bolts clamping the arm onto the spindle similar to a stem, and just about everything else that uses a self-extracting crank bolt on either the drive-side or non-drive.

For Shimano cranks, or anything else with pinch bolts (usually 24mm spindle), loosen the pinch bolts on the non-drive side. These are the two bolts that pinch the crank spindle and hold it in place. Once loosened by a full turn or two, remove the preload cap at the end of the spindle – this is usually a large plastic cap with a star/spline type tool face that threads into the crank spindle. You will need a specific tool for this. Once fully removed, lift up the plastic locking tab between the pinch bolts with a small screwdriver or pick, and the non-drive crank arm should pull off. The drive-side crank will then pull out from the other side.
Most other cranks use a self-extracting bolt type arrangement — you can tell these because they typically have a large cap for a hex tool, usually around 16mm, with a smaller bolt inside, usually around 8mm. The inner bolt pushes against the outer cap as you unthread it, pushing the crank off. Just grab your 8 (or 10mm) allen key and unthread the center bolt. They can be tight so expect to use some force, particularly with DUB cranks – in this case I often use toe straps to secure the non-drive crank arm to the chainstay of the bike, and use an extension like a handlebar over the allen key for extra leverage.


Checking out the BB
Once the cranks are off, we can check the BB bearings. Use your finger to spin the inner bearing race – if they feel bad then we’ll change them out. If they don’t feel so bad, maybe the problem is elsewhere – for example there might be too much preload on the crank, incorrect spacers, or something else. I suggest digging up the user manual for your specific crank or BB and checking that you have the correct configuration of spacers and install specs. It’s worth mentioning that often when the bearings are not preloaded they may feel perfectly fine, but once they’re preloaded they feel bad, so it can be worth just checking this. If they feel bad when spinning the crank I like to change them just to be sure.
Preventative maintenance
They say prevention is better than cure, right? Well a little preventative maintenance can go a long way, and when we’re talking about bottom brackets, that means a clean and grease. I’ve found that regularly cleaning and greasing bearings such as bottom brackets and headsets can dramatically increase their service life. While grease serves to lubricate and ensure things move smoothly, it can also serve to keep water out, and water is the main enemy of steel bearings. Refreshing that grease regularly keeps the water out and your bearings healthy.
To do this, once we have the cranks off, remove the dust seals over the bearings if you can – they should practically fall off if they are removable, for example Race Face or SRAM GXP. However some are not removable, for example Shimano or SRAM DUB.
Once the dust cover is off, or not, use a rag to thoroughly clean it up as much as you can, as well as the crank spindle. Grab a good quality waterproof grease — I like Maxima waterproof grease — and liberally apply to the inside of the BB and crank spindle, in particular where they will interface. Once done, skip ahead to the reassembly step further down the page.


I like to do this probably three or four times a year, and find that I can get multiple seasons out of my bottom brackets, even living on the west coast, otherwise known as the “wet coast.” of BC. It can be a good idea to do a full drivetrain clean at the same time while doing this, as part of a full service.
Replacing the BB
When replacing a BSA threaded BB, the first thing to know is that the drive side cup is a reverse thread, also known as a left-hand thread, while the non-drive side up is a regular right-hand thread. Next we need to find our tool – since most external cup BBs are notched on the outside for the tool, we need to know how many notches the cup/tool has, and the outer diameter. This Park Tool page is very useful for finding the correct tool. For example a couple of the most common BB cup sizes would be 16-notch and 44-45mm diameter for Shimano and many others, using the Park Tool BBT-9. Race Face Cinch and SRAM DUB use a 12-notch and 45-47mm diameter using the BBT-79.3.
Once we have our tool, we can start to remove the BB. It doesn’t matter which side you start on, just make sure you’re turning the correct way — clockwise to loosen the drive-side and counter-clockwise to loosen the non-drive. Whatever you’re using, you will likely need to apply a good deal of force, and often find that a breaker bar or extension, such as an old handlebar slid over a ratchet driver can help. Put the tool at either nine o’clock on the non-drive side or three o’clock on the drive side and push down. You can put the bike on the floor if this helps. Once it’s cracked loose, it should be relatively easy to get it all the way out. Repeat for the other side, and don’t forget to remove the plastic dust sleeve from the middle if there is one. Be sure to pay attention to any spacers that are removed and where they came from.


Again, give the threads in the frame a good clean with a rag and some degreaser’ WD-40, isopropyl alcohol or something similar can help. Next apply a generous layer of anti-seize or grease to the threads on the frame, and the new BB. Make note of any spacers that you need to include, for example most Shimano BBs on a 73m shell will use a single 2.5mm spacer on the drive-side. If you’re not sure, check out this guide I wrote on selecting the correct BB, and check the tech docs for the BB you’re installing.


When installing the new BB, make sure you’re fitting the correct cups to the correct side, most will say “L” and “R” on them somewhere for left and right. When threading in I like to start them by hand to lower the possibility of the cup going in crooked or cross-threaded. Cups should thread in nice and easy at the start. I like to give them a half back-turn to line the threads up then start threading in. It should start easy and get harder; check to ensure the gap between the BB cup and frame is the same all the way around to make sure you’re threaded correctly. Then use your tool to thread it all the way in, and using a torque wrench snug it up, usually to around 50Nm — most cups are marked with the proper torque spec. Repeat for the other side, not forgetting the plastic dust sleeve if you’re using one. Apply a liberal layer of grease to the inside of the new BB cups and to the crank spindle, especially where they interface.


Reinstalling the cranks
Now we can reinstall the cranks. First, if there is a pre-load ring, loosen the pinch bolt and back the ring off so it’s at its closest to the crank arm. Insert the crank spindle into the new BB and push it as far in as you can by hand. Grab your other crank arm, and if it’s a pinch-bolt Shimano style, slide it over the exposed piece of spindle, being sure to align the splines correctly. Use the preload tool to thread the preload cap in until it’s just finger tight. Push down the safety tab, and tighten the pinch bolts to spec, usually around 12Nm, alternating until both read the correct torque.
If using a self-extracting type crank, simply offer up the other crank arm, again making sure the splines are aligned correctly, and thread on using a torque wrench to achieve proper torque, usually around 50Nm. Wipe away any excess grease, tighten the preload ring, and thread it toward the BB cup until finger tight and there’s no play in the crankset. Finally, snug down the pinch bolt.


Refit your chain to the chainring, and voilà, you’re done. You successfully changed your BB, good job. Keep an eye out for further articles in this series, and please let me know if you have any questions in the comments, or requests for other articles.


