
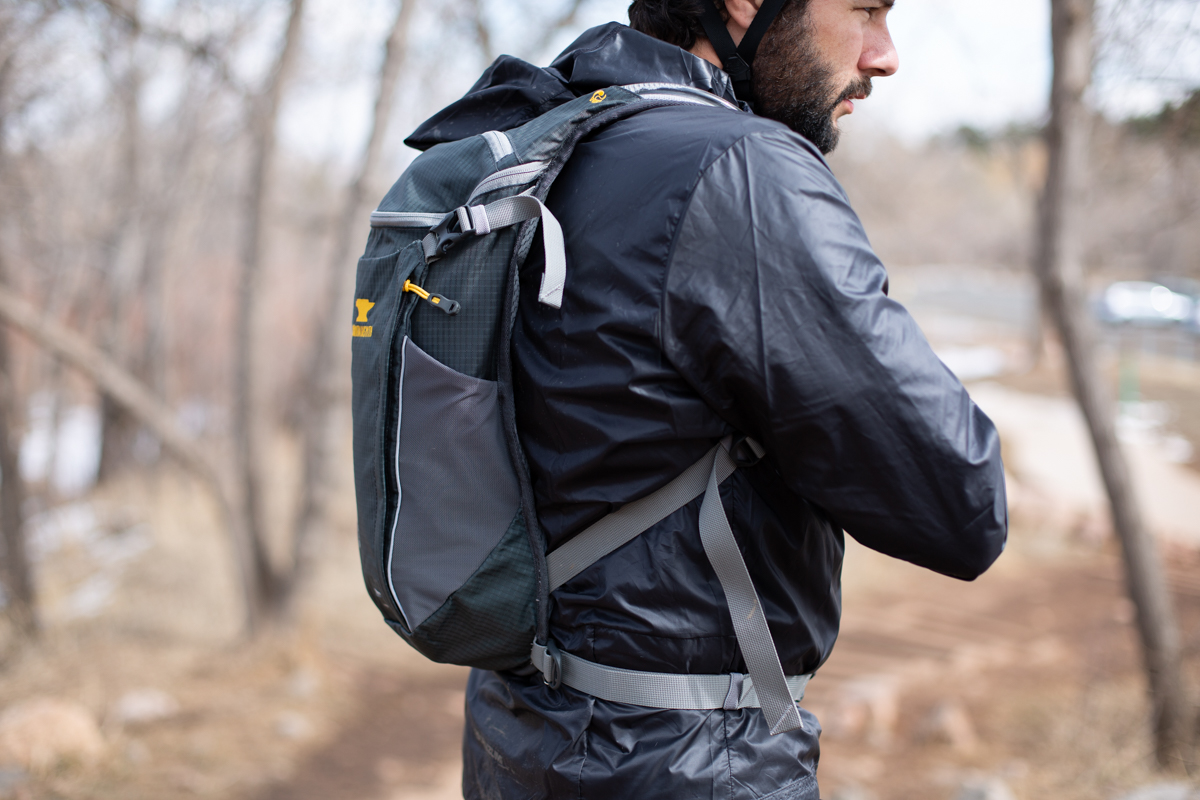
Mountainsmith, based in Golden, CO has a background in mountaineering gear. Their packs are straight to the point, with strong designs, and the anvil logo only further implies durability. This year the brand is throwing a hydration pack into the line, marketed for mountain biking and hiking.
About the Clear Creek 10
- Double ripstop nylon
- Nylon embossed liner
- Weight: 1lb, 6oz
- Includes 2L hydration bladder
- Removable waist belt
- Air-channeled back panel
- Perforated shoulder straps
- MSRP: $70
- Available at Amazon

Wearing the Clear Creek 10
With a $70 price tag, the Clear Creek 10 is pretty entry-level as far as hydration packs go. There aren’t a bunch of whiz-bang features to get lost in or confused about. You put water in the bladder, stuff in the compartments, maybe a jacket or snacks in the elastic external pouches on the back or front straps, and that’s about it. Probably the most high-tech feature on the pack is the whistle on the chest strap buckle.
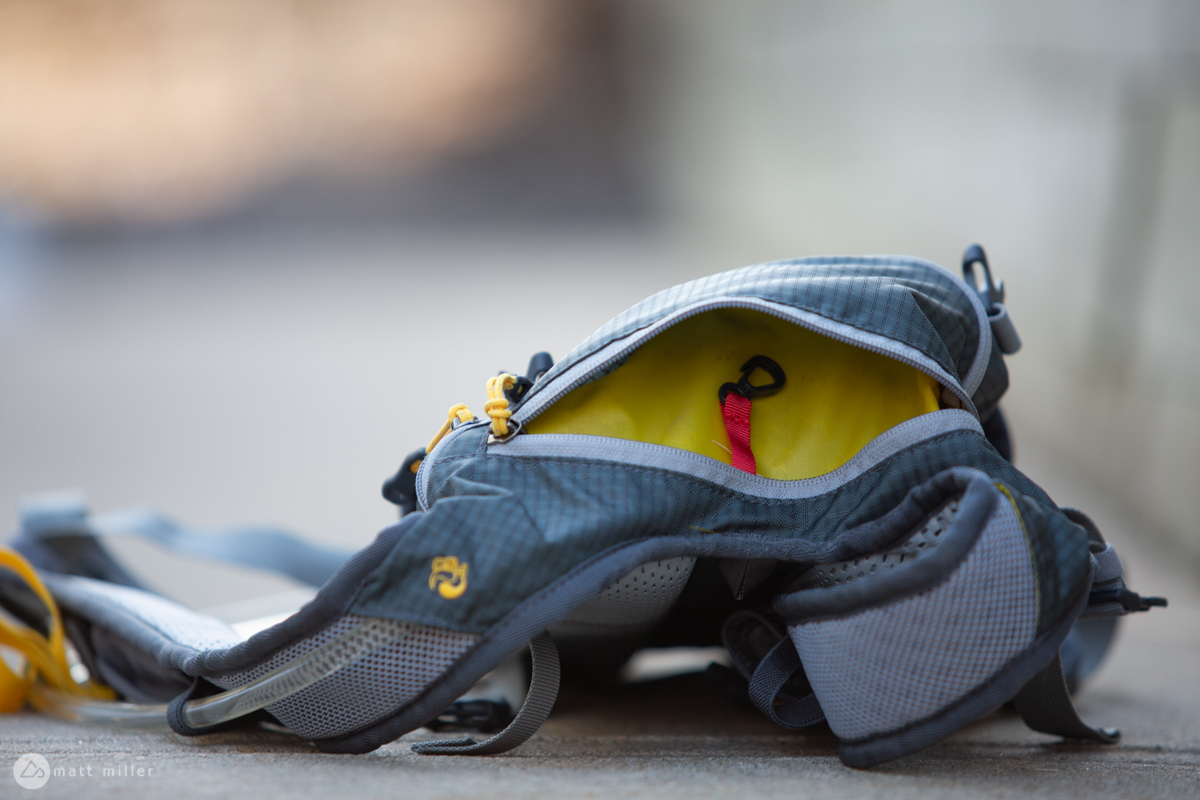
The simple back panel worked better at venting than expected. It’s really just ventilated fabric and padding with a groove down the center that lets a little bit more air in. It’s not as sophisticated as other packs, but I didn’t accumulate as much sweat as I thought I would.
The hydration hose can be mounted on the left or right side. I found the right side best because it stays on the buckle side of the chest strap and doesn’t need an extra unlatching when removing the pack. Otherwise, you have to unbuckle the chest strap from the left side and then pull the hose from the right side strap that holds the drink valve in place.

On the same topic, a simple elastic strap holds the bite valve in place. You can sort of stuff the hose back up in the pack and keep the bite valve higher up so that the hose doesn’t cross over your chest, but the hose can be a bit stubborn when pushing the excess back in the pack.

The pack feels centered on my back when I ride, and I don’t have any complaints about the weight distribution. Again, without a real fancy design, it performs well.
Recommendations
The downside to the Clear Creek 10 is the lack of organizational pockets on the inside. I use a non-traditional tool set when I ride (this one) because it’s lighter and easier to use than a foldable multi-tool.

So I had a bunch of little tool pieces getting thrown about on the inside of the pack and knocking against each other. For anyone who carries the bare essentials on a ride like snacks, a tube, pump, patch kit, and other stuff, the pack is going to make stew out of them.
Personally, I’d have to opt for a different pack with some internal organization over the Clear Creek 10, and there are several that offer that at this price point.
Final word

While the Clear Creek 10 comes up short in organization, it seems to be a solid and durable pack for the price. It’s simple and straight-forward. For those who want something entry-level and don’t care about keeping stuff in one place, it’ll work.
Thanks to Mountainsmith for providing the pack for review.


0 Comments