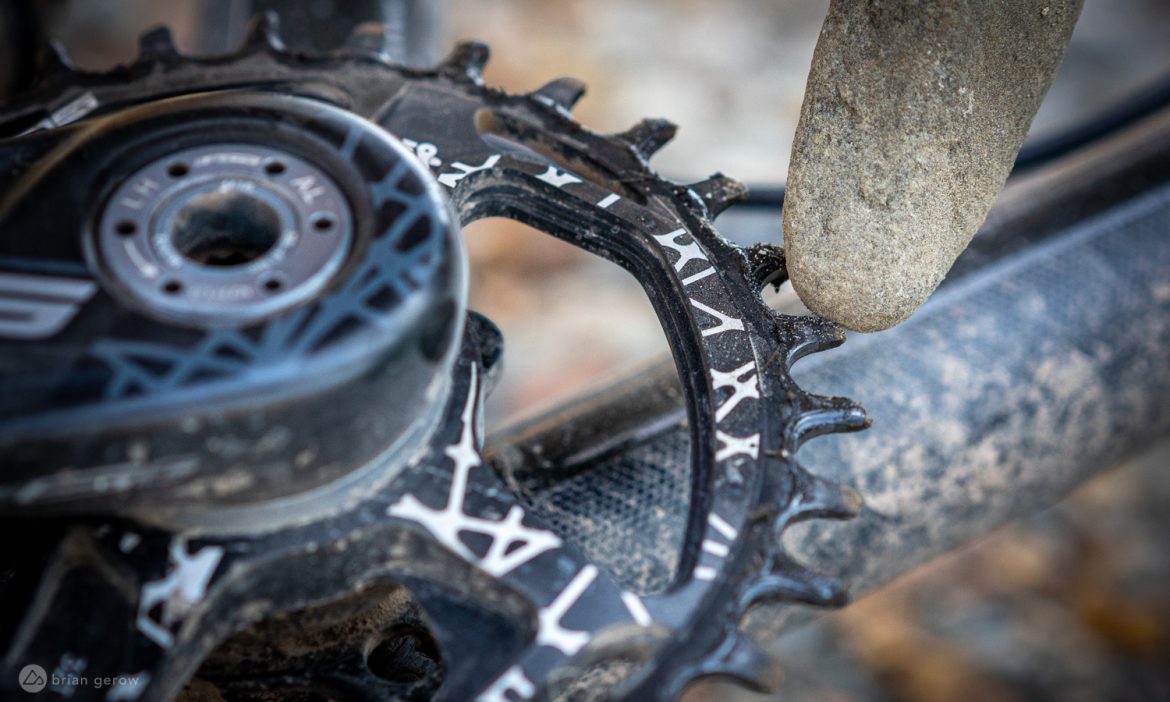
With this Quick Question series we will present fast fixes and collect comments from seasoned riders around specific D.I.Y. mountain bike repairs. While much of this trailside triage is covered in our repair articles and videos, this is a space for longtime riders and readers in the Singletracks community to share their knowledge. Please type your related experiences and advice in the comments below. Do you have a quick question? 🤔 Email [email protected].
Eventually, folks who live in rocky regions of the globe will likely bend a chainring and need to straighten it out enough to keep the chain on for the ride home. The best bash-guards can’t protect the ring from side impacts and square hits at high speeds. A bike’s chainring location makes it even more vulnerable than the disc rotors. The tool for fixing those shiny brake-plates is included on most larger multi-tools, but the best instrument for straightening a chainring looks quite a bit different.
We want to hear your stories of bent rings and their requisite repairs. Did you have to remove any mangled chain links? Did you have to tripod-push home?
I recently bent a few teeth while out on the trail, causing the chain to fall off as I pedaled. With a long climb between myself and home, I had to Flintstone the aluminum ring into a workable shape. Fire up your inner Luddite for this one.
The first step when trail-truing a chainring is to turn the cranks with the chain on to determine exactly which teeth need to be bent, and in which direction. Wipe the dirt off those teeth to clearly mark them, then remove the chain and go locate the mythical “stone of destiny.” You’ll need a rock that can sit directly on the bent tooth or teeth without touching any others. Ya don’t want to grow the problem area by smashing adjacent teeth. Then, find a larger stone to use as a hammer.

Steady the smaller stone on the bent teeth with one hand and smack it lightly with the larger hammer-stone in the other. The narrow pieces of aluminum bend fairly easily, so make those first strikes softer than you think they need to be, checking the tooth angle after every blow or so. This is a very perfect science, so make sure to smack your thumb a few times in the process just to be sure it’s done correctly. If you happen to have a steel or titanium ring you may need a heavier hammer, though you likely won’t have to deal with this issue in the first place.
If a larger portion of the ring is bent you may need to find a “stick of destiny” that can be used as a pry-bar, pulling all the teeth flat enough to arrive home where they can be tossed in the recycling bin. No matter how much deep-tech Flinstone ingenuity you need to apply, be sure to take it easy and not augment the problem or break the ring entirely.
If you regularly bend rings it might be time to install a bash guard. As stated, they are not guaranteed to prevent bent teeth, but they can definitely help. Loads of brands like Funn, MRP, OneUp, and others make chain-guides with lower bash-guards attached to prevent dental accidents like the one outlined above.
Your turn! Please share your chainring smashing stories and what it took to get home.


