

Some of us get to travel to warmer climates in the winter, or fly to distant forests to experience new trails. There are a variety of reasons you might fly with your bike. Knowing how to Tetris a bike into a bag and reassemble it when you arrive can save you heaps of time and money while traveling. Below I will outline the few simple steps necessary to arrive at your destination with a functioning bike.
Before you get started, make sure to take note of your bike’s saddle height, where the spacers are located under or above your stem, and any other elements that will help you rebuild the same bike you had when you left.
It’s always good to pack an extra set of brake pads, some chain lube, a first aid kit, headlight, a spare derailleur hanger, and all of your daily riding gear. For rocky destinations you may want to fold up a spare tire and throw it in the bag. If you are riding in a secluded area the list of provisions and precautions could be far longer.
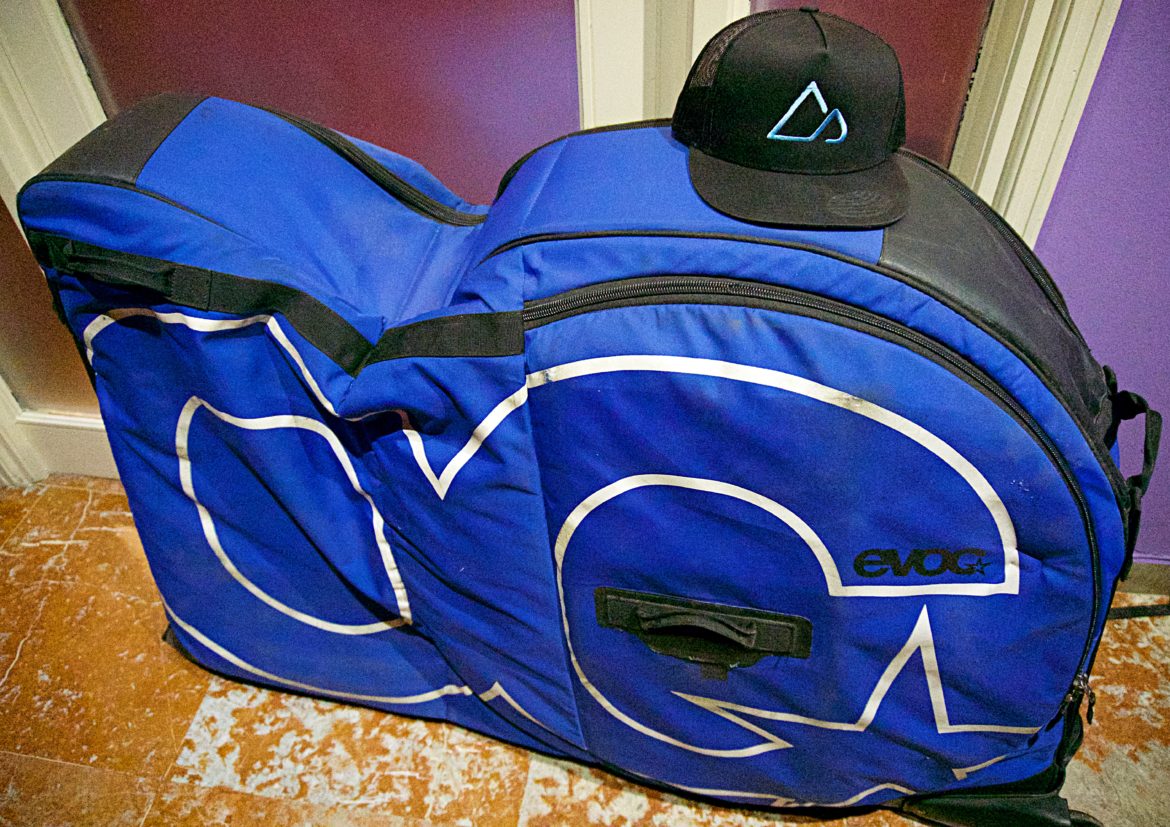
A dedicated bike bag like one of these is a good choice for durability and security. However, a cardboard box can work in a pinch.

1. Remove the pedals
Most bike bags require that pedals be removed in order to make the bike’s profile narrow enough. After removing the pedals I immediately put the wrench and pedals in a sealable pocket in the bike bag. For all of the following steps, it is helpful to pack the tool as soon as you are done using it.


2. Remove stem from steerer tube
This video on tightening your headset will show you everything you need to know about how this step works. Headsets are like stream crossings. They all look alike in theory, though they often have something unique to trip over. The most important step here is to make sure not to lose any of the small parts in your headset. You can thread a long zip-tie through the head tube to hold everything in place if you have loose pieces.

Next, remove the top cap and pull off the stem and bars together. Depending on your headset this may require more steps. Once you have pulled the stem and bars off the bike, put the top cap and cap-bolt back in to keep the top of the headset from falling off into the bag.
It is better to remove the stem from the steerer, rather than removing the handlebar from the stem, because you won’t have to worry about tightening forces on your handlebars or proper handlebar angle when you rebuild the bike.

3. Remove wheels
Remove your wheels and put the axles back in the frame to maintain some strength and rigidity. This will also prevent the axles from falling out and getting lost when someone inspects your bag.

4. Remove both rotors
Some folks like to skip this step, until the day they unpack their bike on vacation and have to replace both rotors before they can shred. It’s worth the extra few minutes, and afterward, you will know that your rotor bolts are tight. Wrap your rotors in something to protect them from oils and grease, and store them someplace where they will not be bent by the weight of other bags.

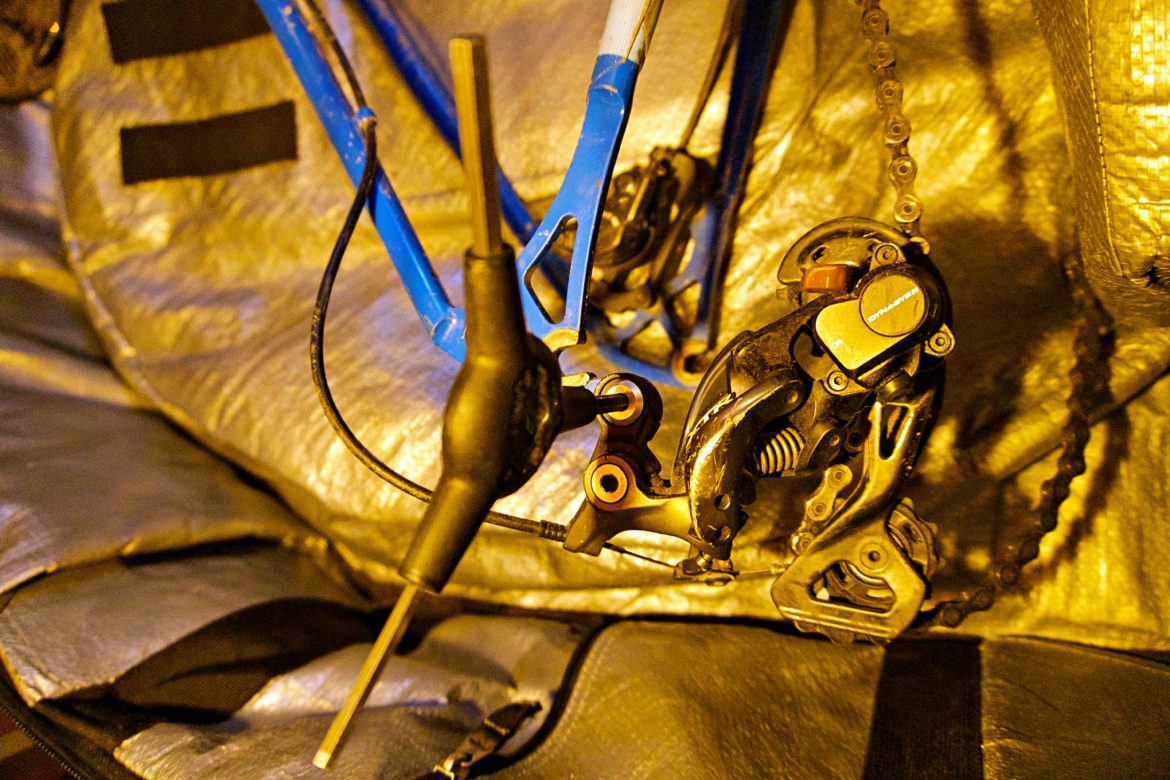
5. Remove rear derailleur
Remove the rear derailleur and wrap it in a bag or an old t-shirt. Make sure you only loosen the mounting bolt that connects your derailleur to the hanger. Then store it safely in your rear triangle, with the shift cable still attached. This will prevent your hanger from being bent when other heavy bags are piled on top of yours.

6. Strap
Strap the bike and bits in the bag securely, with the idea that someone will open the bag and rummage through it. I like to cram as much of my riding gear into the bag as possible, lashing it to the frame so it doesn’t fall out during an inspection. That added gear also acts as padding to protect the bike.
7. Unpack
Reverse all of the above steps to make your bike look like a bike once more. Remounting your rear derailleur and adjusting your headset may be the tougher bits. Check your notes on where to replace headset spacers, and what your saddle height measurement was. Lastly, make sure not to over tighten things as you reassemble. A broken handlebar or stripped derailleur bolt could deplete your travel budget significantly.

Your turn: What lessons have you learned when flying with a bike?


7 Comments
Jan 27, 2019
1) Buy an extra set of headset spacers to put under the top cap after removing the stem to keep the fork nice and tight in the frame.
2) Get a bag with an anti shock frame of some sort. This holds the bike steady in the bag and also provides crush protection for the fork and rear triangle.
3) Get a bike bag with wheels at each corner, this makes it much easier wheeling the bag around airports.
4) I've never found it necessary to remove the brake rotors, just orientate the wheels in the bag such that the rotors face inwards.
If I think of any others, I'll post them here later!
Mar 10, 2019
Feb 4, 2019
Jan 25, 2019
Jan 25, 2019
Jan 26, 2019
It's worth noting that some airlines do not like you keeping anything in your sports equipment bag other than the item itself (ie they would not be happy with shoes/helmet in the bike bag) and may ask you to remove them. I tend to err on the side of caution, rather than risk having to re-pack my bags or even leave something in the airport.
Jan 25, 2019
Here in Italy, you can fly with your bike to many destinations at no extra cost, and I save heaps of money when I travel by taking the extra 15-20 minutes to pack it up. It also gives me space to bring things home if need be.