
We get a lot of questions about tubeless mountain bike tires here on Singletracks, so I thought it was time to put together a tubeless guide. I’m not going to get into specific brands and components, but instead give you an overview of the various systems and point you in the right direction so you can choose what works best for your budget and riding style.
WHY TUBELESS?
This is the big question: why go tubeless? There are several advantages to losing tubes. I’ll cover the general theory here, but there is a lot more detailed information out there on the web if you search for it.
Lower tire pressure: Without a tube you can run lower tire pressures without worry of pinch flatting since there’s no tube to pinch. The lower pressures will allow the tire to more easily conform to the ground, providing a more comfortable ride and more traction, as well as lower rolling resistance.
Less rolling resistance: This could be an entire post all by itself, so I’ll try to keep it quick and simple.Rolling resistance is caused by the interaction of the tire and the ground. The first thing you need to get out of your head is the old school roadie theory of high tire pressure equaling lower rolling resistance. We’re not using skinny smooth tires on a smooth hardsurface. We’re using fat knobby tires on an uneven, bumpy, sometimes soft andloose surface where the physics are different.When you hit a bump the wheel either moves upand/or thetire deflects around/over the bump. This deflection requires energy, and that energy is robbed from your forward momentum, slowing you down. So the less energy it takes to deform the tire, and the less forward momentum becomes upward momentum, the less forward energy you lose. Using lower tire pressure is the easiest way to allow the tire to deform over irregularities in the trail instead of forcing the wheel upward.
When using tubes there is also friction between the tube and tire, and this friction has to be overcometo allow the tire to deform. By getting rid of the tube you get rid of that friction, and reduce the energy needed to deform the tire. For more reading on the science of rolling resistance check out this page which provides a summary of an article in aGerman mountain bike magazine.
Fewer flat tires: Without a tube you no longer have to worry about pinch flats since there’s no tube to pinch. In very rare cases you can pinch the tire – but I only know one person who has ever done this. Also since you’ll be using a sealant, any punctures will get sealed up without you even knowing it ever happened. If you do get a puncture the sealant can’t seal, simply install a tube like normal and continue the ride.
Improved ride feel: By getting rid of tubes you get a much better feel for what your tires are doing. The ride gets smoother, faster, easier; you have to feel it yourself to really understand. The tires even sound different!
Less weight: Weight loss is not the main advantage of tubeless, it’s just an extra perk. You may not even lose any weight, depending on which tubeless system you use.
Disadvantages: Installing tires without tubes can be a pain, and sometimes requires an air compressor. So if you like to change tires often, tubes are certainly easier.
[see_also id=”38628″][/see_also]

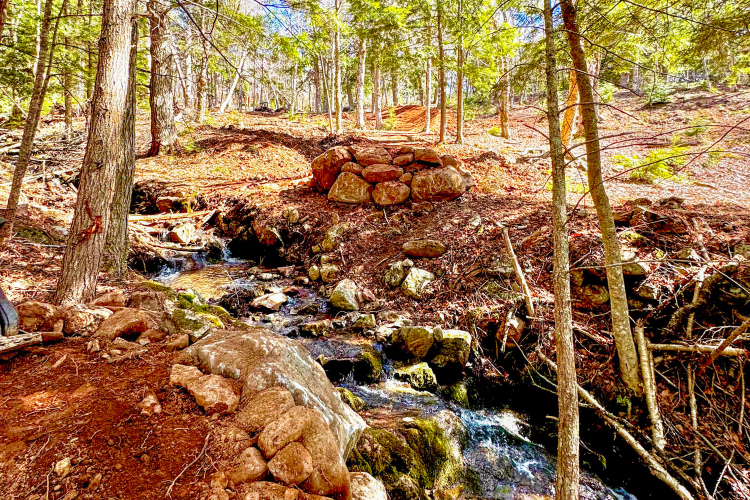
Where the rubber meets the dirt. Ditch the tubes, and improve the interaction.
HOW TO DO IT
There are three ways to go tubeless. You can convert non-tubeless wheels, use a tubeless-ready system, or use a UST system. Each has its own advantages and disadvantages.
Conversion Kits: Stan Koziatek developed the first reliable and commercially available tubeless conversion kit back in 2000 when he formed NoTubes, and his kits are still the benchmark that all others are measured against. The kit helps you convert nearly any rim and tire to tubeless and retails for around $60-$70, making this the cheapest way to try tubeless since you don’t need to buy new wheels or tires.
Downsides: Kits will not give you the lightest set-up and getting the tire bead seated and holding air usually cannot be done with a floor pump – for that you’ll need an air compressor.
Some rims convert more easily than others, as do some tires. Research before you buy! Some riders have experimented with tubeless set ups, where they fashion their own rim strip of out a 20″ tube. Some have success with this method, but I can’t recommend it personally.
UST – Universal System for Tubeless: UST was developed by Mavic in the late 90’s. Itis a tubeless standard, meaning the rim and tire bead shapes are manufactured to very specific specs with tight tolerances and for any product to bear the UST label it must go through inspection andtestingto be approved. This means any UST rim is guaranteed to work with any UST tire, but tire selection isn’t great (especially for 29ers) and the tires are usually more expensive because of the approval process. Non-UST tires do not generally play well with UST rims.
UST also has the tightest fitting beads, which makes installation a pain but allows for an extremely secure bead hook which is great for truly aggressive riding (think DH racing). USTtires have an extra layer of air-tight rubber in the casing so they don’t require sealant like the other two systems, but this adds weight and makes the tires stiffer. Most riders will use sealant anyways for puncture protection. I have heard sometimes you can get the tires installed using a floor pump, but sometimes an air compressor is needed. Pretty much every rim and tire manufacturer has UST products.
Tubeless Ready: Tubeless ready is the way of the future I think. Tubeless ready rims basically allow you to use any tire – without tubes. Thereare tubeless-ready tires as well, with tighter fitting and stronger beads. Unlike UST, tubeless-ready set ups require sealant to make the tires air tight, and the bead shapes vary from one manufacturer to another – so some tires and rims work better together than others. Tubeless-ready tires are often easier to set up than regular tires, usuallywith a floor pump.
Tubeless-ready systems are generally the lightest option since many do not require the thick rubber rim striplike conversion kits (some use a rubber strip, others use lightweight tape instead) and the tires do not have the extra air-tight layer of rubber like UST. Without that extra air-tightlayer in the casing, tubeless-ready tires are more supple than UST tires. Specialized, Bontrager, Geax, Hutchinson, NoTubes, and WTB all make tubeless-ready mountain bike tires. More and more manufacturers are introducing tubeless-ready tires, with Schwalbe being the latest, and Kenda promising some in the near future. But again, most standard tires can be set up tubeless on tubeless ready rims, so there are tons of tire options to choose from.
YOUR EXPERIENCES
Tell us about your tubeless experiences in the comments below! What systems have you tried, what worked well, what didn’t work well, etc.
[see_also id=”12563″][/see_also]


31 Comments
Apr 7, 2011
Thanks for clearing that up. I can live with a flat, but I told my wife that she wouldn't have to worry about punctures with Stan's. Better top up her tires now!
Apr 7, 2011
Jan 25, 2018
http://www.superclydesdale.com/?p=1406
Hope it helps
Apr 6, 2011
@steve32300 - Don't go over 40psi, it can blow the tire off the rim. What you're about to find out is that 45psi was way too much! Your bike will ride SO much better with less pressure. Start at 35 and go down from there. Keep lowering the pressure until either you start bottoming out the rim on roots/rock or the tires feel like they're squirming in the corners.
Apr 11, 2011
As for tires, with the conversion kit you can use pretty much any tire (not sure about UST). I never tried a tubeless ready tire w/a conversion kit, but I bet it would be easier to get the tire mounted than a standard tire is. As long as your existing tires are in good shape, go ahead and use 'em!
Apr 11, 2011
Madd is also reffering to "establishing the bead" before the tire is preasurized in order to contain excaping air to make airing up the tire prior to getting the tire to seat on the rim.I think the bead sealer would help "establish a bead but would it interfere with the stans sealant if some of the bead sealer was inside the tire and keeping the stans from just doing its job.
May 15, 2014
Enough said!
Jan 25, 2018
Apr 6, 2011
Apr 7, 2011
Let the wheel sit for a little while, then shake it. You should be able to hear the sealant sloshing around in the tire. If not, add a scoop.
Apr 6, 2011
Question: What is burping and how does it happen? I haven't run into this yet but it seems to be a unique concern with tubeless tires. What's the best way to avoid this on the trail?
Apr 29, 2011
http://twentynineinches.com/2011/04/28/the-state-of-tubless-ness-tubeless-re-try/
Apr 10, 2011
I wonder if that bead sealer will help too madd,the race car I help on does'nt use any bead sealer and 99% of the time they don't need soapy water to get em up on the bead either,just blow em up with air an POP goes the bead,hahahahaha.
Jun 7, 2016
1. Tiny pin holes in rubber allow sealant to seep out. Air seems to only hold for a couple days.
2. Tire does not fit tightly enough on the rim to hold pressure. Even when strapping wheel to increase snugness of fit the tire will pop off bead and not maintain seal
Apr 21, 2011
Jul 7, 2011
The Stans Rim strip cost far outweighs the cost in ease and refill of sealant. (removable Presta core)
26" Tires:
2.35 Kenda Nevegal 120 TPI
2.35 Kenda Excavator 60 TPI
2.10 Kenda Nevegal 60 TPI
2.10 Kenda Slant Xix 120 TPI
2.10 Kenda Small Block Eight 120 TPI
26" Wheels:
WTB Speed Discs
Neuvation MTN MX
Neuvation MTN MAX
All work:
60 TPI easier to seal sidewalls
120 TPI sidewalls are more porous require more time
If you figure out a way to seat the tire using a hand pump let me know I tried like a furious monkey with little success. I have had to use a compressor to seat the bead on almost every occasion. Sometimes I had to go past the recommended 45 PSI to get the bead to seat correctly.
Couple of Tips:
If this is your first attempt allow adequate time this is not a quick process first time around.
When you mount the tire make sure prior to pumping up with air both beads are in the center channel.
Make sure that when you mounted the tire the rim strip (Stans) is still flat around the circumference of the wheel (When I had problems inflating I double checked to find the rim strip had folded over or moved too far from the bead lock)
Use lots of soapy water as this help with inflating and the bead seating easily
I have had flats from nails and screws so even-though I run tubeless I still have the weight of the tubes in my pack. LOL
The ride is incredible and worth the extra hassle IMO
I have another set of wheels because I do like to ride with different tires for different terrain. These have tubes though.
Apr 6, 2011
Apr 6, 2011
Jul 12, 2014
Apr 6, 2011
Jul 7, 2011
Hit me up if you have questions member tcarbone.
Apr 10, 2011
If I use a kit like Stans to convert my Easton XC One wheels, can I then use my regular tires, or would I need to get the tubeless ready version?
Also, I've mounted many car, truck and tractor tires growing up around my dad's service station, and for those we used bead sealer to help establish and keep an airtight bead. Is there any advantage to dabbing some of that on a tubeless bicycle wheel setup?
Apr 6, 2011
Adjusting by just a few psi can make a big difference, so spend some time experimenting!
Jan 25, 2018
Apr 7, 2011
Jul 7, 2011
Apr 11, 2011
On my tubeless ready Stans Arch rims I can get any tire seated using a floor pump, but standard tires you have to get kinda crazy with the pump and really get on it for a minute or two, pumping away really fast. With the Specialized 2Bliss tires it's incredibly easy, two pumps of the floor pump and bead is seated and the tire is holding air. EASY!!
Aug 18, 2016
May 23, 2011
Sep 21, 2011
Apr 6, 2011