
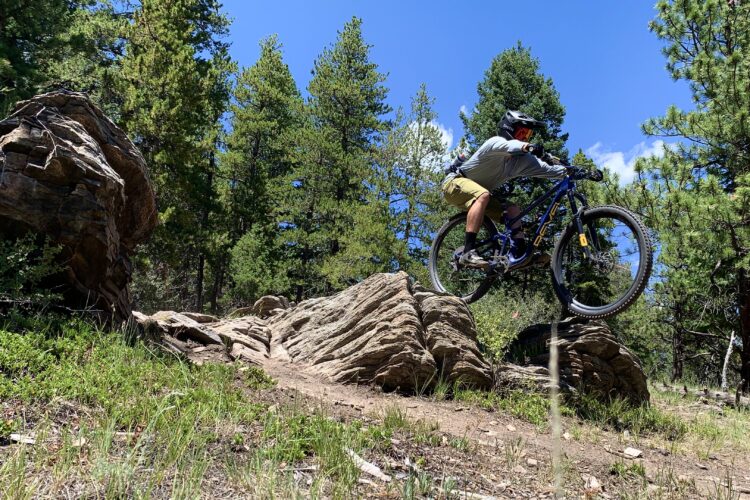
How often do you fiddle with your mountain bike suspension? Are you someone who increases or decreases the rebound and compression depending on the type of trail you are riding? Finding the right settings for one or the other can be a confusing task.
Quite a few of us set our suspension to the manufacturer’s setting and leave it, despite the trail we ride. But could we ride faster and more confidently with just a couple of clicks here and there?
To find out how we should run our suspension on different trailsl, we chatted with Trevor Elson. Elson is a suspension specialist and the owner of Specter Suspension in Redmond, Oregon.
Suspension settings confusion
To help understand the difference between suspension setups for tech trails and flow trails, it is important to understand what the different suspension settings do. There is rebound, there is sag, and there is compression. Three settings don’t seem all that confusing, but rebound and compression are multiplied with high-speed and low-speed settings.
Elson finds this is where most people need clarification. “There’s a lot of specifics with suspension but high and low speed adjustments seem to really confuse people.”
However, “high” and “low” speed have less to do with how fast we are riding and more with how quickly our suspension moves.
“A lot of people think…high speed would be fast trails like downhill, and low speed is going slow on a trail like climbing or flat pedal-driven trails,” Elson said. “This is not the correct way to understand it.”
For example, a “high-speed” compression can happen when moving relatively slowly. “Think of pedaling slowly on a climb or a flat trail, then suddenly you strike a square-edge rock,” Elson explained. “The ‘speed’ that we are talking about is shaft speed—the speed in which the shock or fork moves.”
To understand how a few clicks here or there change the speed at which our suspension shafts are compressing and rebounding, we need to dive into dampers. Luckily, Elson knows those waters, or perhaps oils, well.

Inside a Suspension Damper
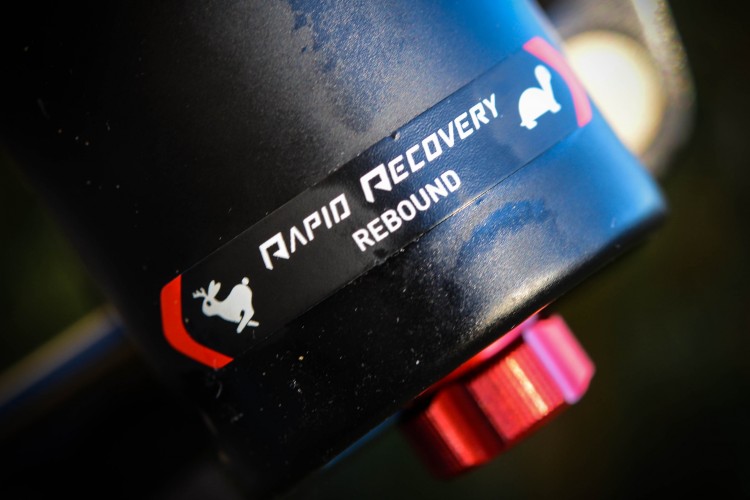
A counterclockwise click of rebound here, turning high-speed compression toward the positive there, is all about controlling the oil flow in your suspension.
“Just about every single damper has oil, a piston, and shims,” Elson explained. “The shims are like really thin washers, [each with a] different thickness and diameter.”
Elson noted that bike manufacturers achieve different suspension tunes for specific frames by how these shims are placed and organized.
“As oil flows into the piston through a series of holes, the shims bend or flex back into a cone shape and controls the rate of oil flow. High-speed compression adds [or takes] pressure to the shims, making it easy or harder for oil to flow through,” Elson said.
For compression, oil flows more freely as you click the dial toward the negative symbol on your suspension. In this more “open” setting, your suspension will feel less firm. Adding compression does the opposite, as oil pressure increases and the overall feel of your suspension firms up.
Elson said we can essentially think of rebound as compression’s counterpart. “Rebound is the shock or fork returning to full travel after the compression. Oil flows up through the compression shims and down through the rebound.”
Rebound adjustments change how quickly the suspension returns to full travel. Similar to compression, high-speed and low-speed rebound don’t correspond to trail speed but rather how quickly the suspension shaft returns to full travel.
So, is there a “ride and feel’ for flow trails but a different “ride and feel” for tech trails? For Elson, it is more nuanced than just a simple yes or no, but he pointed out some general differences and patterns that work best.

Suspension set up for Flow Trails
If it wasn’t confusing enough with high-speed/low-speed settings for rebound and compression, another adjustment—volume spacers—comes into play. The absence or addition of volume spacers helps in the linear or progressive feel of the suspension. And while they aren’t exclusive on suspension setup for flow trails, Elson did say this is where he predominantly sees them.
“You’ll often find that for flow trails, you’ll want to add a volume spacer or two,” Elson told us. “Less spacers give you a more linear feel, meaning it takes the same force to push through the spring. More spacers give you that ‘ramp-up’ feel, meaning it gets firmer the deeper you go into the travel.”
Volume spacers help create a firmer suspension setup for flow trails, which seems the norm. “For flow trails, I like to recommend a bit stiffer setup, shooting for 20-25% sag,” said Elson. He also explained that high-speed adjustment isn’t as crucial for flow trails.
This is where the confusion of suspension adjustments can come into play. Despite some flow trails’ high overall speeds, you will likely encounter more low-speed shaft movements.

The shaft movement of low speed is relative to high speed. It is easy to imagine how much quicker a suspension shaft moves when significantly impacting a drop-to-flat versus the slower shaft movement of compressing our suspension into a corner.
“Think of low speed like a slowly moving fork or shock,” Elson said. “It’s easier to explain as pumping through a roller, cornering in a berm, or preloading for a jump.” These types of compression are much slower when compared to square edge impacts we might encounter on more technical trails.
With flow trails, Elson said high-speed settings aren’t as crucial as low-speed. “For flow, you’ll want to focus on low-speed compression and low-speed rebound adjustments.”
Along with having sag settings sitting a bit higher, Elson also recommends low-speed compression on the firmer side. “You don’t want to preload for a jump and soak up your entire travel on the lip. You need some support to give you a proper amount of pop.”
With rebound, Elson says to slow things down. “Slowing it down will help you stay more balanced when getting airborne and not getting bucked over the front end.”

Suspension set up for Tech Trails
For tech trails, we exchange our emphasis on low-speed settings for high-speed and go softer. Overall, Elson recommended a softer setup for tech trails.
“Usually learning towards the 30-35% sag. Softer will allow you to constantly grip the ground and terrain as opposed to bouncing over it,” Elson told us.
For adjustments, consider increasing high-speed compression. “You don’t want to be barreling into a technical rock section and absolutely dive your suspension to bottom out on the first hit,” Elson said. “You’ll need some high-speed compression adjustment to firm up the suspension for those hits.”
Elson said adding high-speed compression won’t change the feel when pumping through a berm or compressing into a jump.
You can also add a couple of clicks of high-speed rebound. “Applying some high rebound will help when hitting continuous rocks,” Elson said. “Too slow will cause the suspension to ‘pack up.’ Packing up means the suspension doesn’t have time to rebound and get ready for the next hit.”
However, suspension setup for tech trails tends to be a bit more “tricky,” as Elson put it. While the information that Elson shared is a good general understanding for tech trails, he did mention that setup for tech tends to be more personal than flow trails.
“I do find that for today’s tech riders, suspension is completely personal. The ones who grew up hitting jumps and flow and turned to tech still run their suspension pretty firm. But the ones who start with tech then go to jumps [usually] adjust their suspension for each trail.”

The Quick and Dirty
Without another deep dive into your suspension’s inner workings, here’s a review of Elson’s recommendations for both trails:
For flow trails:
- A firmer setup
- Emphasis on low-speed settings rather than high-speed
- Sit a bit higher in your suspension with a sag setting of 20-25%
- Slow low-speed rebound down so you don’t get bucked
- Increase low-speed compression to help keep things firm
For tech trails:
- Run your suspension on the softer side
- Focus on the high-speed settings
- Turn up high-speed compression for big impacts
- Increase high-speed rebound so your suspension doesn’t “pack up.”
While this general understanding of suspension settings may ride better on different terrains, Elson says these are personal preferences. “To get the best feeling setup, I recommend my riders to pick their favorite trail and ride it four or more times, each lap changing the compression and rebound a click or two. This will help you decide what setting is helping you get the most control and confidence.”


0 Comments