Properly adjusted and tuned disc brakes will allow you to ride faster. You can rail corners and unseen terrain with more speed when you have the confidence that your brakes will slow and stop your bike quickly. If you need convincing, check out one of these videos on proper braking.
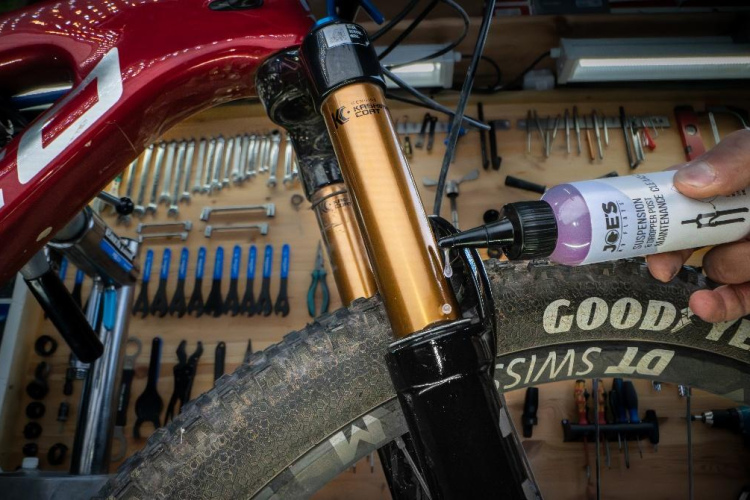
Hydraulic brakes require far less tinkering and maintenance than their cable-actuated cousins, allowing you to shred more than you wrench. That stated, even the best hydro stoppers occasionally need a pad swap, bleed, de-squeak, plunger adjustment, or power improvement. Below we will outline the elements of proper lever placement, share some of the common issues folks encounter with their braking systems, along with their possible solutions, and suggest ways riders can increase brake power.
Disc brake terms
Before we start, let’s define some terms.

Reach adjust
This is an adjustment of the space between the brake lever and handlebar. On most modern brakes the reach can be adjusted with a finger-screw or a 2mm bolt. Check your brake manufacturer’s website to find out how to adjust your lever.
Free stroke/bite point
The brake lever’s free stroke — or bite point adjustment — changes the amount you can pull the lever before the brake pads first contact the rotor.
Modulation
This is the amount of stroke your brake has between its initial engagement and fully locking up. Low modulation means you only need to engage the brake a little bit before it locks up. High modulation indicates that you can feather or manipulate your lever across a broader range before the brake locks up and your wheel skids. Brakes with low modulation are described as being either fully on or off, with little room in between.
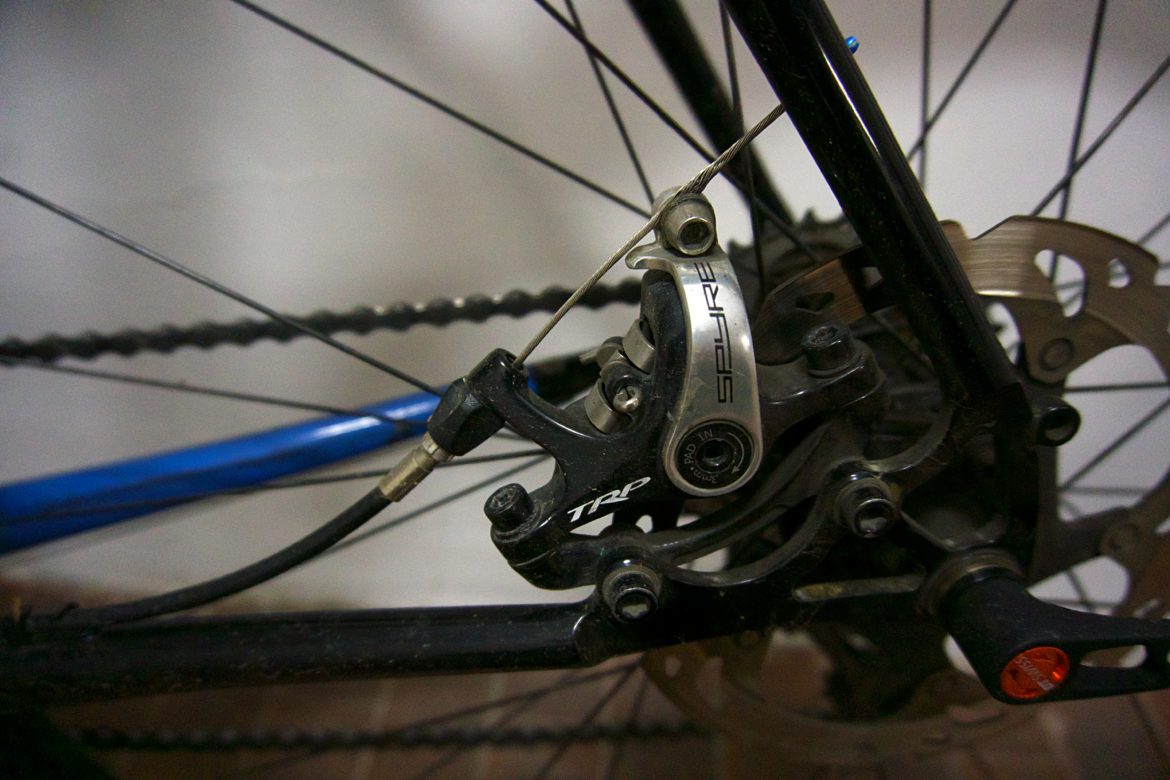
Caliper
This is the part of your brake that clamps the pads down on the disc when your finger asks it to.
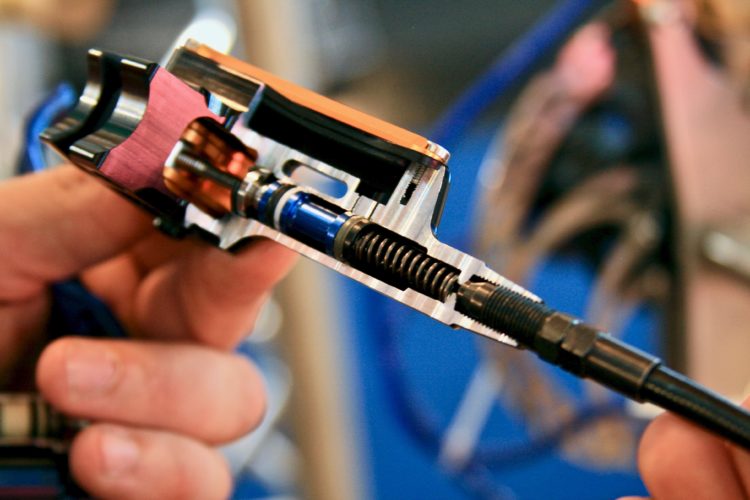
Plunger (aka piston)
Plungers or pistons are metal, ceramic, or composite cylinders that are pushed and pulled by the fluid pressure in the brake system. They, in turn, push the pads into the rotor.
Metallic, metal-sintered, organic, and resin
These adjectives refer to the compound of the brake pad that interacts directly with your rotor. The quick story is that resin/organic (different brands use different names) are better for drier weather, they allegedly make less noise than metal pads, they won’t wear your rotor down as quickly, and they don’t last quite as long as metal pads.
Metal or metal-sintered pads can help your brakes function more consistently in wet conditions, last longer than resin pads, wear down your rotor faster, and occasionally riders find that they make unfavorable noises.
Some people insert a metal pad on one side and resin on the other to get the feeling they want from their brakes. What you choose depends on your needs and preferences, though there are some rotors that require one pad compound or the other.
Steel- vs. alloy-backed pads
The backing of the brake pad is the part that holds the pad in place, rests against the plunger/piston, and dissipates the initial heat from the pad compound. Alloy backed pads will dissipate heat faster than steel, and cost a bit more as a result.
Mineral oil and DOT fluid
These are the two fluids used in nearly all modern hydraulic brake systems to transfer pressure from the lever to the caliper. Mineral oil is a somewhat generic term, though it is most often a byproduct of transforming crude oil into gasoline. DOT fluids are comprised of a variety of elements, and their associated number (e.g. DOT3 or DOT 5.1) indicates their tested boiling point.


Olive and barb
These are parts of the brake system that allow your hose to interact properly with the lever. The barb is inserted into the end of the brake hose at the lever to ensure a precise amount of fluid movement after the hose is pressed into the lever. The olive is a soft metal piece that is smashed between the lever body and the hose using a hollow bolt, sealing one end of the system.
Disc/rotor
These terms are used interchangeably and in tandem to signify the circular metal plate attached to a hub that the brake grabs to slow riders down.
Bleed
To bleed a brake system is to remove all of the air/dirt/water/etc. from the system and replace it with the appropriate fluid. Sometimes a bleed includes replacing the old fluid with clean, fresh fluid, while other times you will only remove a few air bubbles from the system while bleeding.

Disc brake lever setup
Single finger distance
All modern mountain bike brake levers are designed to be pulled using only the index finger. With your brake clamp just loose enough to move the lever lengthwise along the bars, put the brake clamp against your grip and slowly slide it toward your stem a centimeter or three, until your index finger rests naturally on the end of the lever while in a comfortable riding position. Your wrist should be straight and comfortable, not straining in either direction to allow your index finger to rest comfortably on the lever.

Lever angle
This measurement is born from preference and riding style, but generally, you want your levers to be in a comfortable position so that your hand and forearm are in a straight line while seated in your most common riding position. You may need to ride with a wrench to get this angle dialed where you like it.

Some gravity riders prefer their levers positioned in a more horizontal position, as they need their brakes most when they are behind the saddle, and their forearms are far lower than they would be in a pedaling position. In contrast, XC riders who spend a lot of time out of the saddle pedaling often like their levers closer to a 45° downward sloping angle. The important thing is that you find a position that is both comfortable and provides unfettered access to your stoppers when you need them.

To make sure both of your levers are on the same slope you can go by feel or use a level. Another trick that works well is to sit back on your bike until you can barely see the brake levers while looking over the bars, then choose an element of the brake lever to line up with the bars. I typically use the brake hose, as other things may be bent or obscured by dropper levers. You can use the same element of the lever on either side to line up with the handlebar and determine if the brakes are in the same spot.
If you crash often and have broken a few levers, it can help to only tighten your brake lever-clamp enough to keep it from moving when you pull the lever. If the lever is loose enough to move rather than break when it hits something you will save some cash, and likely save the rest of your ride.
Lever reach
Like those above, this measurement is somewhat determined by feel and preference, but there are other aspects to consider. Make sure the reach is adjusted in close enough that you don’t have to loosen your grip on the handlebar to get your index finger on the lever. You also don’t want the lever so close that it hits the handlebar, or your middle finger, before fully engaging the brake. The ideal spot for most folks is to have the lever sit right behind your last knuckle (the one closest to your fingernail) when it is disengaged.

Free stroke/bite point
The point where your lever stops freely swinging toward the bar, and the brake begins actively braking is what is being adjusted here. If you like your reach adjusted close to the handlebar you may want a short free stroke. Otherwise, your lever will come too close to the bar and hit your finger or handlebar before fully engaging the brake.
For beginners or folks who know they sometimes pull the brakes too hard, you may want to give your rear brake lever slightly less free stroke than the front. That way, when you get spooked and grab a handful of both brakes the rear will engage first, and hopefully, you can refocus before the front brake ejects you into dirt-nap oblivion.
Troubleshooting common disc brake problems
Let’s wipe the dust off of things and start looking for a solution to your brake woes. Once you’ve identified the problem, check the end of this section for links to step-by-step repair instructions.
I have new pads and rotors and my brake feels weak.
New pads and rotors need to get to know one another through a process called “bedding in.” This article explains how to bed in your brake pads properly. If your brakes still feel sickly after bedding them in you likely need to bleed them. You will quickly notice a theme in this troubleshooting section: that bleeding solves most disc brake ailments.
My brake is making a scratchy metallic sound when I pull it.
This sound is most likely due to worn-out pads. Pull your pads out and have a look. If you have less then 3mm of pad remaining they will need to be replaced.
Occasionally sand or other debris can become lodged in the pad, causing it to make noise before it is worn down. In this case, use a clean piece of sandpaper to clear the surface of debris, and a needle to pick out anything embedded in the pad.

My lever feels spongy and doesn’t pull as close to the bars as it used to.
Spongy or soft lever feel is almost always a result of air in the system. It’s time for a bleed. Before you bleed, check to see if your pads need to be replaced. This will save you a step in the future, as often a pad swap also requires a quick bleed.
I took my wheel out and can’t get it back in. There isn’t enough room for the disc.
If your lever is actuated without the disc in place it can allow the pistons to move beyond their normal spot. This will decrease the amount of space for your rotor, and you will need to adjust the pistons back into place. This video explains how to go about pushing the pistons back into the caliper.

My brake seems to be losing power. It doesn’t really stop me anymore.
A loss of power can be due to a number of things. You may have air in the system and need to bleed your brake, your pads may be worn too far, your rotor may be too dirty, or your pads or rotor could be contaminated. Before bleeding, make sure that everything is clean, and that your pads have at least 3mm of useable material remaining.
Pad glazing could cause a brake to lose power, especially after a big descent. Essentially, the top layer of the pad material becomes smooth and slick instead of rough and grabby due to heat. Pop the pads out and scuff the surface on a rock or other rough object to get them back in shape.
One of my pistons is not moving as much as the other, and it seems stuck.
Pistons move in precise increments in and out of the caliper thousands of times per season, covered in dirt, in all states of overheating and cooling. Eventually, they will start to stick and need to be cleaned.
One side of my brake is rubbing.
If both of your plungers are moving equally, but one pad is rubbing the rotor while the other is not, your caliper needs to be realigned.
If you are having trouble getting your brake to align properly with the rotor, try adding cup and cone washers to prevent the bolt from determining the angle of the caliper. If that doesn’t fix the problem you may need to have your frame’s brake mounts faced in order to provide a level mounting surface. This is a job for your local mechanic.
The brake caliper makes noise at a certain point in the rotor’s rotation.
If you hear a clipping or scratching sound at a certain point as your wheel spins, while the brake is fully disengaged, your rotor is likely bent. Here is a video on how to true the rotor. If the bend in your rotor is minuscule you may be able to silence the noise by realigning your caliper.
If you are trailside with a bent rotor you can true it with a small stick or tire lever, using the caliper body as a truing guide. You can also true it with a gloved hand, so long as the rotor has cooled off and your glove is free of oil. Rotors can be searing hot and sharp, so take care with this approach.
It is best to true the rotor with something blunt, like a soft stick. Acute objects, for example, needle nose pliers, can create small creases in the rotor that will negatively affect braking. Truing a rotor often takes less force than you may think, so push gently at first and recheck its alignment often. One small bend in a rotor is far better than a bunch of bends cause by an impatient repair attempt.

My brakes howl like a bereft banshee whenever they get a little wet.
Brake howl or squeak occurs when your pads vibrate as they grip the rotor. If this only happens when they are wet you can try different pad compounds that may better interact with your wet rotor. Metal/metal-sintered pads often perform better than organic/resin in wet conditions.
Worn rotors with chipped or concave pad contact surfaces can also cause your brakes to howl, and need to be replaced.
Additionally, there are several products you can spray on the front or back of the pads to eliminate the vibration and noise. I have had good results with this one.
The brakes are squealing constantly.
First, check that your pads have sufficient material, the pad contact surface of your rotors is not pitted or concave, and that your calipers are properly aligned. All of these elements can cause your brakes to howl.
If your brakes are squealing whenever you use them there is a good chance they are contaminated. Often rotors and/or pads can become contaminated by oversprayed chain lube or brake fluid from a recent bleed. If you use aerosol chain lube, try putting a shower cap over your caliper and rotor when you apply lube to prevent contamination.
The simplest solution to contaminated pads and rotors is to replace both. Replacing only one or the other will typically result in continued contamination. Alternatively, you can try cleaning them with brake cleaning solutions or light them on fire.
To burn off contaminants, begin by placing the pads and/or rotor on a non-flammable surface. Then cover them with a light serving of alcohol. Light the alcohol and let it burn off, hopefully burning the oils or other contaminants at the same time. You don’t want to let the pads/rotor burn for too long, as heat will also damage them. I typically shoot for about 30 seconds.

It feels like my brake is jumping, and not grabbing smoothly.
If you are getting a stilted or jumpy feeling from your brake lever you likely need to clean your rotor. If your rotor is clean, check it for any sharp dents or bends that are being reflected in the lever feel. You may need to replace your rotor.
I am in the backcountry and my brake is hardly working.
If you are out on the trail and your brake decides to take a break, try pumping the lever rapidly until you can feel it start to work. If this solves the problem you may have to continue pumping the brake throughout your ride to keep it working, then bleed it when you return home.
If your brake system loses pressure and you need that brake in order to get home (i.e. on a long bikepacking trip), and you don’t have any bleed tools, there is a possible solution. It’s a bit of a longshot, but it can work.
This emergency hack will only work with brakes that use mineral oil, as DOT fluids are far too toxic. Also, there is a good chance this will destroy your brake. First, you will need to find out where the brake lost fluid and repair the leak. Then with a sealed brake system, remove the brake from your bike and open the bleed ports on either end of the brake. Fully submerge the brake in water, shaking it and moving it around until no more bubbles are escaping from the ports. With your brake full of water, close the bleed ports and remount the brake. If the system was properly sealed the brake should now work. Braking performance may be poor on long descents, as the water heats up and eventually boils. Once home, try to bleed the system and see if your brake still works. If not, maybe hang it on the wall as a reminder of that adventure.
I snapped my brake lever (or ruptured the hose or bent the caliper).
Nearly all brake manufacturers offer replacement parts for their systems for far less cash than replacing the whole brake. This hose replacement video will help you swap any of the busted bits.
My brake hose is rattling around, making noise inside my frame.
There may be a hundred videos on this topic, and none of them do a good job of explaining how to fix it. You can try this one. If that doesn’t work you can wrap the internal part of the hose or housing in weather stripping.
Another fix is to remove and rubber frame seals that hold your brake hoses and shift cables in place, pull out a few inches of the hose and tighten a zip tie snug on part of the hose that will be in the frame. Then with the zip tie tight and uncut, push the cable back into the frame, along with the hole zip tie. Do this at either end of the hose entrance and exit, and then replace the rubber frame seals. The long end of the zip tie will force your brake hose against the internal wall on one side of the downtube, keeping it quiet most of the time.

Once you’ve identified the problem, here are some videos that will offer more detailed repair instructions.
- General overview and preride brake checklist
- How to clean your rotors
- How to clean brake pistons
- How to align your disc brakes
- How to change brake pads
- Bedding in disc brake pads
- A general overview of how disc system bleeding works
- How to bleed Hope brakes
- How to Bleed Shimano brakes
- How to bleed Sram Guide brakes
- How to bleed TRP brakes
- Bleeding Formula R1 brakes
- Bleeding Magura MT5/MT7 brakes
- How to true a bent disc rotor
- How to swap brake hoses
- How to shorten brake hoses
Also, for more bleed info, check with your brake manufacturer for their specific instructions.
Tuning for power and performance
If you travel to someplace with steeper tracks than your home trails, or your riding style moves in a more aggressive direction, you may find yourself wanting more power from your brakes. A perfectly-adjusted brake can sometimes be made even better with the following changes.
Bleed it (again) If you have done a quick job on your brake bleed, a more thorough bleed can sometimes remove the last bits of air in the system, making it perform even better. Replacing the fluid in your braking system once or twice per year will also keep it in top shape, and keep the seals happy and healthy inside.
Rotors A larger rotor offers your brake additional leverage to more quickly slow down the wheel. Pie plate rotors are also better at dissipating heat on long descents, keeping the whole system running more consistently. Lastly, rotors with steel braking surfaces and alloy centers will cool faster than their all-steel friends, and weigh less. In this case, the old adage that “steel is real” isn’t so positive. Some frames and forks have a rotor size limit, often listed on the manufacturer’s website.
Different pads There are loads of companies vying for your business in the “better brake pad” market. Some make pads specifically for DH or e-bikes. Trying different pads and unique compounds can be a good way to dial in the brake feel and response you want.
More pistons Nearly every modern brake company offers a 4-piston (aka four pot) brake caliper for gravity riding. If your current brake has two pistons total and you are looking for more bite, you may want to switch your caliper for a 4-piston model. Gravity-specific brakes truly are stronger. Here is a review of an affordable model from Shimano.
More tire traction If you are doing all of the above correctly and still searching for more stopping power there is a good chance that your brakes are not the issue. Roughly 70% of your bike’s braking power happens at the front wheel, so make sure you have a grippy tread that is well-suited to the kind of trails you are riding or racing. The more grip you have, the harder you can brake. Then have a look at the tread blocks on your rear tire. If you like your rear tire to grip hard while braking you will want something with long brake-bars across the center of the tread. The Maxxis DHR II is a clear example of a tire that is designed to grab the earth firmly under braking loads. If you prefer a more ruddered “outboard motor” rear brake style, maybe an E*thirteen SS tire is more your flavor.
Here is a video on how to get more power from your brakes. There are some more complicated things you can do to increase braking power, but let’s start with these for the time being.
This list is by no means exhaustive. Please share your brake hacks, fixes, bodges, and tricks below.


0 Comments