
The Quick Question series answers your MTB repair questions. Do you have a quick question about mountain bike repair? 🤔 Email [email protected] and we’ll do our best to answer it!
Mountain bikes are relatively simple tools, and with a little time, we can all learn to work on the majority of their parts. For this Quick Questions installment, we want to collect helpful tips for swapping out brake pads from our knowledgeable readers. Whether folks need to replace worn pads or want to try a new compound to improve the performance of their mountain bike brakes, knowing how to properly swap pads will benefit everyone at some point. We’ll give an overview of the process to get things rolling.
Replacing mountain bike brake pads
First, make sure that your brakes are fully cooled down before working with them, and be sure to never touch the rotor or pads with your bare hands. Our natural skin oils can contaminate braking surfaces and cause obnoxious noises and diminished performance.
Remove the wheel and clean the rotor thoroughly with some isopropyl alcohol and a clean rag. If you’re changing pad compounds you will want to eliminate all of the old brake residue. Then, set the wheel aside and let the rotor dry while swapping the pads.


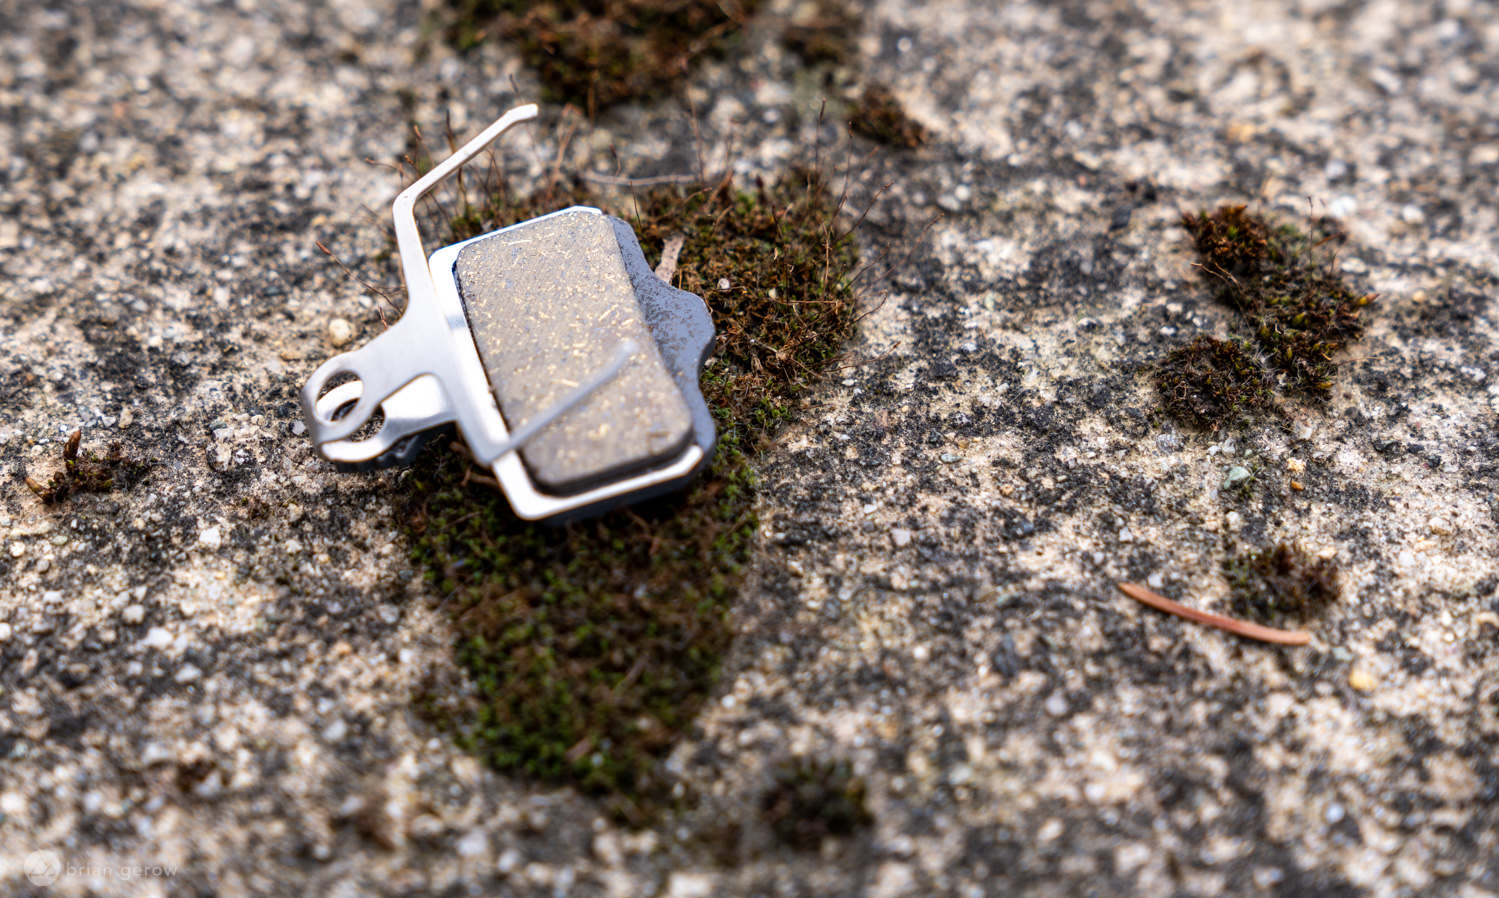
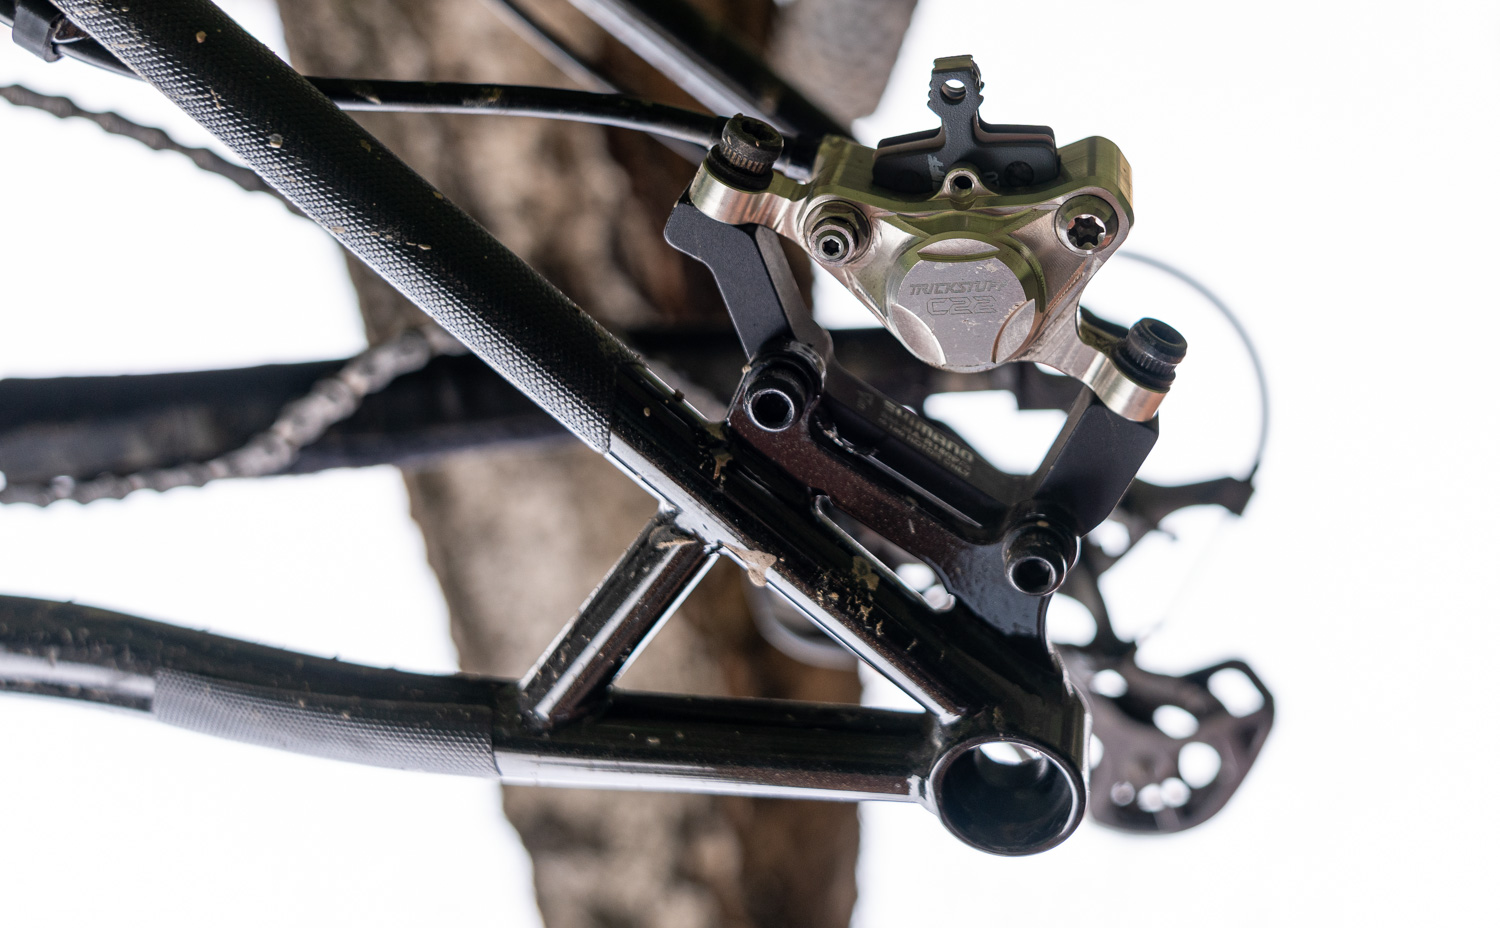
The brake pads will either be held in the caliper with a bolt or a cotter pin. Either way, you’ll need to remove that pin or bolt in order to slide the pad out. If your pads are held in place by a bolt there may be a tiny safety clip or cotter pin on the opposite side of the bolt that has to be removed prior to loosening it. With the bolt removed, the pads and separating-spring will slide out of the top or bottom of the caliper, depending on the brake model. The pads should slide out with little effort, and if they don’t you’ll want to look closely to find the hangup. Forcing them out can bend the separator-spring, which you may need later.

As brake pads wear down over time the brake’s pistons move closer together to take up space where the pad material once was. The pistons will need to be pushed back into the caliper before swapping pads to make room for the new thicker set.
If the pistons are noticeably dirty, this is a good time to douse them with some high-concentration isopropyl alcohol and thoroughly clean them with a rag and some cotton-swabs. With the pads still in place, you should be able to pull the brake lever a few times to expose more of the pistons for cleaning while the spent pads keep the pistons from sliding too far. Be careful not to push the pistons out too far, as they will eventually fall out of the caliper and create a lot more work than you had originally planned. Once the pistons are showing enough of their shiny heads, pull the pads, clean the cylinders and inner caliper, reinstall the spent pads, and push the pistons back into the caliper with a pad spacing tool or clean tire lever. There are a lot of different techniques around lubricating the piston seals once they are clean, and we would love to hear yours.
If you’re throwing the pads away you can go ahead and use a pad spreader like the metal one pictured above to press the pistons back into the caliper before removing the spent pads. You won’t want to be in a ham-fisted hurry for this step, as the steel tool can easily damage the aluminum caliper body. Using the old pad surface to push against reduces the chance of damaging the pistons themselves.

If the pads you are replacing are going to be used again at some point, you won’t want to mar or soil the braking surface with a tool. Remove them first, and then push the pistons into the caliper with a tire lever or a sturdy piece of wood. I like to use the base of two bamboo chopsticks, as the material is fairly strong, but it’s not hard enough to scratch anything. Also, if they break you can get a fresh set with your next takeout order.
With everything cleaned and free of hand oils, carefully place the pad-separating spring on the two pads so they can be slid into place as one assembly. The pads should slide back into the caliper with zero resistance. If there is any difficulty getting them in place, recheck that the pistons are pushed as far into the caliper as they can go.
With the pads in place, tighten up the bolt or cotter pin, throw the wheel in, and go bed in the new pads with the freshly cleaned rotor to ensure top performance.
Some brakes will need to be bled after swapping the pads, and the only way to know is to make the exchange and then test the lever feel with the pads bedded in properly. If the lever feels spongy or the bite point is inconsistent or vague there is likely air in the system and you will want to bleed it before riding.
Every home mechanic has their own little tricks for this process, and we want to hear yours in the comments. Do you have any special tricks to make a new pad feel especially good, or to dial in the precise bite point for your brakes? Please share them with with us!
The Quick Question series answers your MTB repair questions. Do you have a quick question about mountain bike repair? 🤔 Email [email protected] and we’ll do our best to answer it!


0 Comments