


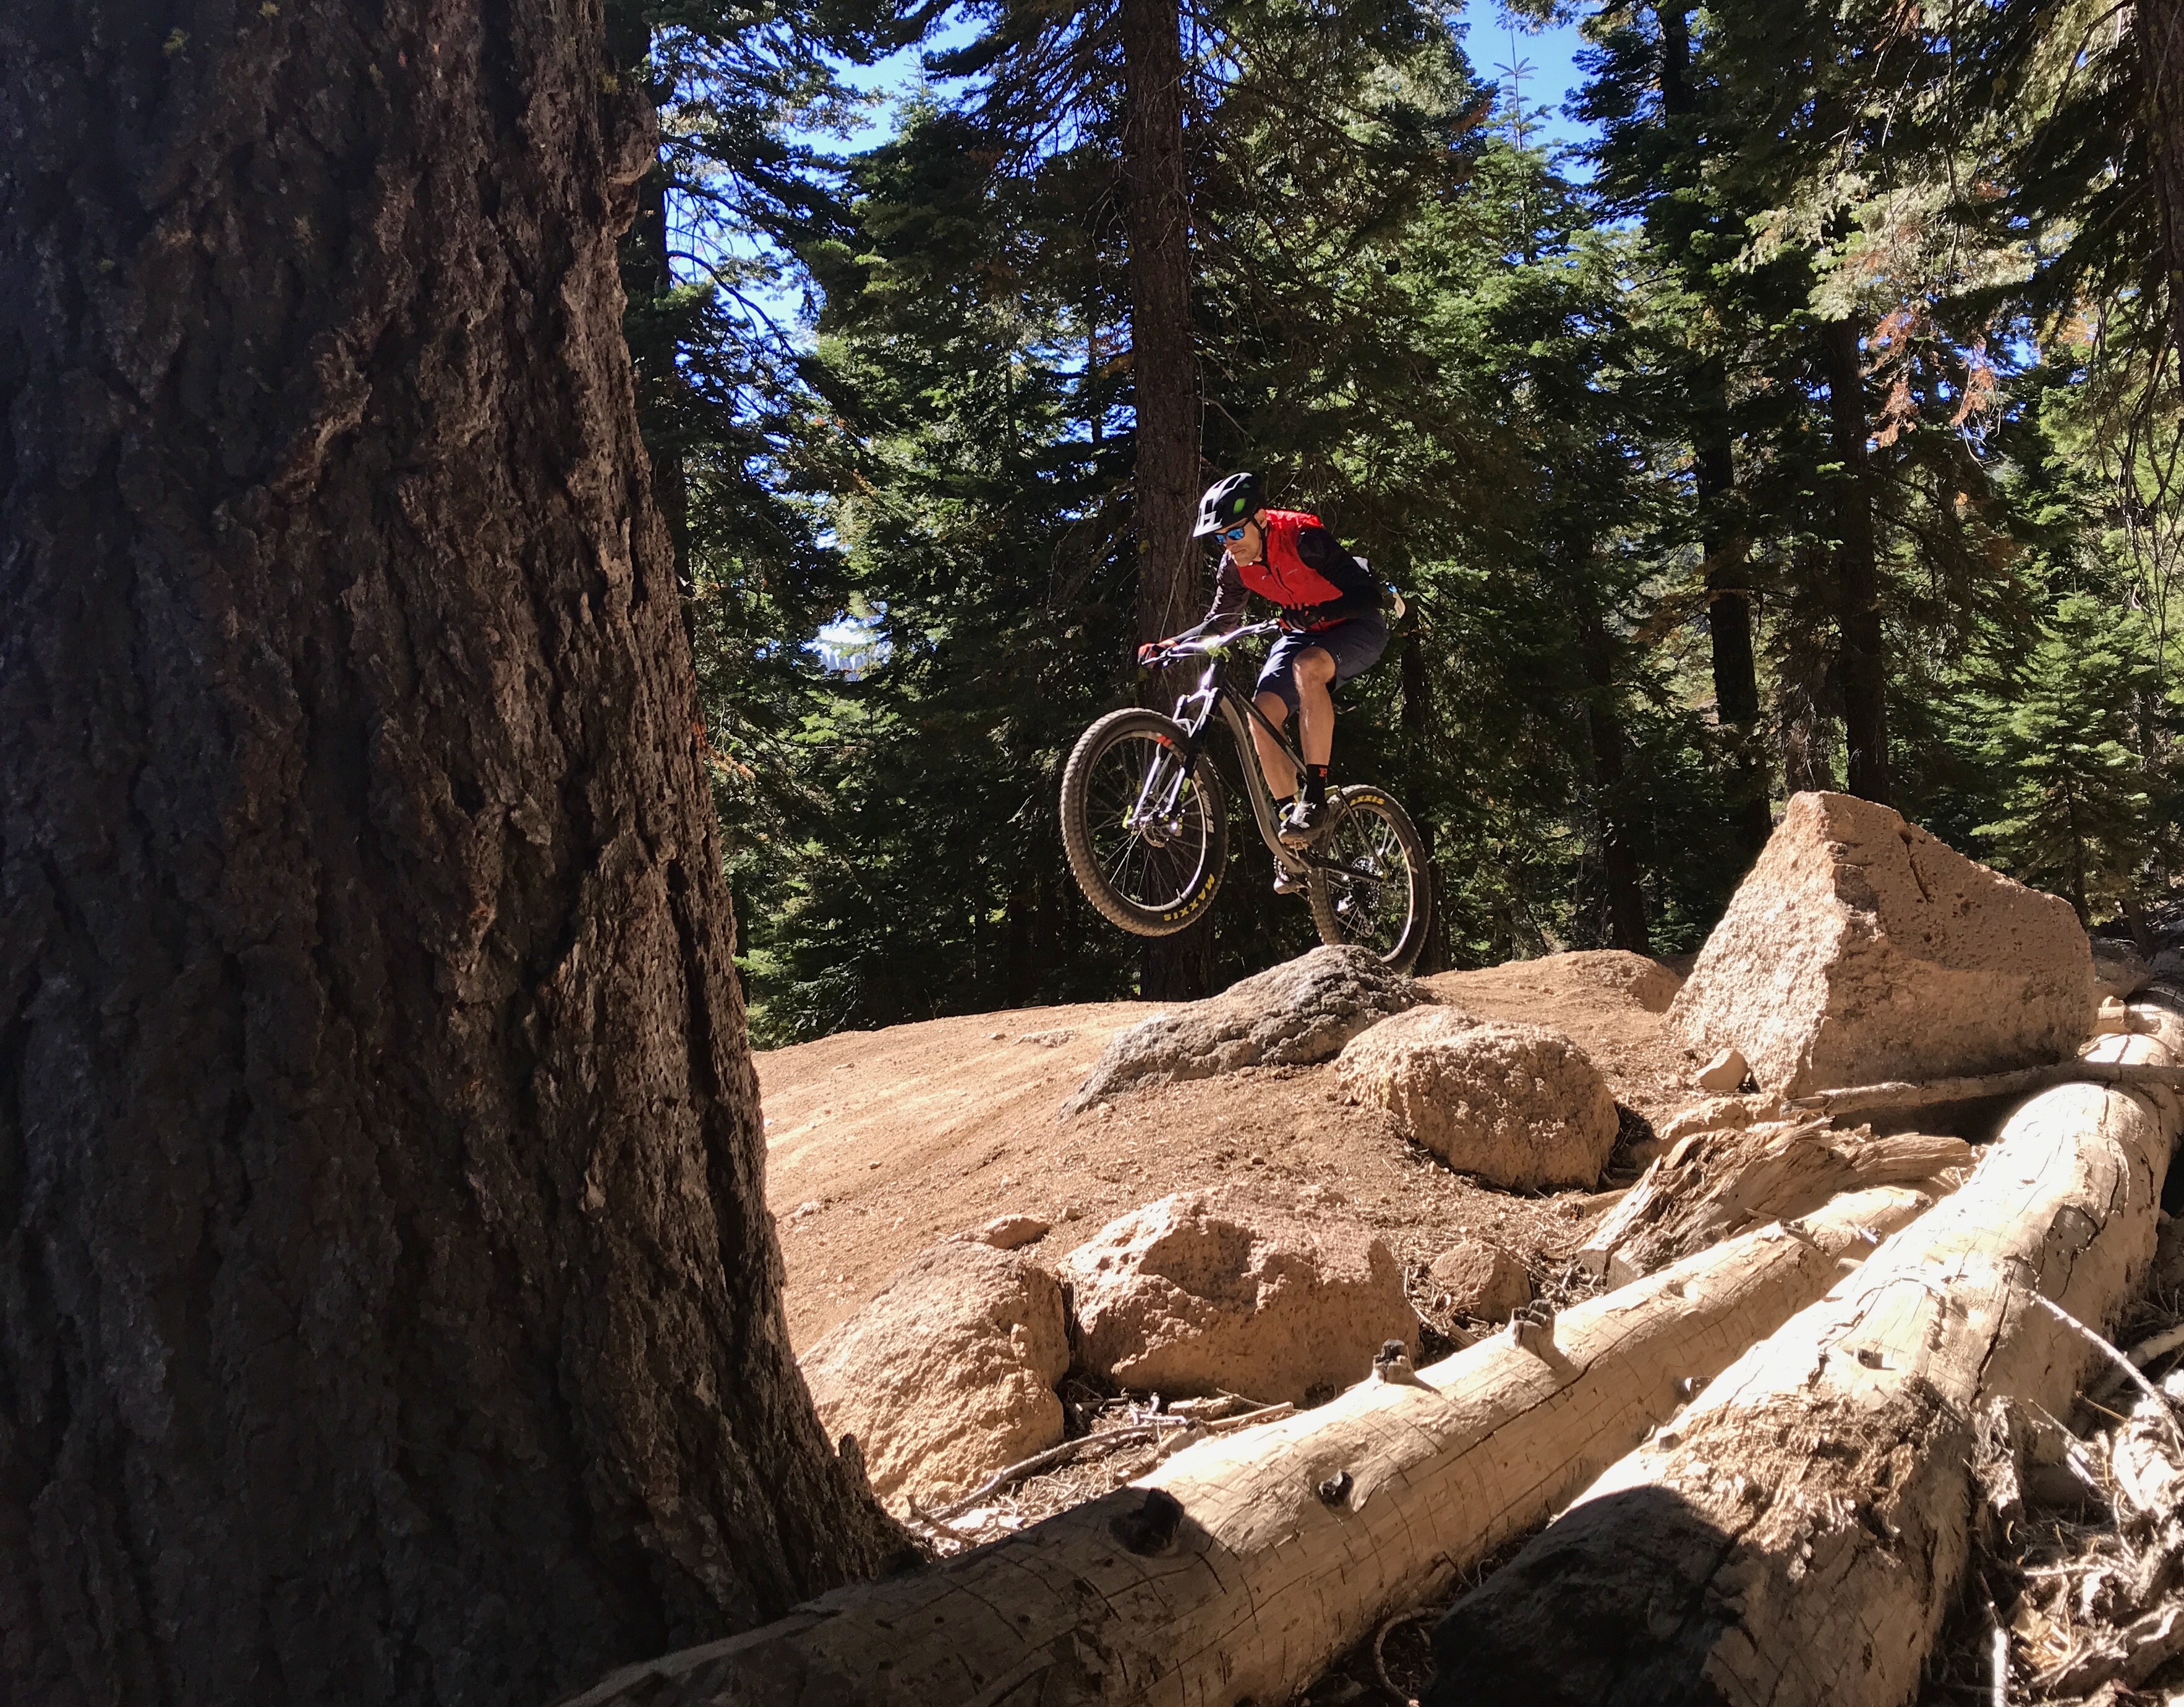
Jeff Barber hitting a jump at the Northstar resort. Photo by Matt Miller.[/caption]
There really isn’t a case where I’d rather shoot photos with a phone than a DSLR, but in every case I’d rather save the six to eight pounds of camera weight for something that can fit in my pocket.
Most of us don’t ride with a DSLR, but most of us do have a smartphone with a camera, and we often bring it to record either the distance or the visual aspect of our rides.
While DSLRs offer an infinite amount of adjustability, smartphones are comparatively limited. This doesn’t mean it’s impossible to get a great photo with an iPhone or Android though. It just means we need to adjust the way we shoot. Like anything else in life, the things that we say “we suck at” are the things we just need to practice.
By combining a few basic photo composition techniques and learning what to expect out of a smartphone, we’ll talk about how to get a good camera phone photo on your next ride. Because as they say, the best camera out there is the one you have with you.
The basics
These have been covered in some other articles on Singletracks by Michael Paul and Syd Patricio, but we’ll briefly go over a few of them again. Since the technical abilities of a cameraphone are limited, the best thing to do sometimes is rely on compositional techniques.
Composition
Rule of thirds
Why does photography, an art, have rules? Well, it has something to do with science and the way that your eye reads a photograph. When looking at a photo, the human eye wants to roam around it, rather than stay in the center. If the subject is in the center, the eye doesn’t have anywhere else to go, and the depth of the photo becomes limited. This isn’t always the case though, and sometimes a center-subject photo looks great.
Most likely, the smartphone will have a grid of thirds that can be turned on when in shooting mode and you’ll just need to time the shot once the subject hits the intersecting lines. Post-process cropping is also an option and sometimes a centered photo can be cropped so that the subject is further away from the center.
Framing
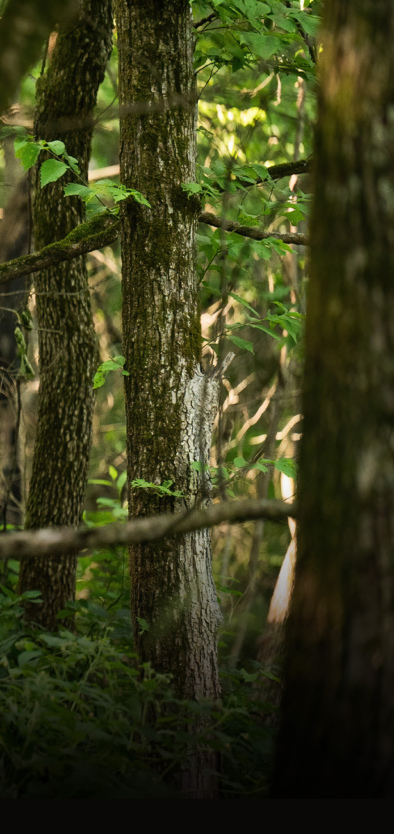
This is one of the easiest techniques to employ on the trails. Framing is done by placing the subject between trees, leaves from a bush, or some other object.

Two trees make an easy spot to set up a framing shot, but there is an infinite number of objects to use on any trail. Photo by Matt Miller, taken on an iPhone 7.[/caption]
Framing points are usually easy to find since mountain biking happens in the middle of a ton of objects. To get the timing just right, hold the shutter on burst mode and pick the best photo out of the bunch.
This photo combines a bit of framing with the rider on the left between the sign and the trail, with minor leading lines from the trail. The smoke in Whistler on that day added a dramatic element. I just wish the riders dropped in a bit closer together. Photo by Matt Miller.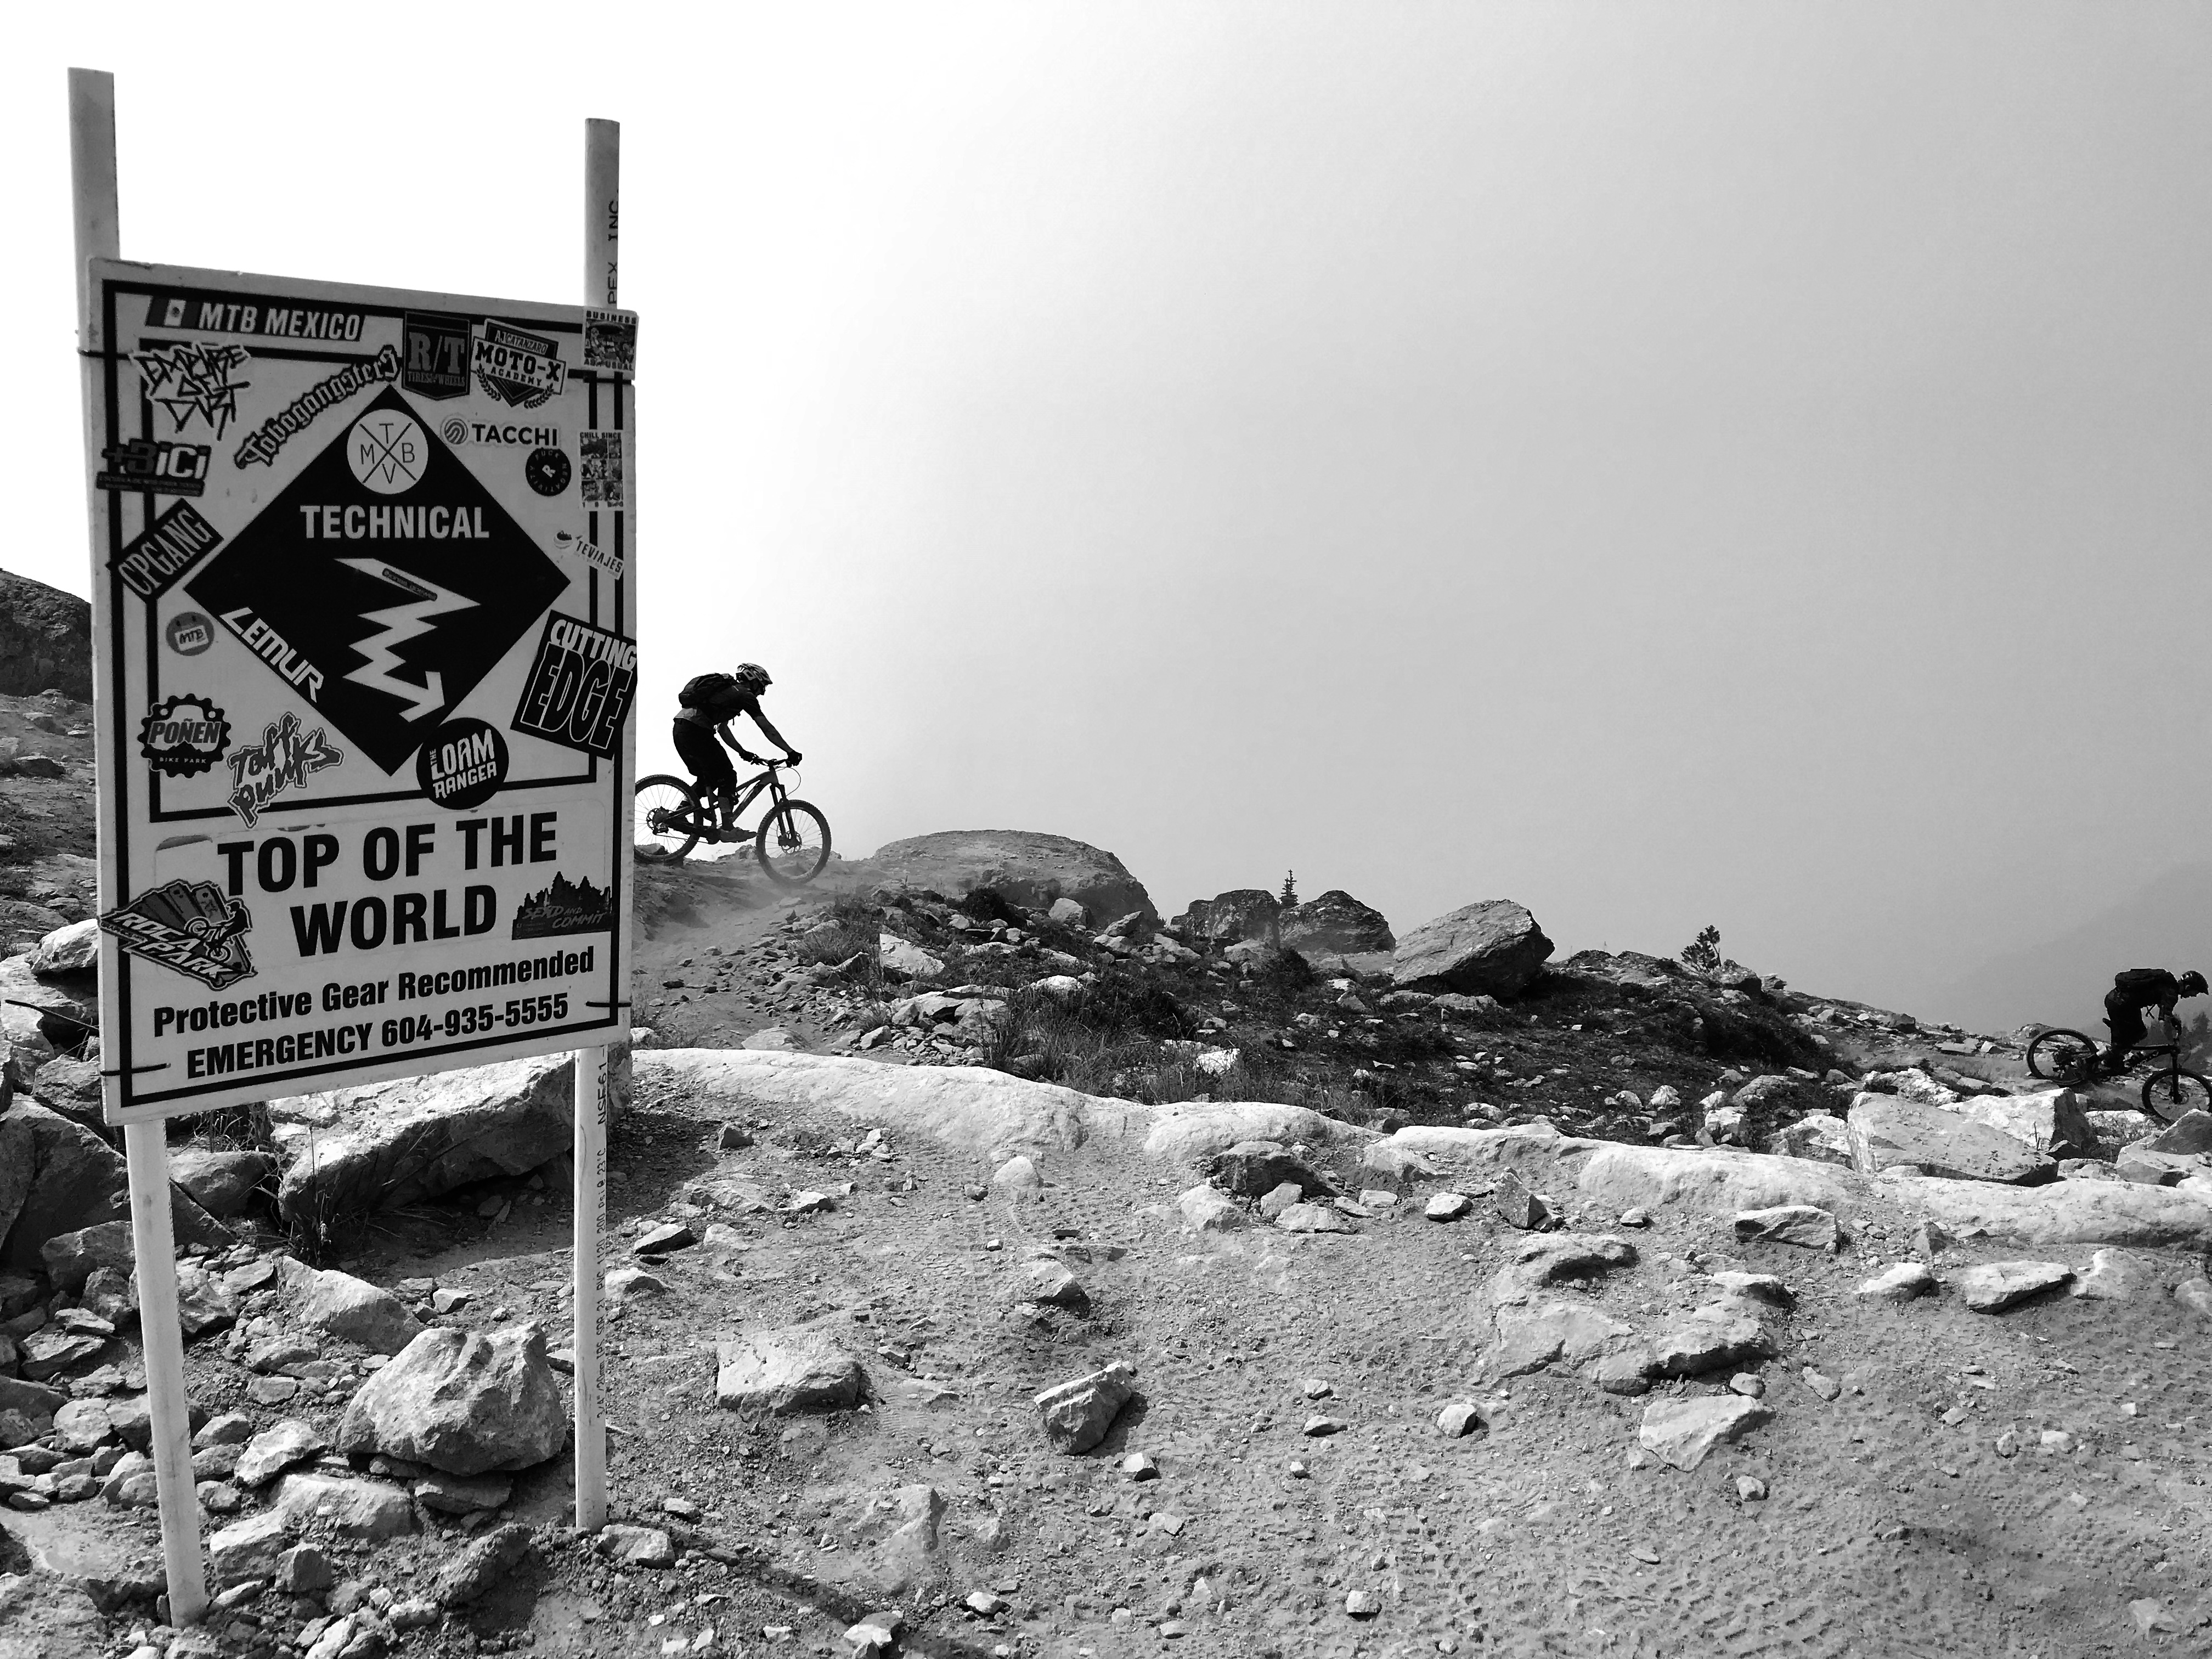
Panning
Panning is one of the most fun techniques to learn on a DSLR. A panning shot puts the rider in better focus and makes viewers feel the rider’s speed. On a DSLR it takes practice and nailing the settings to get a good exposure, but with a smartphone, it gets much simpler.
A panning shot by Hannah Morvay taken with an iPhone 7. The photo was also taken before sunset. The light is soft and warm on the rider and not too harsh.
It’s best done by using a spot on the trail where there aren’t any objects between the photographer and the rider. As the rider moves along the trail, hold down the shutter for burst mode and follow the rider with your phone. The phone should automatically focus on the moving subject and should blur out the background.
Light
One of the best ways to enhance any photo, including photos taken on a cameraphone, is shooting at the right time of day. Shooting in the morning, or the few hours before sunset when the light is softer, will result in a more aesthetically-pleasing photo. A cloudy day can also help at times.
There’s no bike in this shot, but it was taken on a ride with an iPhone 7. A low perspective, depth from the cactus to the horizon, soft light at sunset, and soft light around the cacti edges make it a good photo. In harsh, mid-day light, the same position would not be as good. Photo by Matt Miller.
[see_also id=’28753′]
If you can avoid it, it’s best not to shoot during mid-day when the sun is highest in the sky. The direct light will give the photo a harsh look. Also, avoid spotty lighting, like the kind found on a sunny day under leafy tree cover, where blotchy shadows appear on the ground. On the same note, it’s best to avoid split lighting if possible, where a shadow may take up a big portion of the photo and contrast with a lit portion.
Burst mode
The last thing you want to do is miss the shot, but you don’t have to anymore. Most cameraphones have a ‘burst mode’ now. Hold your finger down on the shutter and the snapping will continue until you release it.
Hit the shutter before the rider is in the frame and let go once they are out of it. You may have an insane amount of photos after this, but pick the best ones and you can delete the rest.
Ditch the zoom
With a cameraphone, it’s better to get closer to the subject when possible so you don’t have to use the zoom. Zooming on a cameraphone only crops the image down digitally, and usually results in a loss of resolution, or an increase in pixelation.
Motion blur
This is similar to a panning shot in some ways and different than others. Ideally, find a fun feature or landmark that the subject will ride past and focus the phone on the feature. By using burst mode again, hold it down as the rider moves past and it should create an image where the background is sharp and the rider is blurred, conveying motion and speed.
With the phone focused on the bridge, hit ‘burst mode’ before the rider enters on the frame, and you should end up with a fun photo of a blurred rider that conveys a bit of speed. Photo by Matt Miller, taken in Waterbury, Vermont.
Perspective

Brandon Temple sends a feature at the Keystone bike park. By moving low and putting rock and terrain in the foreground, the rider still looks like he’s jumping off a large feature. Photo by Matt Miller.
Yes, it’s always hard to figure out how to make a camera “do it justice” when shooting a rider on a steep line or a feature. But it’s not impossible.
It’s time to work your angles. Go low if a rider is hitting a drop, or maybe high up if they are riding down something steep. Perspective is something that will take practice to get right. Oftentimes I like to get my phone lens close to the ground (like the rock in the corner), and then tilt the phone back.
This usually ensures that the rider will have enough room in the frame of the photo and the angle should help the move look realistic.
Depth
One of the toughest elements to convey on a cameraphone is depth. Since a DSLR allows the user to set the aperture and adjust the zoom without distorting the image, it’s a lot easier to create depth. Without that, it gets tricky.
In this photo, the bush serves as the foreground, the rider is the middleground, and the mountains are the background. That also creates a line through the entire photo in which your eye is guided. Photo by Matt Miller.
Layering throughout the photo can help quite a bit. Set up a shot with a distinctive foreground, middleground, and background. Think about using a tree, rock, or bush for your foreground, the rider for the middleground, and a horizon for the background. This will help the viewer understand how big the environment actually is.
Selective focus
The focusing ability on cameraphones has increased dramatically also. One fun way to shoot a photo is to get close to a rock, tree, or other piece of terrain and focus the photo on the piece of terrain with the rider out of focus. By focusing on the closer subject, it adds adds a bit of depth.
It’d not always about the action. Get in the detail and environment shots also. This one focuses on the fall leaves with the rider out of focus. Photo by Hannah Morvay.
Try it with the other subject in focus and pick which one you like the best. The photos below frame the riders between the rocks. One of them has the rocks in focus and in the other, the riders are focused. Adding foreground to a photo will add a bit of depth either way, but by focusing on the rock, it adds a little context to the riding environment.


Editing
Editing comes with some personal preferences, and it should convey a sense of personal creativity and touch. In the end, it’s best not to over do it. An HDR (high dynamic range) filter can enhance a cameraphone photo to a point, but it can also turn it into a photo that looks more like a cartoon rendering. The two images below show the difference in a photo when one (the bottom) has a very strong HDR filter applied. (Photo by Hannah Morvay)


Start with small adjustments. iPhone and Android both have editing capabilities that come stock with the phone’s app and photo programs. The Snapseed app by Google is a great app also. Contrast enhances the photo’s highlights and shadows. Add exposure if the photo is dark, turn highlights down if there are “hot spots” in the photo, and lift shadows to add a little more light to a dark photo.
Go shoot
Now it’s your turn. These tips should keep anyone busy for a little while and hopefully negate the argument that you need to have an expensive camera to get a good shot. Take a few of the rules, get ’em down, and then break them and see what happens.
And don’t forget to share your best shots on Singletracks!


4 Comments
Nov 7, 2018
Nov 8, 2018
Nov 8, 2018
Nov 8, 2018