
AKASO Brave 7 LE Action Camera
AKASO Tech has made a lofty claim that their Brave 7 LE action camera can compete with the GoPro Hero8. We currently have a Brave 7 LE and a GoPro Hero7 Black on hand, and we will go through the stated features of both cameras, followed by a video and user experience comparison.
GoPro has been the leading name in action video technology for many years now, and claiming to match the performance of one of their fanciest camera models is a bold statement indeed. Price-wise AKASO has a clear advantage, with the Brave 7 LE retailing at $139.99 $118.99 (from Amazon) while the GoPro Hero8 Black sells for $349.99 with an SD card. The older Hero7 Black model I’ll be comparing remains retails for $249.99.
AKASO Brave 7 – External features

Weight between the two cameras is relatively close, with the Brave 7 LE spinning the scale up to 127g and the Hero7 Black at 116g. That weight includes the removable battery in either camera and an SD card. Both of those removable batteries hold a similar charge, and they look very similar to boot. Unfortunately, they’re not interchangeable between brands.
The two models seem similarly sturdy, and having crashed while wearing both I can say that they will take a fair number of dirt-naps to destroy.
Either of these cameras has one door to access the battery and SD card, and a separate hatch for attaching cables. The second door on the AKASO has a pair of HDMI jacks for connecting it directly to a computer, where on the Hero7 the smaller hatch holds an HDMI jack and a USB-C port.


Both of the cameras have full-color rear touchscreens so users can scroll through all of the settings and watch clips of their videos. The screen on the GoPro is notably brighter than the Brave7 LE, with more vivid color saturation. The Brave 7 LE also has a front screen to allow vloggers and selfie-enthusiasts to check their shots, and unfortunately, I was not able to get the front screen on the camera to turn on. The GoPro Hero7 front screen displays important information like the current recording mode and remaining battery and disc space. The rear screen on the Hero8 that the Brave 7 LE camera is compared to can be flipped up for a hand-shot vloggger view.
A Brave 7LE camera is weatherproof, warding off any beer spills and wave splashes, and comes with a waterproof case for swimming and diving. While the waterproof case isn’t necessary to mount the camera, it is definitely the easiest way to attach it to your helmet or chest for a ride. The drawback to that easy attachment is that you can’t actuate the touch screen through the case, and the microphone doesn’t pick up much with the waterproof shroud. Additionally, the camera moves around a little in the case, which is a sound that the mic does pick up. Likely the clacking sound of the camera in its case won’t be a problem underwater, but on the trail, it’s sub-ideal.

Speaking of sounds, users will not be able to attach an external stereo microphone to the AKASO, whereas there are multiple options to link a mic to a GoPro Hero7, 8, or 9. You will need to mount the Brave 7 LE in the perfect spot on your bike, without a case, in order to pick up your desired trail tunes. Each of these cameras has a wind noise reduction function that works to varying degrees, but largely diminishes their audio recording quality.

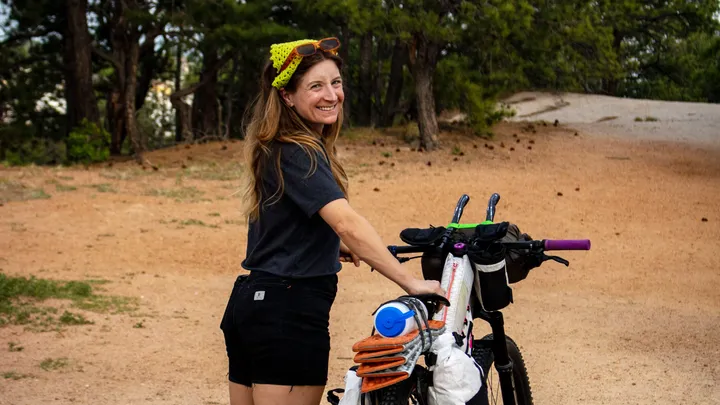
A new AKASO Brave 7 LE comes with an impressive number of accessories in the box, including a wrist-based remote, a pair of batteries and dual-charger, multiple mounting options, and a host of ways to organize it all. The mounts are compatible with GoPro attachments, following a little fiddling, so you can move cameras around without keeping track of which clamp goes where when using models from both brands.
AKASO Brave 7 – Internal settings and features
Anyone who has played around with their GoPro settings knows that the rabbit-hole of variables can grow quickly, and the AKASO system is similarly intricate so I’ll stick to the basics. I’ll also stick to what this camera has inside rather than comparing the settings since they are relatively similar. I was unable to get either of the AKASO Brave 7 LE cameras that I tested to link with the AKASO GO app on my phone, but I didn’t have any trouble adjusting everything with the in-camera settings.
In video mode the AKASO Brave 7 LE resolution can be changed between 4k at 30 fps (frames per second) to 2.7k 60fps, 2.7k 30fps, 1080P 120 fps, 1080P 60fps, 1080P 30fps, 720P 240fps, 720P 120fps, and finally 720P 60fps. That is a boatload of options that should suit any slow-motion or file size requirements. The overall video quality can be adjusted between low, medium, and high to further tune the final file size.

From there users can turn on the wind noise-reduction and auto-low-light features, and adjust the camera’s EV comp to under- or over-expose the image. Those images can stream through one of six filters, including black-and-white and different contrasts. The lens angle can be rotated through super-wide, wide, medium, and narrow settings. There’s also a diving and driving mode, but we’ll leave those alone for now.
AKASO claims that their 6-Axis Image Stabilization (EIS) is Gimbal-like, providing consistently smooth video. The EIS function in the first Brave 7 LE that I received wasn’t functioning, rendering the camera unusable for POV trail video. They sent a firmware update to try and activate it, but it still didn’t work. The company ended up sending a second camera with functioning EIS, and we’ll have a look at that smoothness below.
The Brave 7 LE can also shoot still images, and there’s a long list of options to dial in those shots. Photo resolution is adjustable between 5 and 20 megapixels, quality can be set in low, mid, or high mode, the ISO can be adjusted between 100 and 1600, or left on auto, and the EV comp can be set the same way as it would in video mode.
In both video and photo mode, you can enter a date and time stamp, or leave the field blank. If you do add that info make sure to go into the general settings and choose whether you want the image upside down or right side up depending on how you will position the camera, or you could have a bunch of inverted numbers in the corner of your photo. I typically attach action cameras under my helmet visor or on my chest protector, either of which requires mounting the camera upside down. Unlike the GoPro Hero7 Black I have, the Brave 7 LE does not automatically flip the image. This not only affects the time/date stamp but requires you to flip the image on your computer before editing.
AKASO Brave 7 – Trail POV demonstration
To start off the POV demonstration, this first video shows the Brave 7 LE and GoPro Hero7 Black side by side, with one mounted on a chest protector and the other on my helmet. I shot all of these videos in the super wide view, with image stabilization turned on, in 2.7k mode at 60fps, with the video quality set to high, and the auto-low-light function turned off since it was a sunny day. I chose these settings particularly for the side-by-side video because they allowed both cameras to have equal values in every adjustment field. All of the other functions were set to auto or left in their factory mode to limit variables between the two cameras.
In the video above you can see the difference in image quality and stabilization between the AKASO Brave 7 LE (left) and the GoPro Hero7 Black (right). The AKASO image is far darker, with less detail and color saturation than the GoPro. While a lot of that can be fixed in post-processing, it’s not great for folks who want to shoot and use their video without the extra work. Additionally, some of the detail in those darker shadows will be lost completely, appearing noisy after cranking up the shadows with editing software.
Image stabilization on the AKASO is quite good, and the shaking in this video largely comes from the camera bobbling around in its the waterproof case. When I used it without the case the image stabilization and sound were far better, coming relatively close to the smoothness of a GoPro with the same mounting hardware and position.
Unfortunately, taking the case off did nothing for the way the camera deals with low-light situations. Those elements can be adjusted by turning on the auto-low-light feature and adjusting the ISO, but I wasn’t able to get as much clarity in low-light with the AKASO adjusted as I did with the GoPro set to auto ISO.
In this second video I left the settings the same, and rode the same trail with the camera again mounted on my chest protector. This view shows the full spectrum of shadows and lost detail that the GoPro was able to highlight with the same settings.
Additionally, with only one mic on this track you can hear all of the clanging and banging the camera does in the case, and how it doesn’t pick up the trail sound much at all. While it’s not necessary to ride with the case, I prefer to have the added protection around the camera, and always ride with my GoPro mounted in its protective housing as well. The difference is that the GoPro case doesn’t make any noise, nor does it interfere with the camera’s microphone functionality.
Notice that the lens just barely captures my hands in the frame. This GoPro video was shot from the same camera mount, providing a significantly wider field of view than the AKASO, in the same super-wide setting.
Finally, this last video is a slightly edited version of the previous one, with the shadows lifted, highlights dithered, and the color saturation turned up almost too much. You can see more detail on the trail, but if you pause at any point you’ll notice that a lot of clarity was lost in those former shadows.
The case creates a good amount of additional lens flare that can’t be removed in post processing. Like the rattling sounds and sharp movement, this can be remedied by removing the case, but it would be great to see AKASO make a protective case that didn’t have any of these issues.
Conclusion

Despite my many woes with this camera, I think AKASO is on the right track with the Brave 7 LE. This palm-size robot has all of the right bones for a good action camera, and once they improve the accessories and image quality a bit it could be a worthwhile contender for the GoPro Hero series at a fraction of the cost. For now, I would advise sticking with GoPro, with an eye toward what the folks at AKASO are cooking up.
Tell us about your favorite trail camera in the comments below.


0 Comments