

As it turns out, I’ve been doing it wrong this whole time.
I’ve been mountain biking at night once a week for nearly 10 years now, so I decided to put together a list of the things I’ve learned to help other riders. Almost as an afterthought, I asked the folks at Light & Motion if they had any tips to add.
Much to my surprise, I was the one who ended up getting schooled.
Read on to find out how to get the most out of your lights for mountain biking at night.
Manage your battery life
Most mountain bike lights feature three or more brightness settings, and obviously the brighter settings tend to deplete the battery more quickly. Running the light at full blast the entire time is tempting, but lights aren’t designed with this in mind. That is, unless you only want to ride for an hour or so.
As we found in our brightness vs. speed test, a brighter light generally allows riders to go faster at night. That means it’s best to reserve the brightest light setting for fast descents, and stick to lower levels for slower climbs. In a lot of ways, bike lights work just like suspension and dropper posts. Admittedly it can be a lot to keep track of at the start of a descent (flip the shock, drop the post, turn up the light) but after some practice, it becomes second nature.
Look for a light that offers a large mode button that’s easy to find and press in the dark to make the process quick and easy.
Brightness: Too much of a good thing
You used to get a buzz after drinking a single beer, and now it takes three just to feel anything. Bike light brightness works the same way.
Always start the ride at the lowest brightness setting and let your eyes adjust to the darkness. If after riding for several minutes you feel like you need more light, turn things up a notch and ride some more before increasing brightness again. Avoid starting out on high if you can.

Once you finally do turn a bike light to full brightness, it can be hard to go back down; everything just looks dark. Don’t worry, your eyes will adjust to the low light eventually, just as they do when transitioning from outdoors to indoors on a sunny day.
When I went night riding for the first time, my light was only about 150 lumens. Looking back, I can’t believe that’s all the light I needed. Light inflation, like grade inflation, is real but the good news is as individuals we can avoid it. The even better news is that low-power lights cost less than the ultra-bright ones!
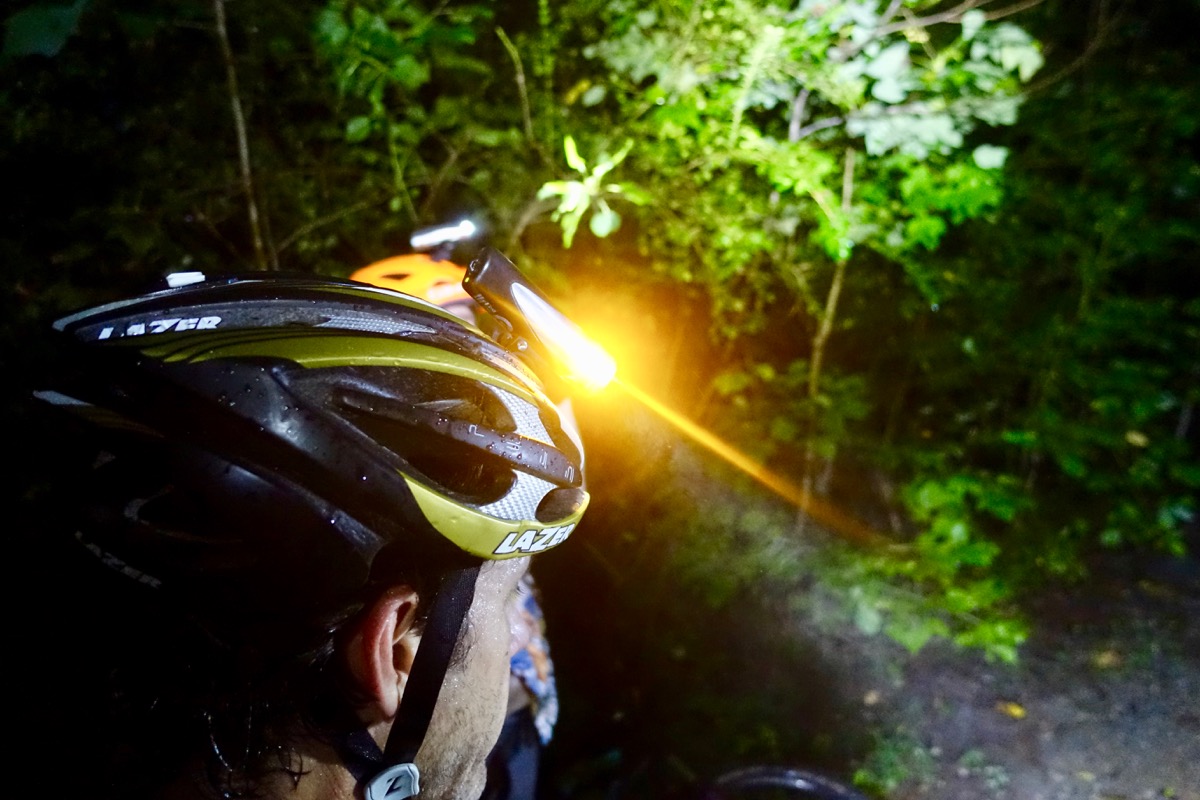
Avoid night trains

Keeping in mind the idea that our eyes adjust to the available light, riders can run into problems when riding too close together at night. If the rider behind you has a bright light, the trail in front will lie in a perpetual you-shaped shadow. By comparison everything around your path will be brighter than the path itself, making it difficult to see the trail.
Our group of night riders has been known to try to “help” those with dim lights by having someone follow behind with a brighter light. It turns out this tactic is actually doing more harm than good.
No blinky rear lights
Rear blinky lights do a good job making bikers seen at night, particularly when it comes to riding on the road. It’s a good idea to run a rear light on the trail too, but running it in full-vis mode makes it difficult on trailing riders’ eyes. Switching the rear light to solid mode goes a long way, as does turning down the brightness if that’s an option.
Battery life: Keep ‘em warm
Maximizing bike light battery life isn’t just about brightness. It’s also important to consider temperature during the ride.
Lithium-ion batteries don’t like very cold temperatures, and in extreme conditions, a battery can lose half its capacity over the course of the ride. There are actually a few things riders can do to mitigate this effect.
For starters, keep batteries indoors until you’re ready to ride. Leaving charged lights in a freezing car while you’re at work all day is going to result in disappointment at ride time.
Insulate your battery if you’re fat biking in the winter. For lights with a corded battery, slip the battery underneath an outer layer so your body heat keeps it warm. For most trail rides, this isn’t necessary — reserve this tip for only the coldest rides.
The heat from the bulb in an integrated light unit often keeps the attached battery warm enough to stay happy. If not, try slowing down to minimize battery “wind chill,” allowing the waste heat to hang around the battery.
Hot temperatures decrease brightness

Here’s something you might not know: quality mountain bike lights have a built-in mechanism to protect them from overheating. Lights are designed with the assumption that the rider will be moving along at a reasonable speed so that moving air can dissipate the heat.
So if a light automatically turns down the brightness to protect itself, it’s time to pick up the pace! This is particularly true in hot weather, when stopping leaves both the rider and the light feeling uncomfortable.
Fog lights
Riders tend to encounter all kinds of conditions when mountain biking at night, from fog and dust to rain and snow. Even pollen in the air can make seeing at night difficult!
To improve visibility in any of these situations, turn off the helmet light and turn on a bar light. If you only ride with one light, just move it from the helmet to the bar in adverse conditions.
I only recently learned this tip from Ryan at Light & Motion, and while it sounded reasonable at the time, to be honest I wasn’t completely sold. Then, a couple weeks ago I got caught in a rainstorm at night and put this tip to the test.
What a difference! I started shouting madly in the rain because I was so stoked to share this tip with everyone in the group. “You guys gotta try this!”
Plan for an emergency

Many riders can and do get away with riding with a single light at night, but I always recommend bringing a spare. Few of us would go out for a ride without a spare tube or a multi-tool, yet I’ve been on many night rides where someone’s light broke or simply ran out of juice and they were hosed. Sometimes night rides take longer than anticipated, either due to a mechanical or just plain getting lost, which can cause the ride time to extend well beyond light runtime.
If you prefer to run both a helmet- and bar-mounted light at the same time, I recommend setting one of the lights to the lowest setting for the entire ride, and toggling the brightness on the other light based on speed and conditions. That way, the light that stays on low will keep burning long after the other light is out of juice.
For those who run just a single light, I highly recommend stashing a small, all-in-one light that’s fully charged in a pack. In fact, this is a good idea even for day rides, particularly those that begin in the late afternoon or early evening. You never know what might happen, and it’s no fun to be caught on the trail, in the dark, without a light.
Mountain biking at night can seem intimidating at first, and there is a lot to learn. But follow these tips, and you’ll get the most out of your lights and will enjoy seeing the trails in a whole new light!


2 Comments
Oct 2, 2018
Oct 2, 2018
Mine lives in my riding pack for every ride.