Why a vulture? Because the massive carrion eaters can be trusted to clean up after their larger community, they can stomach the rougher bits, and their demeanor is super metal; kinda like MTB suspension. We hope this overview of frame suspension kinematics will help clean up some misconceptions so you can enjoy the rougher bits, no matter what music you prefer.
We chatted with Forbidden Bikes founder, Owen Pemberton, to add real-bike examples to help explain each element of squishy physics. Originally from the UK, Pemberton has lived on British Columbia’s Vancouver Island for roughly twelve years now and was designing frames for Norco prior to kicking off his own company. The bike brand is named after the Forbidden Plateau, where many of the island’s best trails can be found. He has designed and ridden all manner of full suspension frames and has a clear idea of what works well where, and why. Prior to bikes Pemberton also worked for Rolls Royce for ten years, “playing around with jet engines” as he puts it.
The smallest change in a suspension design can greatly affect the way a bike performs. For example, adding length to the chainstay makes that lever longer, which will affect the amount of pressure that the shock needs in order to maintain the same level of support. Or, where the main pivot is located in relation to the cranks will change how much the bike grips and bobs while pedaling. The number of meaningful variables in a frame’s suspension system is extensive, and it all fluctuates depending on the chosen platform and intention of the bike.
Suspension performs a number of roles for a bike and rider. It can make the ride more comfortable, decrease fatigue, increase traction, allow for faster riding on rougher trails, and maintain a given chassis angle while doing all of that. The shock and fork have to deal with body mass shifts from braking and acceleration forces, as well as impacts from the trail below, and all of that can be adjusted in almost infinite ways. This is why any two single-pivot, multi-link, four-bar, or otherly-linked bikes that look very similar can have their own unique ride characteristics, making them better for different pilots and trail types.
This piece will paint with relatively broad strokes, and we will follow up with the finer details in subsequent articles. It’s helpful to remember that each element of a suspension design affects and is influenced by the others, and every design has its compromises. If there’s an element of kinematics you would like us to dig into further please share it in the comments below.
Axle path

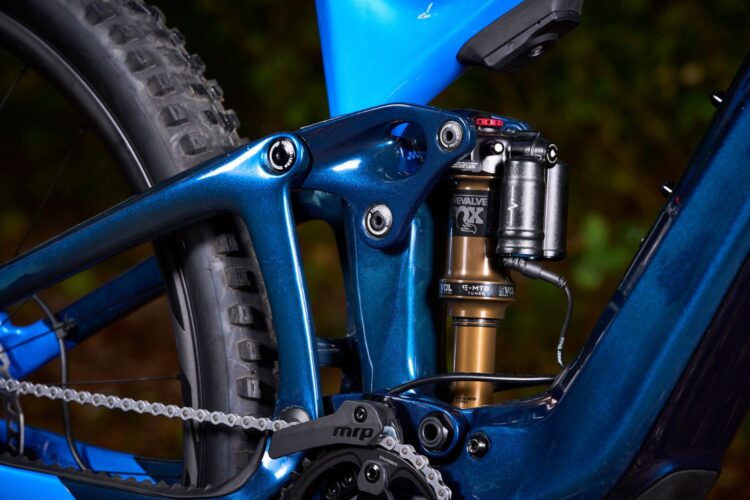
Forbidden is one of the few frame brands to proudly display all of their kinematic charts and tables for public viewing, so we will dig into their bike data for our examples.
Let’s start with the part of the frame that initially separates it from a hardtail: the axle path. With most suspension designs, the bike’s rear axle rotates upward and forward as it compresses into its travel, which shortens the overall wheelbase at the same time. A longer wheelbase is important for stability at speed, so a bias toward more upward movement rather than forward is preferable. At the same time, the fork is moving rearward as it compresses, additionally shortening the bike’s wheelbase. One benefit of upward and forward axle paths is that the associated suspension platforms can be relatively simple and lightweight.

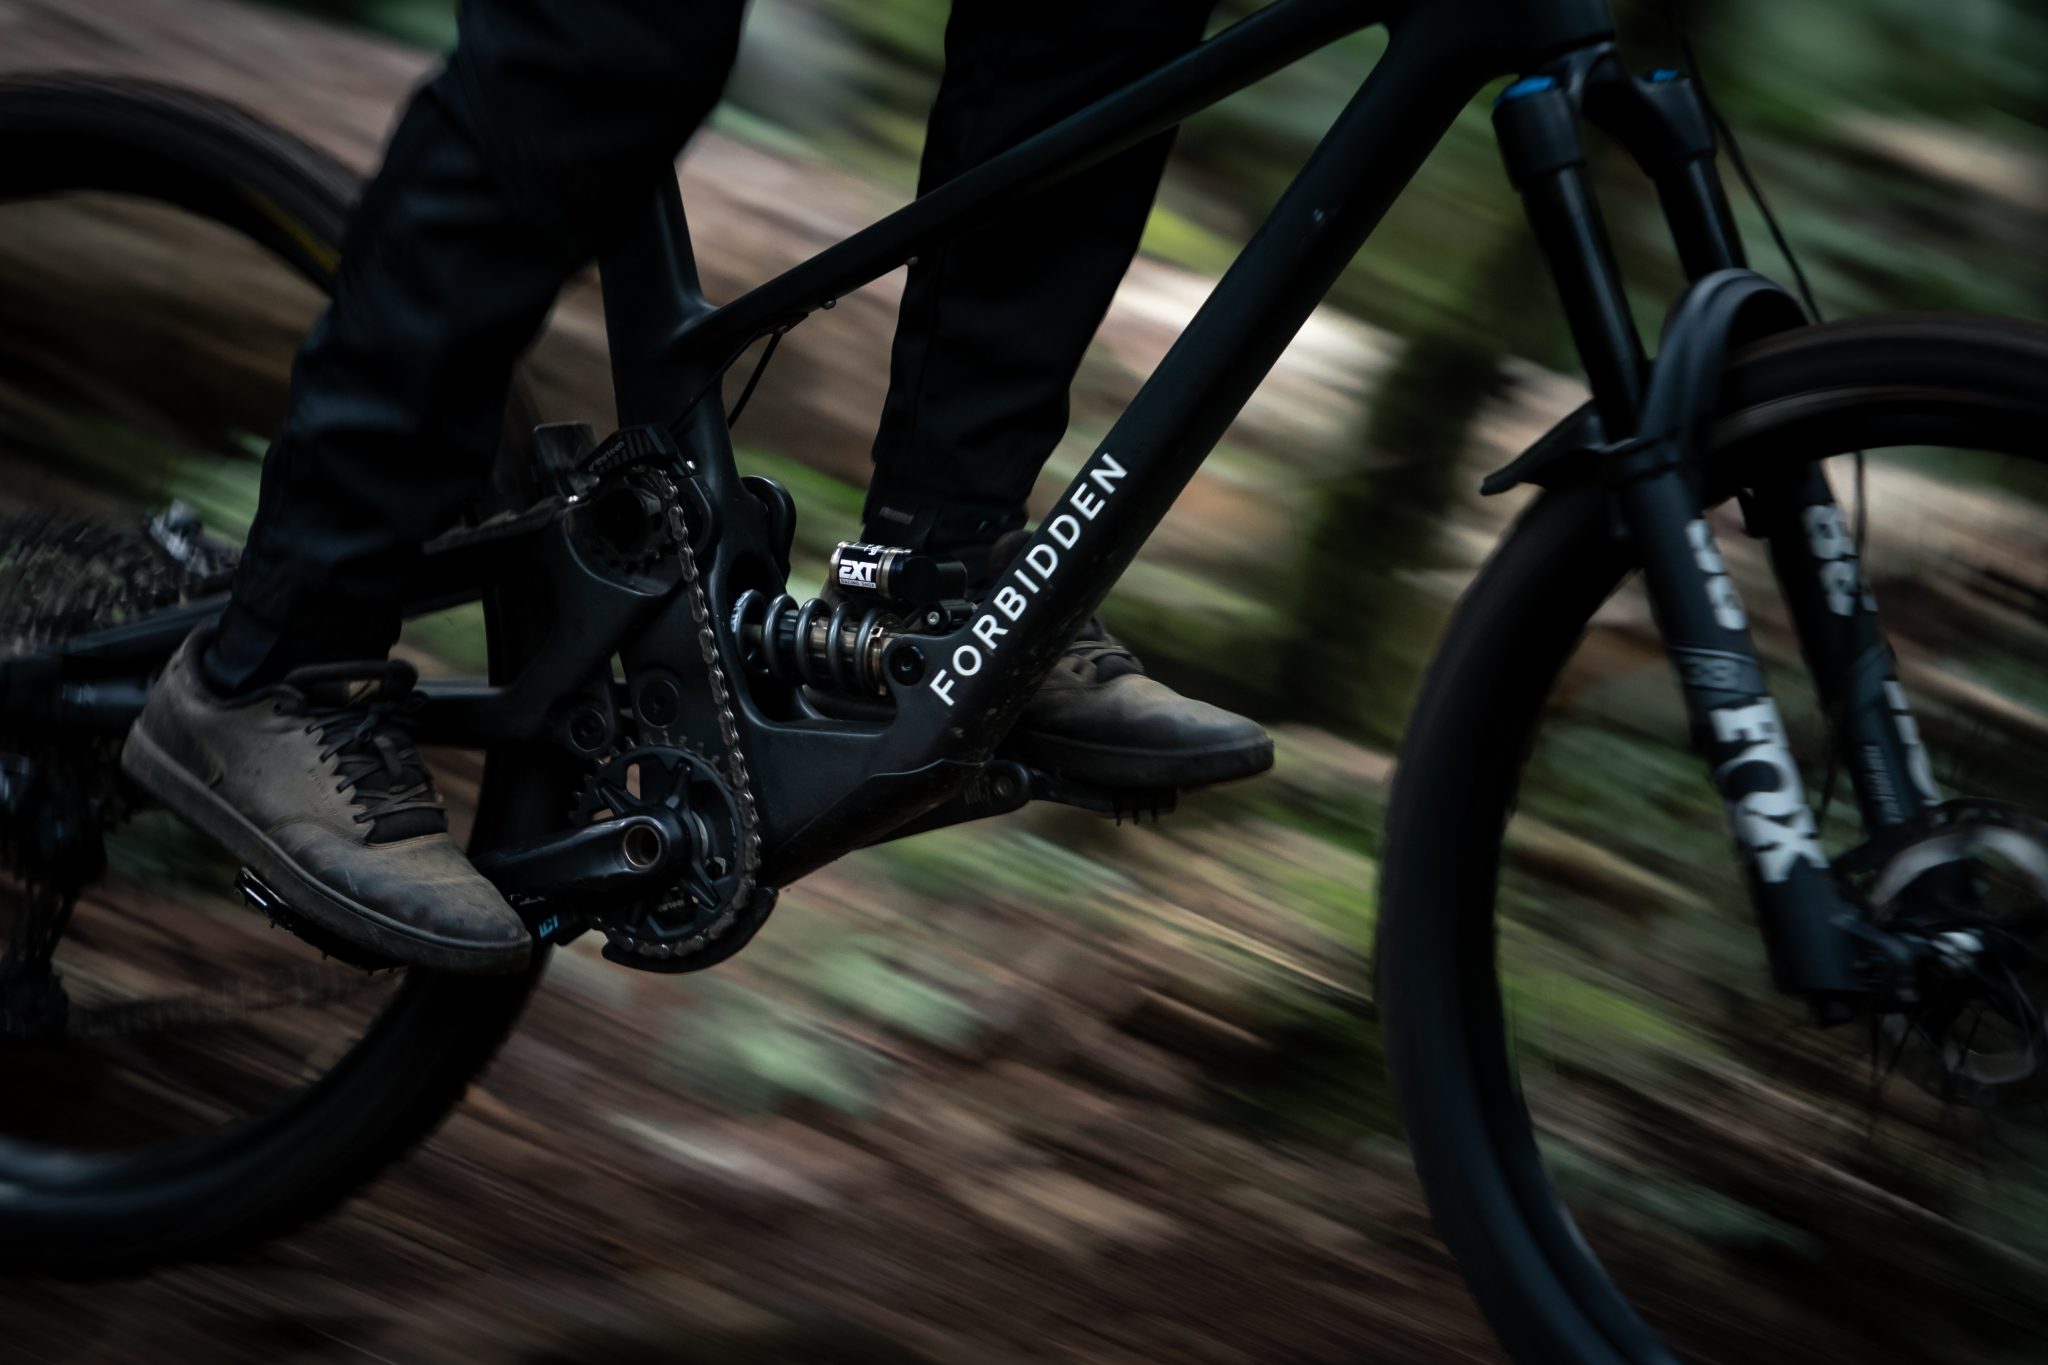
Some frames, like those from Acto5, Commencal, Deviate, and Forbidden, use a high single pivot design, where the main pivot is located above the chainring. That high rotational center allows for a rearward axle path that lengthens the chainstays as the suspension compresses, and Pemberton says it also gets close to resembling the axle path of the fork. With this design, the bike’s wheelbase remains more consistent as the trail grows rougher, and the rear wheel also moves in the direction of the impact energy, similar to a boxer following the path of a punch to make it hurt less. Since the axle path doesn’t fight against the direction of impact energy, these bikes often feel smooth and composed on rowdy trails. This system can weigh more than some of the other pivot layouts, which is one reason we don’t see high-pivots on all bikes. Another reason is that it requires an idler pulley to keep the chain-growth from causing massive amounts of pedal-kickback, and not everyone wants another moving part in their transmission. More on that later.
Pemberton says that the fight between the forward wheel motion on most frames and the opposing impact force is something we all get used to, and when riders first experience a high-pivot bike the difference can be surprising.
“I really enjoy the first time that any rider experiences a high pivot bike. They launch into a rough section, and your body, your muscle memory braces expecting the bike to slow down. With a rearward axle-path bike, it just keeps going. Because of what your brain is processing, and what it has processed before, everyone jokes that the bike feels like it accelerates when it lands. Because the wheel is moving with the impact, it allows the bike to better conserve momentum. That’s especially noticeable on sustained sections with multiple repetitive hits.”
Progressivity and wheel acceleration

Next, let’s look at how that axle movement is affected by the linkage design and shock tune. Depending on where the pivots are placed and how long the levers and links are, a suspension design can have a regressive, linear, or progressive leverage ratio through the travel, and often it’s a mix of those three. This “leverage curve” shows how much force is required to compress the shock at a given point in the travel, and how that required force changes at different points of compression. Then, those forces can be further manipulated by the internal shock tune, spring rate, and external settings, but let’s stick to the frame design for the time being.
Some leverage curves are regressive at different points in the travel, meaning that the required pressure to compress the shock decreases as it’s compressed. This characteristic can be desirable to make the first few centimeters of travel more sensitive and to overcome any stiction produced by the shock.
A linear leverage rate requires the same amount of pressure to compress the suspension throughout, putting all of the added support and bottom-out duties on the shock itself. Fully linear platforms work best with air-sprung shocks that ramp up as the air is compressed. Many frame designs use a linear rate through a portion of their mid-stroke to give the bike a supported and predictable feel, with a progressive ramp up in the final few centimeters to slow everything down before the shock reaches bottom-out. Fully linear platforms are quite rare today, and what we often call “linear” refers to a system where the rate of progressivity is consistently ramping up throughout the travel.

Most commonly, suspension designs will dial up the required compression forces throughout their travel, creating a progressive leverage ratio that works with the shock to prevent bottom-outs, increase support, and absorb larger impact forces. Pemberton says that since the leverage curve ramps up without the aid of a shock spring, “bikes with progressive leverage curves work well with modern air shocks, and curves with higher overall progression will work better with coil-sprung shocks.”

Pemberton mentioned that “just like with geometry, people are trying to make bikes more capable. There was a bit of an arms race to make things more progressive, which I totally believe in. You get so much more bang for your buck, and more from your travel, if you have a progressive kinematic. But, to get the bottom-out response that aggressive riders are looking for, the rate of change in the mid-stroke can become too steep. We were finding that the mid-stroke was actually too supportive. So the wheel can’t react to multiple mid-sized hits as fast as you would like it to. That’s what lead me to work on our three-stage, slightly S-shaped leverage curve that you see on a Forbidden. It’s quite a subtle thing, but what we’re doing is manipulating the rate of change. So, how fast the progression is happening at various points in the stroke. That allows us to create a bike that reacts and absorbs impacts in the mid-stroke really well, and it ramps up to resist those harsh bottom-outs.”
Again, all of these leverage curve characteristics have to work in conjunction with the shock tune and setup, which can have a massive effect on the way a bike handles — irrespective of the frame engineer’s intentions.
Anti-Squat

Why would anyone be against squatting? Isn’t it good for your joints? For rear suspension, anti-squat refers to the amount a given design resists pedal bob, and it directly affects the bike’s climbing prowess. If a bike wallows and bobs about when the rider puts pedal force into the drivetrain, it has a low anti-squat value. At 100% anti-squat, the suspension should not move whatsoever under pedaling forces. With more than 100% anti-squat the suspension will stiffen further and eventually extend with pedal power, making the bike feel more efficient on climbs.
Anti-squat is fighting both the force of the tire maintaining traction on the ground and the drivetrain pulling on the chain, coupled with the rider’s mass above. That big blob of a human makes things tricky, as not all riders place their weight in the same place on the bike, and most of us move around while climbing. We also don’t have perfectly consistent power output, so the chain tension variable changes throughout each rotation. Things are further complicated by the fact that the chain ring and selected cassette-cog size also influence the anti-squat value. Given all of these variables, anti-squat numbers can vary drastically from one frame to another, though the intention is always the same: to keep the chassis level and free from bobbing while pedaling.
Pemberton weighed in on anti-squat and the inherent compromises. “Any traditional bike that has a significant amount of anti-squat will not have active suspension while pedaling. That’s physics. You can’t change that. They firm up, and your suspension essentially isn’t allowed to work unless your pedals move backwards. So, while you’re pedaling you have to break your pedal stroke to absorb an impact. On dirt roads, that’s not such a problem, but on technical climbs it certainly is.”
Pedal kickback
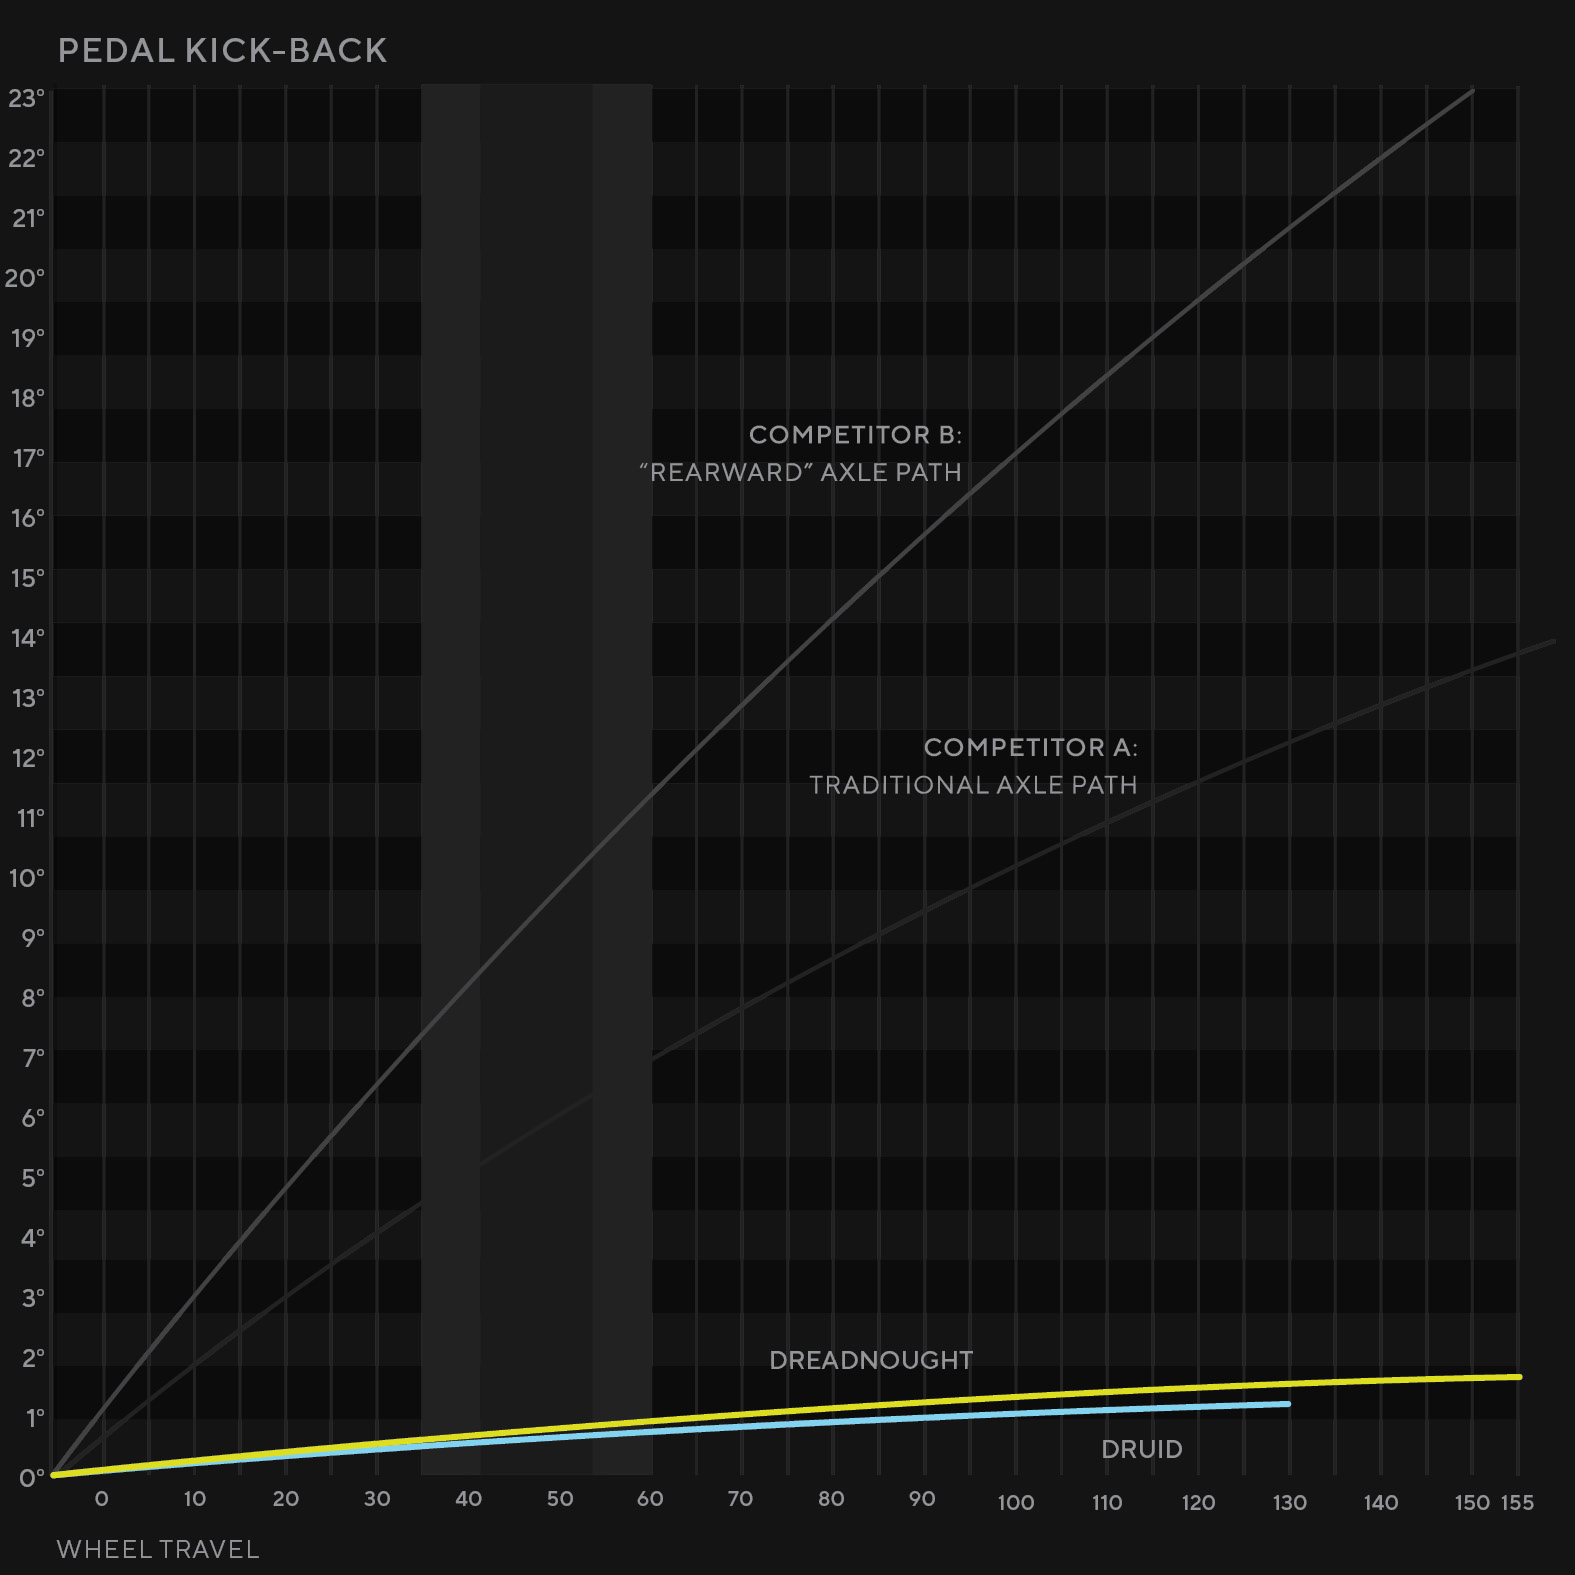
One negative effect of too much anti-squat is what we call pedal kickback. If the rear suspension compresses while pedaling the distance between the BB and the rear axle grows larger, pulling on the chain in a process called chain growth and jerking on the cranks. That sudden energy that reaches the cranks is called pedal kickback, and it can be quite disconcerting on technical climbs. The more a suspension design depends on the pedaling forces of the chain to maintain high anti-squat, the more pedal kickback that system will produce.
With speed, this issue is decreased since the cassette can simply spin forward instead of transferring that force through chain growth to the pedals. On steep and rough sections of trail, with the rear wheel locked up and acting as a steering rudder, the kickback returns. Those are precisely the times when you don’t want your feet being slammed around, so getting the anti-squat values right on gravity bikes is of utmost importance.
Some bike designers, like the high-pivot makers listed previously, can remove pedal kickback almost entirely by adding an idler pulley to the transmission. The idler sits near the high main pivot, which reduces the chain growth since the space between the main pivot and rear axle doesn’t grow much throughout the travel. Depending on its placement and size, the pulley can eat up nearly all of that chain growth via some fantastical witchcraft. From there, the frame designers can dial in the precise pedaling efficiency they want without this negative effect.
Regarding pedal kickback, Pemberton added that “on descents, when you’re coasting [pedal kickback] doesn’t matter. The chain isn’t engaged. But, when you’re slowing down, especially with a close freehub engagement, if there’s a serious impact [while braking] your feet have to move. Often, when you’re slowing down and there’s a serious impact, all of your body weight is on the pedals. So your pedals can’t move, and you’re all of a sudden riding a hardtail. People often think that’s brake jack, but that’s not what it is.”
Anti-Rise

When you’re braking hard and late, say just before a turn on some steep track, the last thing you want is for the front end to dive and the rear end to rise, pitching you toward the front tire. Unfortunately, physics dictates that this is precisely what will happen. Your mass, held high on the bike, wants to keep moving forward while the bike fights to scrub. Dropping your heels and riding in a low-slung position can help mitigate this pitching, as can a frame with proper anti-rise.
Essentially the opposite of anti-squat, a bike’s anti-rise value denotes how much it resists the rear-end rise that occurs when we hit the brakes. Again, 100% anti-rise would theoretically mean that braking has no effect on the chassis, it doesn’t rise, and the rear suspension remains fully active to do its job in these key situations. A higher anti-rise value, for example, a frame with a 140% anti-rise, will actually squat some when the brakes are engaged, allowing the chassis to follow the fork as it dives and providing a more balanced platform to compress into or over the next trail feature.
The compromise is that added anti-rise allows the brakes to affect the suspension, which makes the rear end incrementally less active and sensitive to trail input. Yup, that can mean a little less grip. A higher anti-rise value also leads to what’s commonly known as brake jack, though Pemberton mentioned that brake squat is technically the correct term. This term is used to note the sensation of less active suspension under heavy braking. For gravity-focused bikes, finding a balance between a stable chassis position and optimal suspension sensitivity is a fine art.
Pro fun
Vultures can’t be good at everything. Wisely, they will often wait for a predator to kill their dinner for them. Riders too don’t have to understand every element of what feeds our trail fun. That’s what engineers are paid for. What we can do is gain a basic understanding of kinematics to better digest and compare information about different frames. It took us all a minute to be able to compare geometry tables between bikes, and the same will be true for kinematics. Let’s forget it all momentarily and go play on bikes!


0 Comments