

Shimano pedals are some of the most popular foot platforms in mountain biking for good reason. They come in a load of affordable models, and a single set can outlast a couple of bike frames if properly serviced. The video below describes two methods to replace the grease in your pedals and keep them spinning smoothly. While some models come apart and go back together with slightly different steps, the overall service is the same throughout. We have also listed the service steps below, directly corresponding to the video.
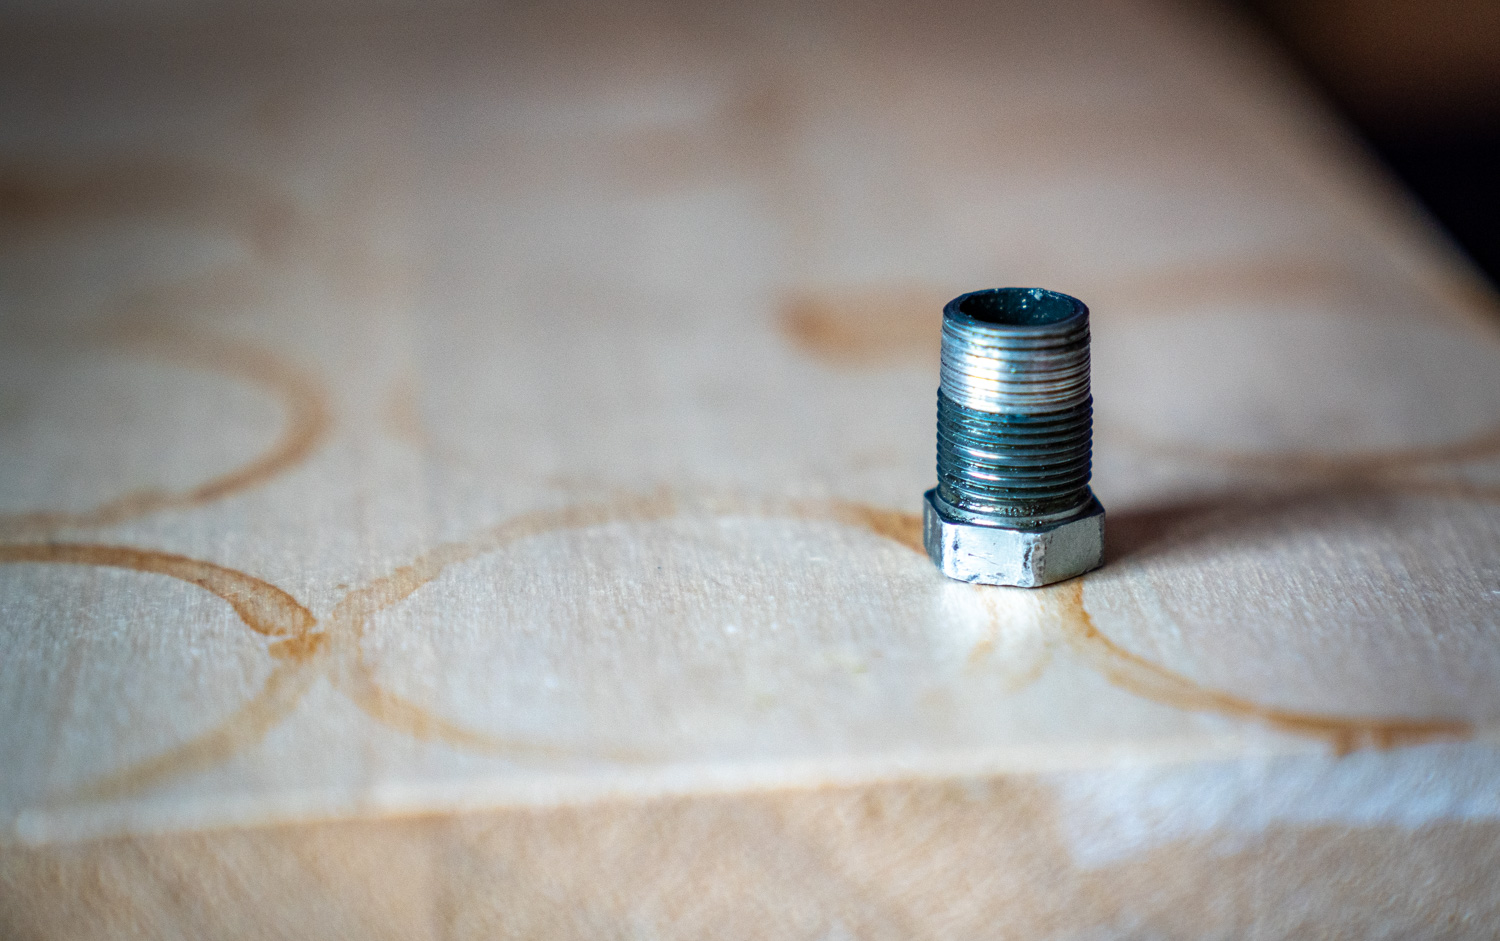
We’ll start with the quick and greasy method. First up, clean the outer pedal body and spindle to prevent unnecessary contamination later on. Then, grab a wrench that fits the shiny piece that resembles a nut, nestled right where the spindle meets the pedal body. Depending on the model you will need a 15 or 16mm wrench, or a special tool that can likely be substituted by a set of soft-jaw pliers. Loosen that nut-looking piece and remove it from the pedal body to access the internal bearing assembly. To loosen it, either clamp the pedal body in a soft vice or wedge a tool in the cleat interface so you can hold the pedal body still. Then turn the nut in the same direction that you would turn the pedal’s spindle to free it from the crank. For the drive-side pedal, the nut loosens to the right.
With the pedal body fully removed, thoroughly clean the spindle and attached bearing casings, then clean the inside of the pedal body. Finally, pack a massive glob of waterproof grease inside the pedal body and press the spindle back inside. While tightening the spindle back in place the new grease will flush through the bearings, pressing the old grease and grime out toward the spindle. Tighten the pedal body down all the way, clean off the excess grease and dirt, and reinstall the pedal in the crank. That’s it. At first, the pedal won’t spin super easily by hand with all that excess grease inside, but actual pedaling performance won’t be affected, and the life of the component will be considerably extended.

The longer-form pedal service starts the same way, with the spindle assembly coming out and being cleaned along with the inside of the pedal body. Next, remove the small nut on the far end of the spindle. This fastener locks the bearing preload nut in place. Then remove the bearing preload nut, making sure to lay each of the pieces out in the order they were removed.

The cylinder pictured above sits between the preload nut and the other cylinder that you loosened to remove the pedal body. On trail pedal models, there will be another plastic cylinder between this and the pedal extraction nut. Make sure to check which direction it needs to go, as the trail version requires that the side with the larger internal bearing races face inward, toward the crank.
Now you can slide the cylinder off that houses both sets of bearings. You will want to be careful with this bit, as the 3/32 bearings are tiny and can easily be lost. I like to do this over an old piece of carpet or a bath towel that can catch the bearings if they dribble out. There are eleven ball bearings on either side, and your local bike shop should have more if needed. A toothpick or chopstick can be a helpful tool to slowly remove all of the bearings.

From here, clean every piece of the pedal assembly thoroughly, making sure there is no grease or dirt left on anything before you slap it all back together. While there are loads of good degreasers out there, white vinegar works quite well, and it’s non-toxic. To get the ball bearings clean, lay them on a paper or cloth towel, fold the towel over them, and roll them around until all of the crud is collected and the steel balls are shiny and clean.
With that pristine lineup of clean parts in front of you, take a close look at the spindle. The quarter-circle shapes in it work with the cutouts inside the two different cylinders that you’ll be putting back on to create the bearing races. It may help to look inside both cylinders to better understand where everything will fit.
Now, grease up the spindle liberally with your favorite waterproof butter and slide the cylinder that once looked like a nut back on, with the wrench-end facing toward the bike. The space between that cylinder and the spindle is where the first eleven bearings go. Pick the bearings up with a magnetic screwdriver and plant them in the grease like little seeds, ready to grow into several million spinning spheres. As you fill the cylinder with bearings, slide it outward until you can see the bearings seat somewhat. Both of the cylinders needs to be in a particular spot in order for everything to fit together properly, but until the little system is tightened together you will want to be rather careful about how much you move the cylinders on the spindle. The ideal spot is to keep that first cylinder right at the point where all eleven bearings fit inside, and where they aren’t able to slip any further into the cylinder.
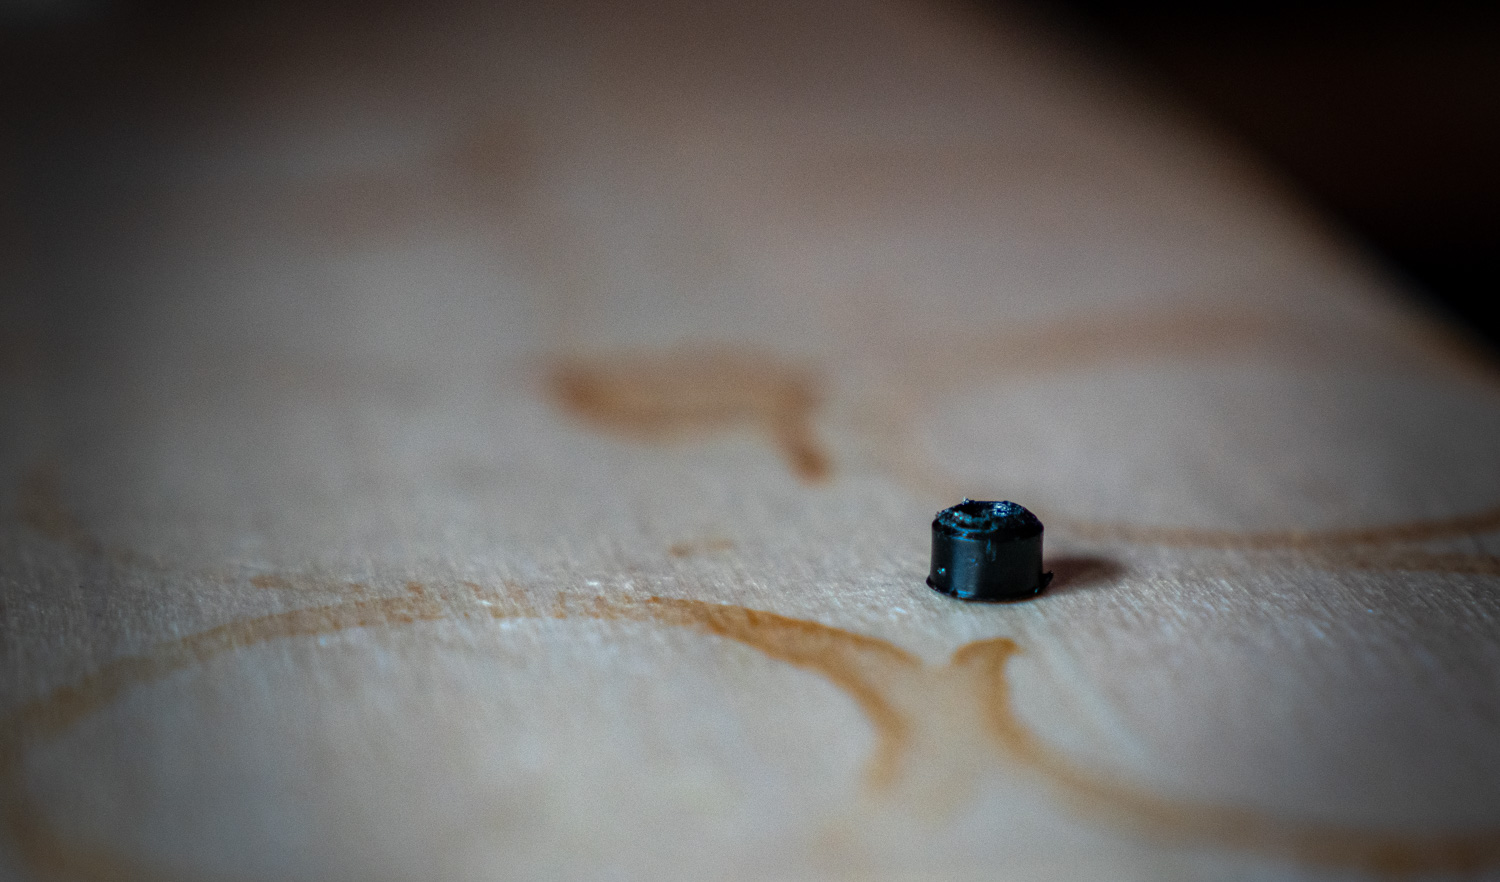
Now you can slide the small plastic piece onto the spindle that was originally in the middle of the second cylinder. You will want the convexed edge of it facing outward, as that’s going to prevent the next set of bearings from falling inward.
Finally, slide the second cylinder in place and pack it with grease. The second set of eleven ball bearings will fill the space between the spindle and that second cylinder. Make sure to hold the first cylinder in place so things don’t slide apart and cause a rematch.
Once all of the bearings are nestled in their tiny soda-can-shaped homes you can put the preload nut back on. You should be able to get it plenty tight with mere finger strength, checking that first cylinder to make sure it spins smooth and doesn’t wiggle in any direction.
With those parts all buttoned up, add the final lock nut that keeps the preload nut in place and you’re nearly done. Tighten the locking nut against the preload nut, making sure not to move the preload nut in the process. Finally, I like to pack the clean pedal body with a gob of grease before shoving the spindle assembly back in. This ensures that every last space is full of grease, and pushes out any tiny grit that you may have missed.
Voila! From there you can enjoy another full season of worry-free pedaling.


1 Comments
Jun 17, 2021