With this Quick Question series we will present fast fixes and collect comments from seasoned riders around specific D.I.Y. mountain bike repairs. While much of this trailside triage is covered in our repair articles and videos, this is a space for longtime riders and readers in the Singletracks community to share their knowledge. Please type your related experiences and advice in the comments below. Do you have a quick question? 🤔 Email [email protected].
A friend recently reached out to ask if they could swap out the hubs in their favorite mountain bike wheels for something better. My buddy digs the blingy carbon rims but would prefer a freehub with tighter engagement than what came with the bike. The short answer to this query is “yes, but you may need to buy new spokes and nipples.” Spokes need to be cut within a tight tolerance to properly fit their position in the wheel system and provide long-term strength. You can use an odd-sized spoke to get by in a pinch, but for a full build, things become trickier.
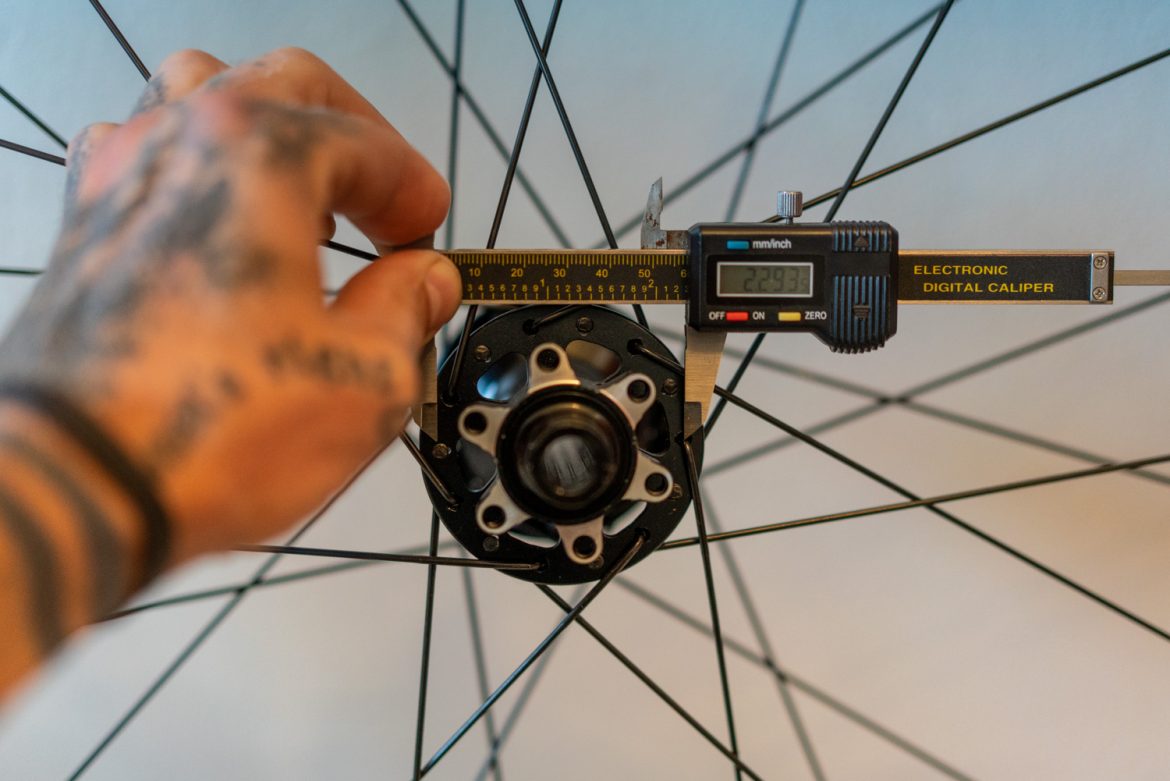
The rim depth, spoke-hole placement, rim thickness, and desired spoke lacing pattern have a significant impact on spoke length. In this case, the rim is being reused, so we can skip to the hub geometry. There are multiple factors to consider when swapping a hub. The flanges are those pieces that protrude from the hub shell to hold the spoke heads. If the distance between them or their diameter changes slightly, you may need to replace the spokes with different lengths. If the hub uses straight-pull spokes, the measurement usually comes from where the spoke heads seat in the flange. Most good hub manufacturers will provide all of the hub dimensions you need in order to determine this piece of the pie.

The main measurements you’ll need are the flange diameter, which is the distance between the center of two spoke holes located on opposite sides of the same flange, the O.L.D. (Over Locknut Distance), and the horizontal distance from the dead-center of the hub to the center of either flange. You can plug those numbers into a spoke calculator to see if your new hub can use all the same spokes and rim as the previous, or if you need to place an order. Usually, if the calculator says you need slightly shorter or longer spokes, say by 1mm, the build should go fine with what you have. However, some wheel builders will only use the recommended spokes, stating that component compromises lead to poor performance and a shorter lifespan for the wheel. Your level of comfort with spoke length tolerances is part of your personal bicycle journey, so choose accordingly.
If the spoke calculator spits out a number close enough to what you already have, and you feel comfortable building the new wheel, get after it! Most wheel builders will replace the nipples with a fresh set every time, but this piece of the pie is also up to your comfort level. Be sure to follow proper spoke-prep for the threads and nipples you’re re/using.
If basket weaving wasn’t part of your college experience, wheel lacing might be a tad tricky. When you’re only replacing a rim, a fast and easy way to deal with lacing is to tape the spokes together where they cross so that they can be plugged directly back into a new rim and tightened into place. For a hub replacement, videos like this one can help determine the orientation of all of those leading and trailing spokes.
Lastly, if the re-used rim has asymmetrical spoke holes, make sure to rebuild the wheel with the rim facing the correct direction. If the rim is flipped everything will be out of whack, and you’ll get even more practice with lacing and rebuilding a wheel.
Your turn! I’m sure some of you have far more experience replacing wheel bits than I do. Please share what you’ve learned in the comments.


