

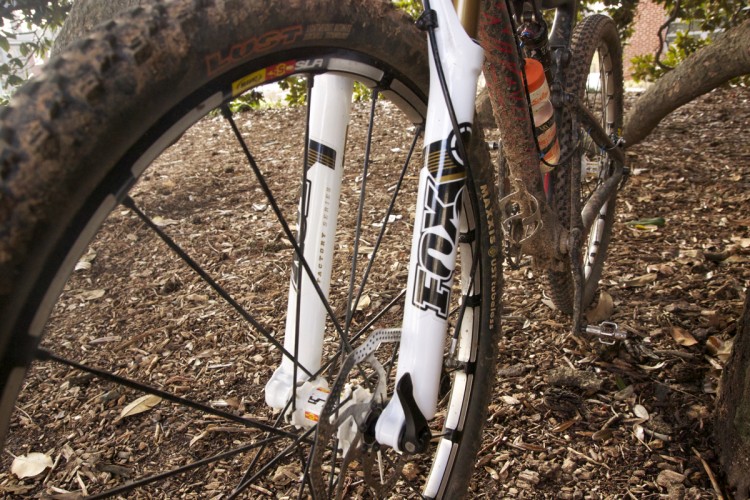
Cane Creek released the 29/27.5+” version of their Helm fork during the spring of 2018, and we recently received one for a long term review. The 2080g (uncut) fork can extend travel between 100mm and 160mm, with offset options of 44 or 51mm, and will pogo on an air or coil spring. I will be testing it on my long-travel trail bike and selected the 160mm 29″ air-sprung option with a 44mm offset. This will be my first test fork with the shorter offset measurement, and I am excited to see how it rides.

It’s a rainy fall here in northern Italy, so mounting a front fender was the first step in setting up this new fork after a quick install. The Helm has threaded holes along the back of its sturdy bridge to bolt on a small fender, but I went for the classic zip tie option and a far larger mudflap from Madflap.


The Helm employs a unique through-axle they call D-Loc. To secure the front wheel, simply insert the 15mm axle in the non-driveside, flop the lock switch on the driveside, then return to the driveside to tension the preload adjuster until the axle’s handle clicks firmly into place. The D-Loc is designed to remove any possibility of miss-threading the axle, which could result in a brisk walk back to the car, or a sad, rideless drive home from the trailhead.
The gold knob on the bottom of the driveside fork leg adjusts the fork’s low-speed rebound, with ten clicks between open and closed. On the first ride, I ran the fork six clicks from fully closed and it felt perfect for our damp soil.

Atop the fork crown, you’ll find the air valve on the rider’s left and both high and low-speed compression adjustments on the rider’s right. Instead of packing in volume spacers to reduce air volume the Helm uses an 8-position internally-indexed system. The process of adjusting the air volume still includes deflating the fork and removing the air spring valve, but once it’s open, everything you need to reduce or increase the volume is waiting inside.

Cane Creek recommends starting with an air pressure setting that is half of your weight in pounds and checking sag from that baseline. I found that number a bit low and added another 5psi to the fork to achieve my desired sag and support feel. After inflating the main chamber, remove the cap on the lower non-driveside leg to reveal yet another shiny gold knob. That is the air equalizing valve, which allows air from the positive air chamber to fill the negative air chamber. Simply unscrew it, depress the valve, and screw it all back together. Then you’re ready to go ride your bike.
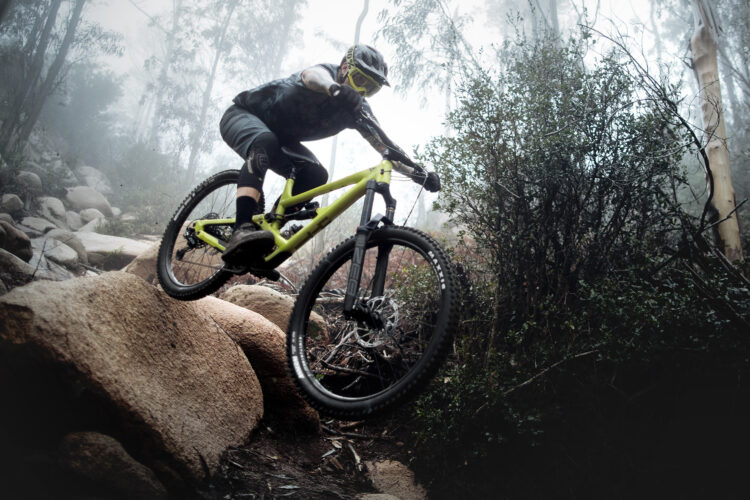
I have been on two rides aboard the Helm thus far, and I am surprised by how quick and easy it was to set up. The base air, compression, and rebound settings felt really comfortable for sliding through the autumn slop. I anticipate some tweaks and changes with the compression, and I will definitely add a little air if the trails dry out, but the Helm has a cozy squish to it already.
Look for a longterm review of the Helm Air 160 in the coming months.

Thanks to Cane Creek for providing the Helm fork for testing and review.


2 Comments
Nov 28, 2019
Nov 28, 2019
The only issue I've had was that I broke 2 of the volume adjustment pistons before getting it right. Everything else about the fork is rock solid though