
One morning while enjoying a cup ‘o joe before both sun and baby arose, I stumbled across Greg Heil’s article from 2013, “How to Brake Your Mountain Bike.” Perhaps due to lack of sleep, ineffectiveness of the caffeine from only 5 cups of coffee, or a momentary flash of dislexia, I incorrectly read the title as “How to BREAK Your Mountain Bike.” And so was born this little rant.
Disclaimer: I do not recommend anything below… unless you are looking for an excuse to buy upgrades. The writers here at Singletracks.com do a fantastic job of product reviews in case you need an upgrade.
I will admit that I very rarely break things on my mountain bike. When I got my first “adult” job a couple of years ago, I took my first paycheck and bought myself a sweet bike. And then I put the remainder of the bill on a shiny new credit card. I love this bike so much that I often walk it over the most technical of spots–for its safety, not my own. In the most extreme cases, I sacrifice skin in its place.
My husband, on the other hand, took his shiny new mountain bike and proceeded to beat the ever-loving crap out of it. Having mountain biked primarily within the state lines of Florida prior to moving to New Mexico, my husband had to test the upper limits of his skill and bike.
For tips on how to break upgrade you bike, check out this compilation of my husband’s very scientific experimentation:
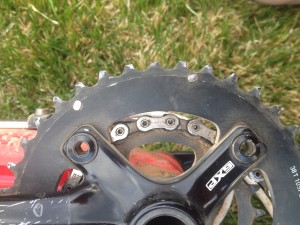
1. Chainrings: Stay in the smallest of front chain rings when going over the largest of rocks or logs (note: this is only effective if you are running a 2x or 3x system without a bash guard). By not protecting your chain ring with the chain, the teeth are likely to be damaged while slamming against hard surfaces.

2. Saddles: Before attempting to huck off rocks that would make your grandma cry, make sure to tap the brakes. This will give you an opportunity to pause and reflect and provide an opportunity for your wheel to wander just slightly, leading you off your line and tumbling down a rock face. Tip: carefully target key parts of the bike on the way down for total annhilation. The truly professional in this arena will be able to break items such as saddles without inflicting scratches or dents to the frame.
3. Derailleurs: In good conditions and a little care, derailleurs are fairly resilient beasts that can last many miles and many seasons. However, no one wants to be seen on the trail sporting last season’s model. To rectify this, seek out rock gardens with large rocks and narrow openings. While threading through these openings, make sure to sideswipe your derailleur. Tip: aim to do this towards the end of your ride while close to the trailhead, if possible. While I enjoy riding our singlespeed, I find doing a full-on singlespeed conversion on the trail is less than enjoyable.
4. Bottom Brackets: Let mother nature help out. If it appears that rain is forthcoming, make your way to the trail that will become the muddiest. This is the most effective if said muddy trail is the absolute furthest from the trailhead, thereby requiring you to ride your bike while rain and dirt converge in your bottom bracket for the most amount of time.
Seriously though, riding through muddy conditions will trash sweet singletrack. Avoid it whenever possible. Don’t be that guy.
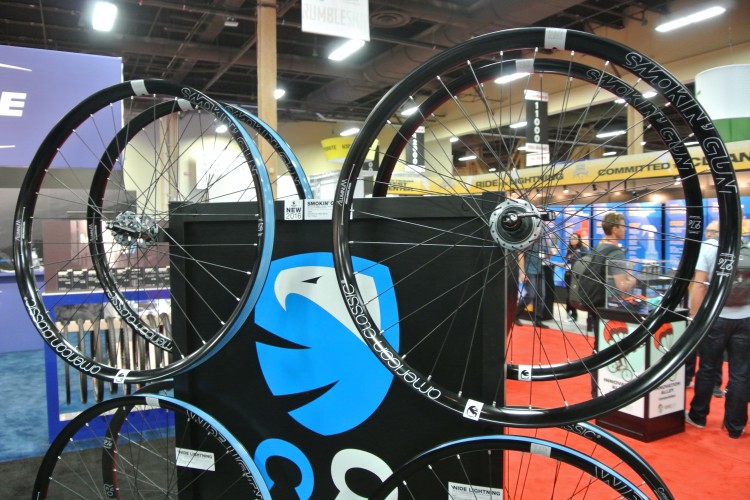
5. Tires/Wheels: Tired of those old tires you’ve had for months? And by months, I mean longer than 4 weeks. Find the gnarliest rock garden on the trails, lower your tire pressure well below the recommended psi, and hit every rock possible. Sometimes you can do double duty here and destroy your rim as well, forcing you to upgrade to carbon rims. Because carbon rims are indestructable. Unless you find even gnarlier rock gardens.

6. Hubs: Since you love your bike so much, and you don’t want other people thinking the poor soul is neglected, wash it every chance you have. Washing it after every ride is a good start, but washing it every day whether or not it needs it is best. After all, it’s only fair. You get a bath every day (well, most days). Shouldn’t your bike? And while you’re at it, use as much degreaser as you possibly can. “Accidentally” stripping out the grease from your hub is another good excuse to upgrade those wheels.
7. Handlebars/Shifters: To be honest, it’s me that has done the most damage in this arena. Basically, by not following any of the advice in Greg’s article “How to Brake Your Mountain Bike”, I have become a master at going over my handlebars. Heavily utilizing my front brake while going downhill over loose rocks is my personal favorite. As such, my face, the handlebars, and everything attached to the handlebars, take a beating quite often.
If all of the above mentioned tactics fail, my husband has found that the best method is to attempt all aspects of mountain biking with more confidence than skill. It’s the only way to get better, right? If executed properly, with enough attempts, and cat-like reflexes to prevent bodily injury, you are almost certain to inflict damage on your bike. The real skill here is to damage the components and not the frame. Unless you’re looking for a real upgrade.
I, on the otherhand, tend to second-guess myself before attempting harrowing feats. This is typically highlighted best while riding through rock gardens or attempting jumps that are not well groomed. In all honesty, though, this method has resulted in more scars and scratches on the frame than upgrades. But there’s always tomorrow to try again.
Your turn: How do you break your bike? What “accidents” have resulted in the best upgrades?


11 Comments
May 5, 2014
1. Strip the bolt head on your EBB, say screw it and keep the gear you've been running on it.
2. Forget about said bolt for 6 months
3. Sign up for a 60-70 mi. race
4. Buy a brand new chain and chainring, install and throw away old ones, but don't finish putting your bike together because the the bigger cog you need for the ride is two states away.
5. Finish putting bike together at 11pm, the night before the race.
6. Realize your folly, put on old cog back on will EBB in same position as used for worn out chain and chainring, making the chain so tight the thing doesn't even want to pedal backwards.
7. Ride for 11 hours
May 6, 2014
May 8, 2014
May 16, 2014
May 5, 2014
Other than that, it's actually all been downgrades. I got a great deal on a full XTR bike, so I snagged it. As I broke components, I just couldn't justify the cost of replacing those components with more XTR (or equivalent) when XT cost half as much (sometimes) with little or no noticeable difference in performance.
May 6, 2014
May 6, 2014
6 hubs (3 of these went out on rental bikes)
6 Scwalbe tires--they don't last but I love em
2 Continental Mountain Kings--the casings are absolute junk
2 Niner frames--both seattube issues, warrantied
2 Niner carbon bars--crashes, both in the last month
1 Stans wheel--drivetrain failure, snapped spokes
2 xx1 cranks--defective, warranty issue
1 bottom bracket-warranty issue
2 xx1 derailleurs--1 crash, 1 warranty issue
3 xx1 cassettes--grinding noises
3 xx1 chainrings--defective
2 xx1 chains
1 Rockshox Revelation fork--defective
1 freehub body
1 broken finger
0 teeth :)
Almost all of this was under warranty (thankfully), especially the SRAM XX1 stuff--which I love---but have had problems with as an early adopter.
So, my LBS probably loves and hates me. If it wasn't for the warranty, I wouldn't be able to afford to keep riding. The labor charges kill me though, especially when traveling.
I ride a lot less aggressive than most of my riding buddies, but sometimes things just don't hold up.
Hey, can I borrow your bike?
May 16, 2014
I am thinking about upgrading to an all mountain bike. Maybe I should let you take it for a spin that way I can have an excuse to upgrade :)
May 5, 2014
May 5, 2014
May 16, 2014