

Bikepacking has spiked in popularity and with good reason. You jump on your bike, ride through sunset, sleep, then wake up and do it all over again. Not only is this the ideal lifestyle, but it allows connections of trails, landscapes, and ecosystems unimaginable in a single day’s ride.
But what about all the stuff you have to take? Doesn’t it make riding less fun? You may have heard things like, “Bikepacking is mostly just for dirt roads,” or “That trail’s too hard for bikepacking.”
These are not facts of life. You can huck into rock gardens, bunny hop logs, launch gaps, and rail singletrack, all on a loaded bike. It just depends on what you bring, and how you bring it.
Step 1: Pack light
The key to packing light isn’t dropping wads of cash on expensive gear. It’s thinking about what you need. I’m not talking about skimping on your repair kit, or layers you need to stay warm.
Clean underwear for sleeping is wise, but if you’re just riding, do you need a full set of camp clothes? Consider bringing a tarp instead of a tent. And what about a stove and cook gear? With exceptions, most bikepacking routes will put you into town every two or three days where you can get a hot meal, so eating cold wraps for dinner is manageable.
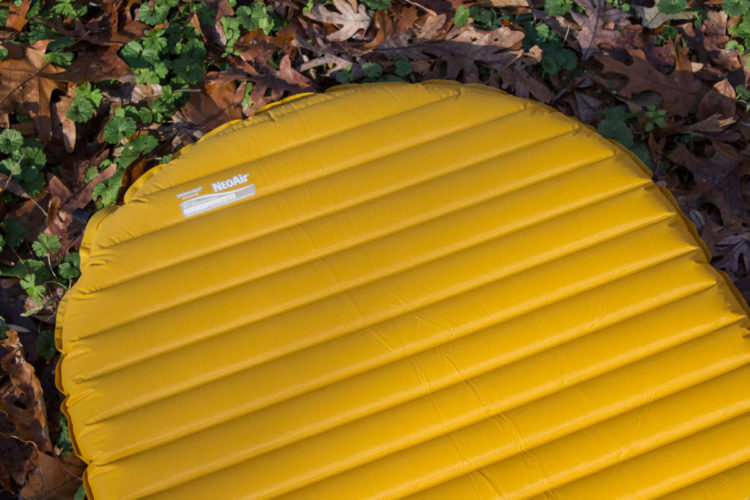
There are a few gear purchases that will help you make everything fit. The big one is a nice, light, packable sleeping bag, or better yet, a sleeping quilt. The down feathers you lay on top of in a bag provide little warmth, which means you can save weight, bulk, and money by buying a quilt instead. A nice down jacket will save you some space with layers. A light sleeping pad is also convenient.

Step 2: Rig
A: Inner frame
While some bikes have more space than others, this is the best place for weight. The closer weight is to your bottom bracket, the less you will feel it. Put dense items in here, like your repair kit, tarp, rain jacket, etc.
Having the right size, or a custom-made frame bag to go here is ideal, but small stuff sacks and ski tension straps can work well to secure gear.
B: Top tube
Weight this far from the bottom bracket becomes more noticeable, particularly toward the handlebars. This is the perfect spot for food, sunscreen, and anything else you want quick access to.
It’s common to have two top tube bags, smaller in the back, larger in the front, but I really like the custom bag my partner made for me, that dips down in the middle for stand-over room.
C: Handlebars
A good place for bulk, not weight. If you load this heavier than just a few pounds, getting your front wheel off of the ground will become difficult. Store your sleeping bag and extra layers here.
While a stuff sack and some straps will work, there are manufactured harnesses and waterproof bags that work very well. These bags push on your front brake cable, and can force it into your spokes when your fork compresses. An extra zip tie around your cable and fork is a quick remedy.
D: Behind the seat
Depending on your height, wheel size, and whether you have rear suspension, you may or may not have room for a bag here with your dropper post. I’m 5’6″, and with 29″ wheels, even the tiniest bag hits my tire when the suspension compresses. Weight here will affect your riding less than on the handlebars, but you’ll want to avoid too much bulk to keep your legs free and body mobile.
There are a variety of seat bag options, even including ones with plastic skid plates that protect the bag from your tire.
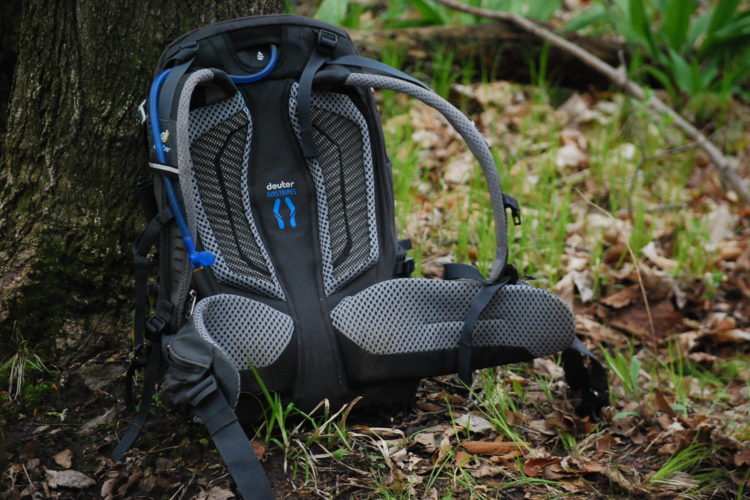
E: Backpack
Most of us ride regularly with our water in our backpack, and I don’t see any reason to change this. Weight on your back moves with your body, so it doesn’t affect your riding as much as weight on your bike. However, a heavy pack means more weight on your lower back, and on your butt, which are two of the biggest problem areas with long days in the saddle.
I limit the contents of my backpack to just my water, and my sleeping pad, which even helps keep the water cold if I put the bladder inside! On long, non-technical climbs, I strap my backpack on top my handlebar bag to give my back a break.
F: Other spots
There are plenty of options for gear storage on your bike. A water bottle beneath your downtube won’t hurt your riding, but gets in the way if you like to shoulder your bike for difficult hike-a-bike sections. Other storage options like bike racks and panniers and water bottles mounted to your fork lowers, might be necessary for big expeditions, but will impair your riding.
Does it fit?
Admittedly, if you’re going out for a few nights without resupply, you may have trouble packing everything as described. You should have extra room for food in your handlebar bag if you’re starting out with a long climb, or in your backpack if you’re starting with a technical descent. Soon enough you’ll have eaten most of it and will be riding light.

Step 3: Rip!
An extra 15-20 pounds of food and gear on your bike will take a bit of getting used to, but after a few hours of trail to get the feel for it, you’ll be ripping along like it’s nothing.


2 Comments
Feb 25, 2020
Feb 25, 2020