

Over the past year, my friends and I have been working to improve one of the trail systems that we ride. We took a look at all the features that were there and falling apart, and decided what should stay, what should be improved, and unfortunately, what should be removed altogether.
Right off the bat, I have to say: if a feature was placed on a trail system on public land and it was not made by you, it should be left alone. However, I do have an amendment to that rule: if that feature is no longer maintained by the builder and is in danger of falling apart, then and only then should it be removed. At Waterdown there were a few of those features that were just out-right dangerously built.
Editor’s note: Syd is primarily discussing building trails on public land in Canada, where the access issues and legal issues are quite different from those in the United States. Before building, modifying, or removing any obstacle or trail, always find out what the legal issues and access issues are in your local area first, and gain the necessary permission. Regulations vary from country to country, from state to state, and from land manager to land manager.

Above is a feature that we felt was originally small, poorly built, and a bit misaligned. With the aid of a six-man team, we ended up building up this double jump quite large. Yes, large does mean possible pain if you’re not ready for a jump like this, but a lot of thought has been taken to ensure that, given you have the right speed, the jump does nearly all the work for you… you just have to hold your line and let the jump do the rest.
How are these jumps built? Well, this is what we call a classic “box jump.” This particular one is made from only naturally-fallen trees. No trees were cut down for these or any other features shown in this article, because this trail was made on public land.
Many things had to be taken into consideration. First and foremost: safety. Consequently, the jump was made as a bypass, rather than the main line. In fact, all our lines that we make have a bypass to provide an easier ride around, which is consideration number two: always plan an alternate route so less-experienced riders can opt out. Never build something that won’t allow everyone to ride the trail.
When building, consider the expected speed, and plan for a gradual landing rather than landing on flat ground. Consider both the low end of the expected landing and the high end. The landing for the jump above starts at 15ft away from the edge of the top log and goes for another 25ft (just in case you really go into it hot). In the photo below, I am taking a good ground-level look at one of my friends landing, to make sure everything is dialed:

Basically I am looking at how Darren is hitting the ground relative to our built-up landing. In the end (see the photo below), my buddy Chris decided to build the landing a bit higher, with more of a hip to it. A hip landing is a sloped landing that will allow a rider to twist his bike in the air and land witha slight inclination to change direction immediately upon landing (setting up for another big jump further down the line).

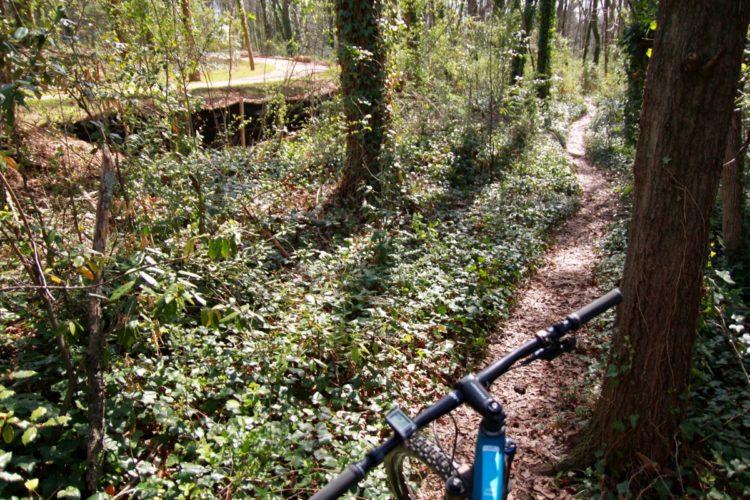
So how do you build a new box jump from the ground up? Well, It so happens that not too long ago the guys and I decided to build a new line featuring a sender-style box jump to clear over an existing trail. This new line required a bunch of earth to be moved–essentially the line starts at the top of a ridge, runs down one of two ways (yet to be built), and then rolls into a steep feature followed by a groomed run-in. Below is a shot of the steep section before the groomed run-in:

The only real work above was the addition of more dirt on the left side to make a smoother run-in before the lower rock. Other than that, clearing the run-in of debris and loose rocks and roots was all that was needed. The natural rock formation was left alone.
To successfully make a jump that is both safe and sound, a few thing have to be considered. One thing that is often neglected is the run-in. To allow the rider to choose his/her line over a jump feature, they should be able to safely access either point of the jump. For this, a level lead-in should be established. At times, a bench cut is needed to level the ground. Essentially, you cut into the slope and level a section off.

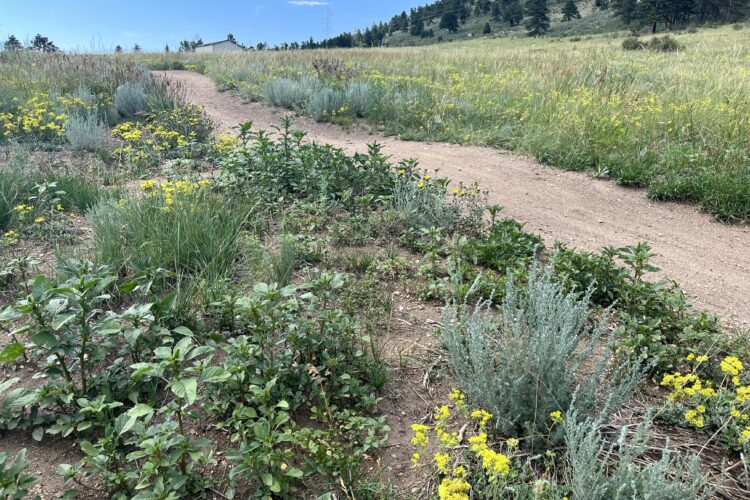
In our new line, seeing that we are traveling along the slope, we needed to cut a large, level swath. At the same time we, also had to consider sustainability of the new line: the addition of rock along the downward edge was necessary to prevent premature erosion. The image below shows the first layer of rock that will eventually get partially-covered with a second layer on top.

With bench cutting, it is highly advisable to have a slight pitch to the terrain, to allow for drainage. At the drainage points, I add extra rock. It serves as a weeping tile of sorts and prevents large areas of erosion.
When you plan your bench cut, keep drainage in mind. Not allowing for good drainage is the single-quickest way to ruin your hard work. A puddle of mud can quickly grow into a large mess of a washed-out trail.
Whether or not you’re cutting for a jump, or just cutting to get from one place to the next, really dictates the width of your trail. The trail above will eventually feed into two lines: the box jump and a secondary line that runs along another ridge (yet to be built).
Building a sustainable box jump that will have a long life requires a mix of mother nature, good planning, and careful preparation of the ground. To keep the jump’s shape and solid feeling, start with a solid base cut into the ground, and then line it with logs. We find and cut fallen trees of 6″ – 8″ inches in diameter, preferably ones which have not started to decay yet. Maple and oak trees are very resilient to rot.

Next, going back to the old ways of doing things, we cut the intersecting edges flat or notched to prevent the logs from rolling out. We use a chainsaw for this. Trees that are wet and are that big just take way too long with a hand saw.
Pro tip: keep a chainsaw file handy, along with extra chainsaw lube.

When we built up a bigger jump (pictured above), you can see the large amount of wood it took. Using a crew of guys walking the forest to identify fallen wood is a good idea. And yes, I did not have safety glasses on at the time of the photo… I was wearing my Oakley’s though (does that count?). The shot above does show the interlocking nature of the box–I was just trimming the ends at the time.
Pictured below is a detail of the cuttings. With a chainsaw cut, it is easier to crosscut thin slices than to cut at an angle and dull your blade.

Staking in and back-filling the jump is next. If you happen to have some old carpet, that makes compacting the edges easier. If not, sometimes smaller branches stuffed between the larger logs or cut into wedges will work as well to increase the stability of the jump.

My buddies ChrisP and ChrisC are at it (pictured above), filling in a feature. They raked the dirt into the logs, then compacted all the way up to the top of the jump. We then add additional dirt to build a crown on the jump, which will compact with a few rides.

Don’t throw away those cut offs! Try not to waste any wood–usually those cut offs can be used to further brace your jump or berms. By cutting them into wedges or corners, you can screw them in, tying everything together! Pictured below is a fast, creative way of not wasting wood, and with a few screws and a drill, you have a solid box jump.


The last thing you should remember when building a box jump for the trail: you don’t want to add too much, if any, lip to the jump. Too much lip tends to kick the rear wheel up for inexperienced riders. We tend to build our jumps with as straight a ramp as possible, or with a slight curve. Either way, larger (4-6ft) jumps are usually 5 bike lengths long, while the smaller 1-3ft jumps are 3 bike lengths long (as a rule of thumb). Anything shorter than that, and we call it a booter (also known as a kicker). As the name implies, it does give you a kick in the pants if you’re not ready for it.
Hopefully these tips will help you build safe, fun box jumps!
Your Turn: Do you have any tips for building box jumps? Share them in the comments section below!


4 Comments
Jan 11, 2014
Jan 10, 2014
Jan 10, 2014
Great article though, and great photos! I love the chainsaw shot!
Jul 14, 2014
You can see the building process here :
http://www.pinkbike.com/photo/10740720/