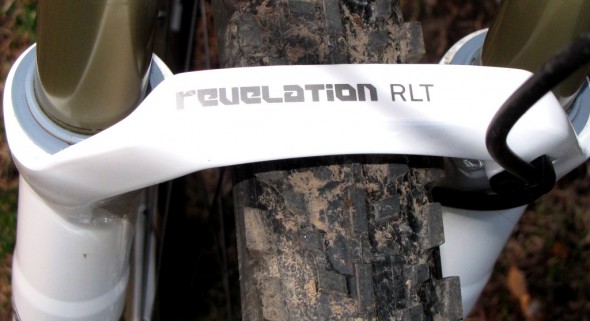
It may come as a Revelation to some that RockShox has a solid line of trail forks for mountain bikes this year. While the company has always been well known for sleek XC-oriented forks, the trail-ready Revelation models are well positioned in today’s trail fork market. I’ll be reviewing the mid-level RLT Ti fork which sits just below the XX and World Cup models since, unfortunately for me, my bike doesn’t have a fancy tapered steering tube. No need to worry though – the RLT Ti is a solid performer!
Specs and Configuration
The RLT is offered in a vast array of configurations: three travel options, a dual position option, axle choices (QR9, Maxle Lite 15, and Maxle Lite 20), and steering tube options. The axle choices in particular are great since it means you won’t need to get new wheels when you upgrade to this fork. For my trail bike I decided to go with the Maxle Lite 15 with the improved quick release for 2011. The latest version is a few grams lighter and offers an even stiffer, more solid feel on the bike. Add that to an already great steering platform and you’re ready for some real technical fun.
My RLT is the 150mm version with spacers for 110mm and 130mm travel set-ups. It’s also the Dual Air version which weighed in at less than 1700 grams once the steering tube was cut to the correct length. All told I shaved 170 grams off my previous set-up – not too shabby for a long-legged trail fork.
RockShox is able to keep weight low thanks to a hollow-forged 6061 T-6 aluminum crown, super stiff 32mm 7000 series stanchion tubes with low friction anodizing, and of course the power bulge built into the magnesium lowers. The best part: none of these weight savings come at the expense of overall strength or stiffness. The Dual Air system deserves a lot of credit for keeping things light and simple; for now Rockshox can claim to have the lightest dual air system available.
Installation
Installing and setting up the Revelation is really simple and if you have the tools to do the job, it should take about 30 minutes or less. If you don’t have the tools, have your LBS do this for you. To do the install correctly you will need:
Star nut installation tool
Park Threadless saw guide (or similar device)
Hack saw (use a new blade) and file
Crown race setting tool (piece of tubing that is slightly bigger than steerer)
Tape measure
Hammer and pry tool
Felt marker
4, 5, and 6mm allen wrenches
Torque wrench
The procedure is pretty simple: start by removing the old fork and slipping the lower crown race off the old fork carefully. Measure the extension on the steering tube and measure off the same amount on the new fork. Mark it using the saw guide and workbench vise; cut the excess steering tube off. Clean the sharp edges carefully with a file and install the star nut; then install the lower race. Follow that by installing the fork on the bike using the torque specs from RockShox and your brake manufacturer. As always, use a proper torque wrench to ensure you do not cause any damage to your fork or bike.

Set-up
Setting up the Revelation is a piece of cake. I used the air pressure guide on the fork leg as a baseline for setting the sag. I found I needed about 10psi more than indicated to get the correct amount of sag I wanted (20%) for my application with full gear on. The Revelation ships with BlackBox Motion control and Dual Flow Rebound. That being said, there are external beginning stroke rebound, low speed compression, external floodgate, and lockout controls on this Revelation.


Before configuring other settings I like to bounce around for a while on a short easy ride to get things moving and broken in. Once I’ve done that I set the low speed compression by starting at full soft (about 4-5 clicks in) before adding clicks until I’m satisfied the front of the bike doesn’t dive excessively when I’m on the pedals or hitting the front brakes hard.
Once I have that down it’s time to get the rebound set up. At this point my only concern is with how the suspension reacts coming back from a hit. I start off nearly open (towards the rabbit) and add more resistance until the suspension comes back without feeling like the bike wants to toss me off. I know when I’ve gone too far if the fork “packs down” after multiple hits.
Finally, it’s time to get the Floodgate set. This setting is pretty easy to configure and it’s used mostly during climbing. The goal is to avoid the threshold point when seated and climbing (giving you a more stable platform for pedaling). The right setting will also balance out potential hits on the way up.

On the trail
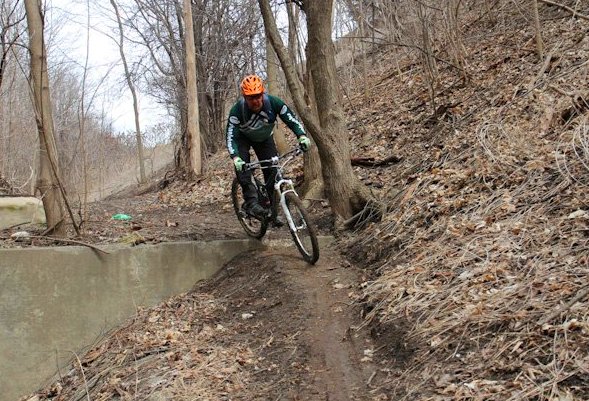
I tested the Revelation through various types of terrain – everything from flat hardpack to rock gardens – and I found that the fork works very well. After setting everything up carefully, the Revelation uses the 150mm travel nicely with a bit of a progressive feel to it (I played with both air chambers to get what I wanted as a spring rate).
Running over rooted trails and rocks, the fork soaks up the harshness of all that but still offers up a ton of traction. A good running indicator of fork performance is that the fork should absorbs the harsh hits while tracking well around the terrain. The Revelation definitely delivers here. Even when there is a mix of inputs to the fork it manages to follow the terrain and react to braking and pedaling forces all at the same time. I guess all that engineering at RockShox paid off!
Now when the trails do get gnarly (drops of 2 – 5ft) the high-speed circuit does its job well. The fork goes through its full travel without feeling like it’s bottomed out and returns quickly to ride height. Now there are a few options available like a remote, but I found that the on trails I ride I rarely needed to use the lock out anyway. A big part of this is getting compression and rebound set-up correctly to maximize performance.
Here’s how I rate this fork on a 10 point scale (10 is best).
| Tracking and steering | 9.0 |
| Rebound control | 9.0 |
| Compression control | 9.0 |
| Construction and quality | 9.0 |
| Trail-worthiness (1 for light XC, 10 for extreme FR/DH) | 6.5 |
| Overall performance quality | 9.0 |

If you’re in the market for a long travel fork and love the idea of options (color, axle, remote or not, steering tube) then check out the new Revelation RLT Ti ($800 MSRP) . I’m sure once you get it set, you too will feel the benefits of a good quality fork on your trail ride.
I’d like to thank the crew at Rockshox for sending down the Revelation for review.


