
Out on the Trail
Unlike most users of frame bags, I decided to install this setup on my 160mm-travel enduro rig. I asked Lane and Monty if these bags would affect my bike handling at all, and they said, that no, there’s no difference whatsoever. I was definitely a little skeptical.
I had the bags installed in July, and after more than three months of hard testing and regular use (including many lengthy all-day rides), I’ve pummeled and punished these bags, tinging them brown from mud and dust, and in general abusing the crap out of them.

As I was asking the Willsons about best use practices for the bags, the one thing they mentioned was, “don’t overfill them to the point that you’re putting tension on the zipper. The zipper is designed to keep the bag closed, not act as a compression mechanism.” So what do you think I did on nearly every ride? Yeah, I basically always filled my frame bag nearly full to bursting.

Despite disregarding the only instructions that they gave me, I’ve had absolutely no issues with either bag. Construction and durability has been impeccable! The Xpac VX42 waterproof fabric has been bomber, and despite my abuse the water resistant zippers have had no issues. Additionally, all of the velcro straps have stayed solidly in place. At first, I was a little hesitant about whether or not the velcro would stand the test of time, especially with some of the straps that I pulled apart often in order to make adjustments. But I needn’t have worried: instead of worrying about wearing them out, I should have worried about having fingers strong enough to pull them apart! Especially the main upper velcro for the main triangle frame bag: after a month of being attached, I thought I’d never be able to peel it apart again!
Ride Quality
I’m sure the question that’s forefront in everyone’s mind is, “what was the ride quality like?” I’m sure of this, because I’ve already been asked this question no less than a dozen times in person, on social media, and on the forums. Here, my friends, is my definitive analysis.
I found Lane and Monty’s assertion that there was no difference to ride quality to be true–but only up to a certain point. It’s true that the frame bags themselves don’t affect the ride quality, but what you put in those bags could make a difference.

For instance, if I simply had been putting clothes layers and a few tools in my bags, I doubt I would have noticed much difference. But since my goal was to get as much weight off my bike as possible, I loaded my bags down with two liters of water, tools, pump, and more (see above). Based on my calculations above, I’ve moved an nearly nine and a half pounds of weight to my frame. With a roughly 30.5lb empty bike weight (depending on what components I have installed at the time), that effectively increases my total bike weight up to 40lbs–about a 31% weight increase.
Before we continue, I do have to mention that some people have commented, “ugh, why do you want to carry all that weight around?!” As I noted above, I’m not actually carrying any more weight than I was before I installed the frame bags. In fact, since I had to dial in my kit even more, I’m hauling around about 6 fewer pounds of weight than before. The key is that the weight has been redistributed to a different location.
Even with this added weight of 9.43lbs on my frame, there were very few places out on the trail I noticed any handling differences. Cornering feels totally normal. Pedaling in general feels normal. Descending, overall, is again like normal. Riding through technical rocks is doable. In fact, most everything that I do on a mountain bike, I can do with all of that weight in the center of the frame.

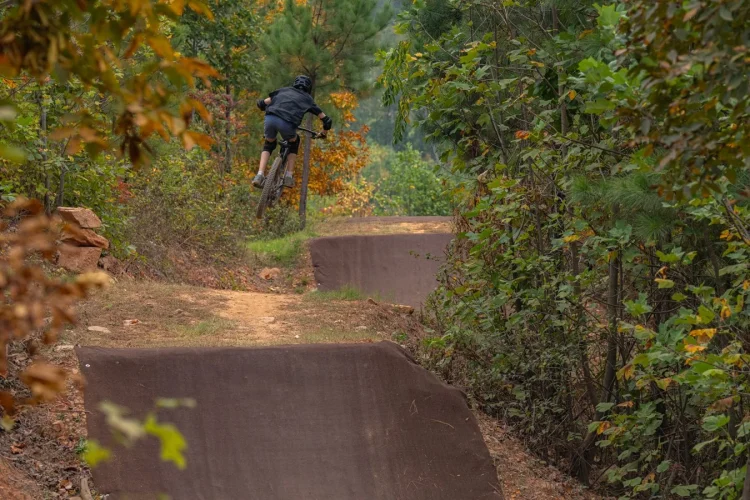
The only major difference I noticed was with getting airborne. Due to the extra weight, the bike takes much more persuasion to jump, to pop off of small lips, or bunny hop. This translates somewhat to technical descending as well, as it’s a bit harder to loft over obstacles and skim across the surface of rocks. In those situations, the bike feels more “planted” than before, and instead of skimming over the surface, I feel like I’m more often riding through the chunk.
Now, that’s not to say that getting air, bunny hopping, or doing any of the above is impossible. Rather, as I’ve been riding with these bags for about three months now, I’ve learned to compensate somewhat for the extra heft. A little more force is required than before, but with some extra persuasion I can still pop over trail obstacles, launch off of rollers and lips, jump, and do most things. However, if I do manage to get the bike into the air, it is much less “flickable” and mobile–again, due to the redistribution of weight.
Overall, though, even with the added weight, my 6″ travel enduro bike comes in lighter than many downhill bikes–and we all know that those can be made to perform in the air. Personally, I think that it’s much harder to pop and play in the air on a DH bike than an enduro rig–I find it takes more speed and bigger jumps to achieve the same sort of playfulness that you can get on a shorter-travel bike on smaller obstacles. The same could be said for adding the additional weight to the frame of my enduro bike.

It’s all about the compromise.
Now, most bikepackers don’t need to worry about any of the things that I just mentioned. They’re not concerned with high speed technical descending, jumps, drops, or playfulness on the trail. But on an enduro bike, those things are important.
Whether or not you want to redistribute your gear to your frame using a bag setup depends on what you want to compromise the least. Due to nagging physical injuries, getting the weight off my back was my #1 priority. In my case, my choice was either move the weight somewhere else, or drastically reduce or stop my riding. Sacrificing a bit of ride quality in order to actually be able to keep riding was a no brainer.

However, even if you’re not limited by injury like I was, you can get numerous other benefits from reworking your gear storage. Additional benefits, which I only realized after I made the switch, include:
- Easier to hit the trail. If you keep your bags well-stocked, all you need to do is plug in your water reservoir and roll. Granted you could do this with a hydration pack, but I have so many packs that I tend to misplace the one I want to use, or my gear gets spread into a variety of packs. With frame bags, essentially your pack is attached to your bike–no losing that gear.
- Less strain on your upper body. Not having to support that weight on your shoulders reduces the strain on your upper body, which keeps you fresher overall.
- Easier to breath, since the hydration pack straps don’t dig into your chest.
- No uncomfortable flopping pack, hitting you in the back of the head when jumping or descending at high speed.
- In hot weather, you stay cooler not having a hydration pack keeping the heat in and causing your back to get sopping wet with sweat.
- Reduced overall weight. As I mentioned above, this forced me to stop hauling around gear that was ultimately unnecessary.
So is a frame bag system on your medium-to-long-travel trail bike the perfect solution for you? Maybe, maybe not. There’s always a compromise. But in my case, the small compromise was more than worth it!
Oveja Negra custom-made single compartment frame bag MSRP: $165
Oveja Negra steerer tube Snack Pack MSRP: $50
Thanks to Oveja Negra for providing these frame bags for review!


4 Comments
Feb 3, 2016
What bladder do you use and do you just stuff it inside the frame bag with other stuff or is there some dividers or attachments for the bladder?
One thing you didn't talk about at all that interests me still is if stuff annoyingly bounces around, especially after you have emptied your water bladder?
I have a Pivot Mach 6 so there is very little room for frame bags, only two very small ones. How ever I'm planning to try it. The bags are not a problem since I could try and make those myself, but to find a bladder that fits is going to be harder.
Feb 3, 2016
These are great questions! I'm currently using a 2-liter hydration bladder from Hydrapak, but honestly it doesn't fit very well into my frame and I'm not very happy with the reservoir. I'm interested to see if I can find one with a shape that will fit my frame better... I have some experimenting to do. Maybe one of the hip-style reservoirs that Camelbak is making now?
I do stuff a few things in with the reservoir but TBH, there's not much room left. I'm lucky if I can fit a mini pump and a multitool in there.
However, even after draining the water, I've had no issue with stuff bouncing around. However, I have found that if I do drain all the water out of my frame bag, I tend to move stuff from my jersey pockets to the frame (water bottle, rain jacket, etc.) to further move gear off my back.
Hope this helps!
Feb 4, 2016
Feb 4, 2016
For my frame with very limited space I was looking at something like this http://www.cascadedesigns.com/ie/platypus/hydration-systems/hoser/product
Of course, this kind of reservoir has it's shortcomings, but I can not fit anything with the wide hard plastic closure bladders normally have.
Would be nice to read about your future findings and upgrades.
Your article and answer made me assured I'm onto something that will enhance my biking experience. Cheers!