A few months back I reviewed Race Face’s new Turbine Cinch Crank. At that time I had it installed on my Santa Cruz Bronson. I have since upgraded my Bronson to a Next Cinch crank, which left me with this mint crank just sitting around.
I had just received my new Norco Sasquatch and wanted desperately to shave some weight off of it. The 986-gram FSA cranks had to go in favor of the Turbines, which weigh significantly less. The Turbine setup with 100mm bottom bracket weighs only 760grams, so you can see why I was hot on the idea to convert.
The best part of the Cinch system is that you can easily convert from one drive line to another without going through the huge expense of replacing everything. You could easily order up any of the parts needed for your next ride. I opted to stick with the 2x drive line for my Sasquatch.
For the conversion I needed to order the axle, crank spider, 36/22 ring set, and 100mm BSA bottom bracket. If I choose to go 1x, the spider and rings wouldn’t be necessary for this job.
Tools necessary to convert the axle:
- 16mm hex socket (hard to find but can usually be found at a quality auto parts store)
- 8mm hex key Cinch bottom bracket wrench (Race Face tool)
- BBT-22 (Shimano ISIS standard tool)
- Tape measure or vernier calipers
- 4, 5, and 6mm Combo Hex keys
- CNW-2 chainring nut wrench
The parts needed to convert (depending on what you already have):
- BBBSA10030B6
- 100mm bottom bracket F30031
- Spindle kit for 170mm spacing RRTUR10EBLK
- Chainring set 22/36 with shims F10001
- 104 BCD 3X spider assembly
The conversion is easy when you have all the right tools. The key to it all is the 16mm hex tool needed to remove the axle from the non-drive crank arm. Without it, you’re really stuck.

Note: this procedure was done on a 2x driveline. Do not touch the front derailleur settings, as they are very useful when setting spindle spacing and act as a guide.
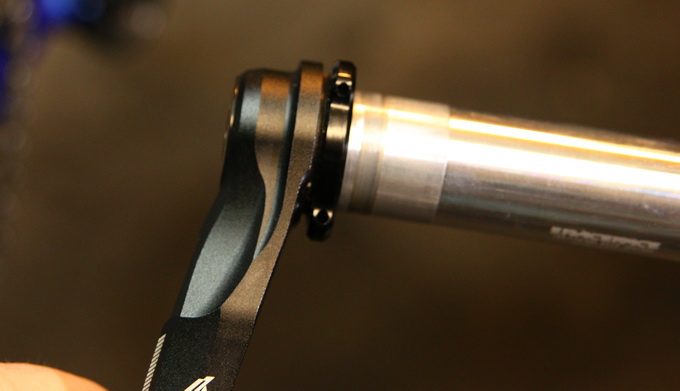
First, remove the non-drive side axle bolt from the crank arm. To do this successfully, loosen the nut a few turns. When loose, back it off two full turns. Then, place a block of flat wood or similar material to prevent marring, and then squarely strike down on the bolt to break free the mechanical wedge between the axle and crank arm. A few taps may be required. Once it’s free, remove the bolt, then the axle. There is no need to touch the Cinch adjustment, but at this time you can turn it back into the crank arm.
Installation of the new spindle is straight forward: there is no right or left to that axle. Before you install it, clean the non-drive side’s socket of any dirt. Once clean, apply a thin coating to the new spindle (just to prevent any unwanted sticking in the future). Torque the crank bolt up to 50nm at this time.
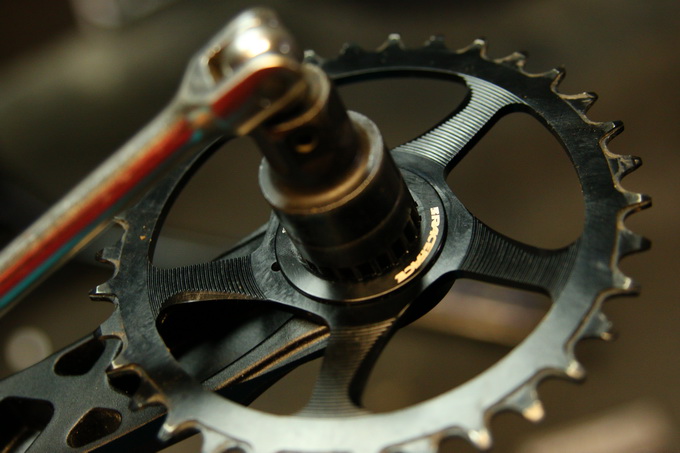
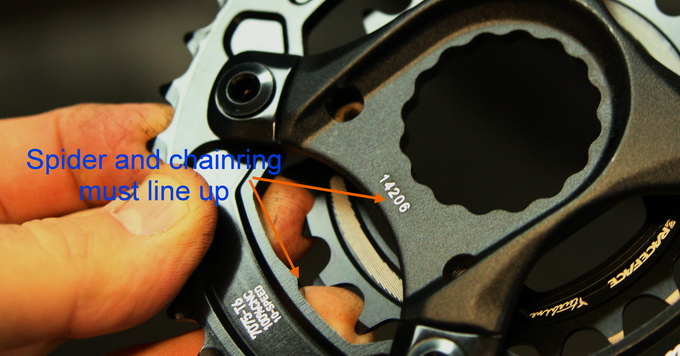
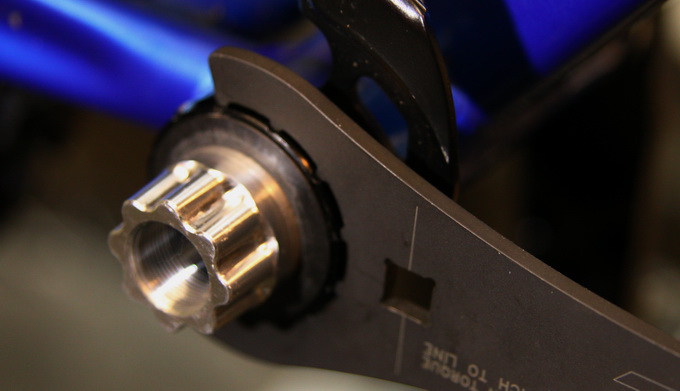
On the drive side, it was a matter of swapping out the direct mount chainring and replacing it with the 104 BCD spider and rings. This is easily done by firstly attaching the chainrings to the spider. The key here is to correctly orient the rings on the spider. There are two nubs on the inside of the ring that line up to the crank arm. Knowing this, simply install the chainring bolts and supplied spacer. Torque them down to 6nm evenly in an x-pattern. To prevent galling, ensure that the chainring nut wrench doesn’t allow the inner nut to spin when tightening the ring bolts.


With the spindle installed on the crank arm, the bottom bracket and spacing is next. This can be a bit tricky. Consulting Race Face’s online literature in the fat bike Section Two documents is a good idea. The spacing can be determined easily enough.

According to Race Face, since this is going on a Norco Sasquatch, two 2.5mm spacers should be used on the drive side to keep things in line. But keeping in mind that the E-type front derailleur takes up one space, I only needed to use one spacer on the drive side.

The best way to install the bottom bracket here was to not touch the E-type front derailleur but rather leave it alone and slide the spacer in the space between the front derailleur and bottom bracket shell, then insert the drive side bottom bracket cup. This must be done by hand to ensure the cup is not cross threading. For this step, threading it half way is good enough.
Next, thread the non-drive side in half way (not forgetting the single spacer). Finish things off by torquing down the cups to 40nm.

When installing the crank on the Norco, I needed to use a few spindle spacers, which were supplied with the spindle kit. I found that installing the spindle (without tightening the crank) and then pressing the crank in towards the bottom bracket to see how far off I was from my front derailleur worked well.

I found that the Sasquatch needed two spindle spacers on the drive side to get things lined up correctly. Once I’d figured that out, torquing the drive side crank bolt to 40 Nm was pretty much all I needed to do.


A quick test on the repair stand, a slight tweak to the front derailleur stops to accommodate the slight chainring misalignment compared to the FSA crank, and the job was done.

The pricing for this conversion depends a bit on the chainring configuration you want to install. Here’s the pricing for this exact conversion:
- Cinch Spindle Kit, 170mm fat bike: $89.99 USD
- Cinch BB – BSA, 100mm: $79.99 USD
- Cinch 3x 10⁴ BCD Spider: $ 59.99 USD
- Turbine 10 speed ring set – 22/36: $99.99 USD
If I had opted to just stick with the direct mount chainring it would have only cost a total of $170 to convert over. A whole new crank could cost $269 or more. So yes, there is still a saving here!
Thanks to Race Face for providing the parts for this conversion.