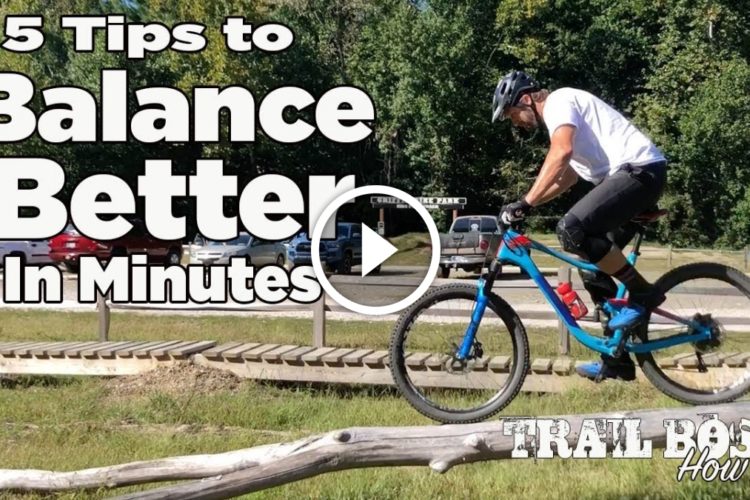
It was by accident that I learned the advantages of a jumping dismount back when I was trying to ride this bridge railing skinny in my hometown of Northfield, MN. I crashed hard before and after I did that dismount, and it wasn’t until I looked at the video again many months later that I grew curious about it and started to practice and use it.

I’ve since learned that some refer to this as a “spontaneous dismount,” which was certainly the case for me that day: totally unplanned.
A little research shows that it’s also referred to as the North Shore Bail (Les Femmes de S&M blog post reference here) or the West Coast Bail (West Coast Style video here), evidently because of the number of high skinnies that have been constructed over the years along the the North Shore of the Vancouver, BC area.
So if you want to learn a good way of saving your butt and other body parts for those times when your skill doesn’t get you across that long, high skinny, a jumping dismount should be high (heh) on your list.
When a skinny is 6 inches or less off the ground, it’s generally no problem when you don’t make it. In most cases, you instinctively stick a foot out and straddle the bike at an angle when you lose your balance. Or if it’s your front wheel that goes off the skinny first (since that’s the wheel doing the most moving around as you try to keep your balance), you can dab on the skinny itself or the ground or both… or just ride off it.
But as your skill progresses and you start attempting skinnies that are 6 inches or more off the ground, strategies for safely bailing become more important. That straddle dismount maneuver can bring the crossbar into your tender regions or it can launch you sideways into trees and/or the ground with more force than you’d prefer.


Also, trying to ride off a high skinny with your front wheel leading the way can often result in OTB syndrome, with consequences that are sometimes memorable.


A level lift to the side is a cool alternative to just sticking your foot out when you lose your balance. But I’m not sure there any significant safety advantages in using it on low skinnies like this one.


Using a level lift to the side when you fall off a high skinny means you land hard and flat, straddling the crossbar, which can be treacherous if you don’t land perfectly.
So here is a progressive series of “jumping dismount” drills you can do in your yard or neighborhood to get you increasingly confident in your ability to use the technique when you fail on those skinnies that create a bit of a pucker factor for you.
Stationary Drills
It’s best to first experience jumping dismounts from a bike that’s not moving, so here are several stationary drills that you can do in your yard or neighborhood.
Drill #1: Jumping dismounts off your seat.
Since the jumping dismount involves landing on your feet from a height that’s at least as high as your seat, prop your bike against a pole or tree where there’s grass or soft dirt. Lower your seatpost, hang onto the bars, get both feet on top of the seat, and then jump off. Do it a few more times off both sides of the bike, seeing how softly you can land.

Drill #2: Jumping dismounts while leaned against a pole or tree.
Prop your bike against a pole or tree where there’s grass or soft dirt. With your pedals level, seatpost lowered, and your strong (favorite) foot forward, jump off the pedals to one side, making sure your feet clear the pedal, hanging onto the bars when you land. Be aware of how much you have to bend your knees before you leap. Notice the degree of weight transfer to your hands on the handlebars once your feet are up in the air. Notice at what exact point the weight on your hands decreases to zero (e.g., before or after your feet land?). Notice how close your feet are to the bike when you land. Experiment with seeing how far to the side you can land.


Drill #3:
Same as Drill #2 but jump off the other side of the bike.
Drill #4:
Same as Drills #2 and #3 but jump with your weak foot forward. My strong or favorite foot is my left foot. So I practice dismounts with my right foot forward. It’s important to have confidence in being able to do a jumping dismount with either foot forward because you often don’t have time to adjust your pedals to a strong foot forward position when you’re losing your balance.
Moving Drills
Once you’re confident in your ability to do jumping dismounts from a stationary position, then you’re ready for drills done while you’re riding your bike. All these drills are done with your seatpost lowered.
Drill #5: Jumping dismounts to flat ground while moving.
Ride an unobstructed area on grass or soft dirt and do a jumping dismount to one side as you slow to a stop. Repeat several times, jumping to both sides, alternating both strong and weak foot forward.
Drill #6: Jumping dismounts–handlebars at midsection height.
Ride along the grass or dirt near the top edge of a curb or other low skinny where your bike’s handlebars are about even with your midsection when you stand next to it. Then, do a jumping dismount off it as you slow to a stop. This will be your first experience doing a jumping dismount with additional height. Again, repeat several times, jumping from both sides, alternating both strong and weak foot forward.


Drill #7: Jumping dismounts–handlebars at head/shoulders height.
Next. find a retaining wall or other wide skinny where your bike’s handlebars are about even with your head and shoulders when you stand next to it. Do a jumping dismount several times, hanging onto the bars when you land. Again, jump from both sides, alternating both strong and weak foot forward.


Drill #8: Jumping dismounts while losing your balance.
All the above drills thus far have involved deliberate jumping dismounts to one side of the bike or the other; for example, you decide ahead of time to jump off the left side. So now you need to practice doing them when you actually lose your balance. Start by riding the length of a plank that’s flat on the ground, with a width that challenges your ability. If you don’t have a plank handy, ride the edge of a curb.


Go very slow, using your brakes if necessary, until you lose your balance. Or do a track stand on it until you start to fall over–whatever works so that you’ve got no clue which side you’ll eventually do a jumping dismount until you start to fall over. Repeat the drill enough times so that you experience dismounts on both sides, and with both strong and weak foot forward. For an additional challenge, use your plank as a ramp on a curb or other prop, and ride so slowly up and down it that you lose your balance and do a jumping dismount.


Drill #9: Jumping dismounts when pedals are vertical.
Experiment doing a jumping dismount with your pedals in a vertical position. It’s much harder, as nearly all your jumping force has to be generated from the one leg on the side with the pedal down/in the 6 o’clock position. It’s not ideal, obviously, but it’ll build your confidence a bit knowing that you can do it should the situation arise where you lose your balance and you don’t have an extra split second to get your pedals in a horizontal position before doing the jumping dismount.


Drill #10: Jumping dismounts while tossing your bike away from you.
As you get more confident in your ability to do jumping dismounts off higher skinnies, it becomes important to not have the bike come crashing down on top of you for obvious reasons. You have to learn to toss your bike to one side while you jump off the other side. So how do you practice this without having to deliberately trash your bike?

First, head back to the pole or tree in your yard or neighborhood with soft dirt or grass. You do the same basic stationary jumping drill described in Drill #2, but let go of the handlebars just before your feet hit the ground, giving them a light push away from you. You can let the bike fall to the ground, or you can let it tip into a resting position against the pole or tree.


Then, find a retaining wall where your bike’s handlebars are a few inches over your head when you stand next to it. A retaining wall with soft dirt or grass on the upside is important for this drill, not just any old high skinny, because you probably don’t want to toss your bike off something high nor onto something hard.

As you start descending, the weight of your hands on the bars will reach zero about the same time your feet are about level with the bottom of your wheels. Give the bars a gentle push as you let go.


Jumping dismounts with a raised seatpost.
Having just done an article on the advantages of a lowered seatpost, I thought it best to not undermine that advice with drills for a raised seatpost. Of course, if you ignore my advice and lose your balance while attempting a high skinny with a raised seatpost, what’s your best option?
Jumping dismounts with clipless pedals.
I always ride flats so other than big cojones, I’ve no clue what’s required to be able to unclip and jump straight up in the air off your pedals within few milliseconds of losing your balance on a high skinny. Chime in with comments if you’ve got recommendations.
So that’s the skinny on the jumping dismount!
My “Holding a Line” instructional series
This is the fourth in my series of Singletracks articles on developing the ability to hold a line, a basic mountain biking skill. At least one more is forthcoming.
The articles are just one component of my “Holding A Line” instructional series. It also includes screencast videos, podcast episodes, and live webinars. To be notified when the entire series becomes available, subscribe to my free Thick Skull Mountain Bike Skills newsletter.


12 Comments
Jan 9, 2015
I typically try not to do drops higher than a foot for the sake of not wrecking my bike or myself. I have done some higher than that when I underestimated the drop. I almost instinctively got back and low really quick, and somehow by miracle landed ungracefully, way out of balance, and luckily without any harm. That is definitely another thing that I do need to practice more at.
Jan 10, 2015
As for drops, are you referring to wheelie drops or regular drops?
Jan 12, 2015
In other words, I first have to really learn drops if I'm going teach them. ;-)
Jan 12, 2015
My bike is more XC than Trail rated. Even though it does have a tougher frame than the average XC bike, I still weigh more than the average XC rider.
Jan 8, 2015
More options is always better I suppose!
Jan 8, 2015
Jan 8, 2015
But for most recreational mountain bikers, I think it's a pretty advanced skill to learn and then deploy at the moment of losing one's balance on a high skinny, whereas the jumping dismount is surprisingly easy to learn and get confident in using. So yeah, more options!
Oct 27, 2015
Oct 14, 2015
My (purely speculative, as my skinny skills are pretty subpar) understanding is that the key is avoiding yanking the handlebar, only relying on body movement.
If you keep handlebar still, your wheel doesnt ride off the skinny and only tip to the side, having more time for bail by dropping, as you can do that even when losing side balance.
Jan 8, 2015
http://mountainbikegeezer.com/progress-on-the-wheelie-drops-aka-slow-drop-to-flat-surprisingly-hard-fun/
Jan 8, 2015
I'm unable to find any photos or videos that shows someone actually losing their balance on a skinny and then doing a wheelie drop as a maneuver to save their butt.
Can you or anyone else point me to something that shows it? I'm not saying it can't be done, I'm just inclined to think that for mere mortals like me, it's a tall order!
Jan 9, 2015