

Search for mountain biking videos on YouTube, and you’ll find that the most popular ones all have one thing in common: jumps. I get it. Cleaning a big tabletop or boosting over a double looks so cool.
However, do them wrong and they can have big consequences. Casing a tabletop or overshooting a landing is a great way to wind up in the ER. There’s little room for error when it comes to this aspect of mountain biking. To learn how to jump tabletops and doubles correctly and safely, I called on Jeremiah “Scratch” Stone, an instructor with Ninja Mountain Bike Performance who has shared a lot of tips with us so far.
First, familiarize yourself with the proper body mechanics


Being a rider who rarely lets his wheels leave the ground, I asked Stone what I needed to know before attempting to jump. His reply was simple: “First, understand your body’s ability to load or compress.”
To do this, Stone suggested trying to stand on even ground without your bike and jumping without moving your knees at all. “You’ll get no lift and look goofy doing it.” Stone says you should repeat the process with your knees slightly bent, and then fully bent.
Obviously, the more your knees are bent, the higher you can jump. “This translates to the bike and helps you understand that any kind of lift (front and rear wheel lift, level lift, bunny hop, manuals, and jumping) will be most effective if initiated with a controlled compression or loading of the body and bike.”


Use these drills to get the body mechanics down
As I learned when I did theskinnies-arent-scary-if-you-know-how-to-ride-them-properly/”> article on riding skinnies, doing drills is a great way to master the skills needed to clean certain trails features. I asked Stone if there were any drills riders could practice to help them gain the confidence needed for jumping. Stone suggested doing front and rear wheel lifts, bunny hops, and bump jumps.
According to Stone, wheel lifts help a rider develop a strong, even compression through their feet, and control that energy as it is released through the wheel lifts. “It is also the first step in understanding the relationship of your compression or loading of the bike and body to get the desired lift.” To do proper wheel lifts, Stone says it should feel “like you’re trying to stomp it to the ground, then lift the front or rear from there.”
After wheel lifts, Stone says a proper bunny hop is super valuable for understanding the body mechanics of jumping.
“Once again, you load the bike and body to initiate a lift, but with the bunny hop we add the element of holding tension in the back wheel before releasing it and letting it lift, thus creating that effective arc in flight.”
Once riders are comfortable doing bunny hops, Stone encourages them to next play with the “bump jump.” He loves bump jumps for both their trail application and the way they can fast track a person’s understanding of jump timing. To teach bump jumps, Stone uses a piece of PVC pipe cut in half, but riders can use anything that is a couple inches tall and won’t move when they hit it, like embedded rocks or roots.
“The bump jump is when you are rolling into something like a root, and you bump the front wheel up with it, then bump the rear wheel into the air. The sound is distinct, a bump – bump, and lets you know that your timing was right. If that’s confusing, channel your inner 10-year-old and ‘boost the root!’”
Stone believes a bump jump can really amplify a rider’s bunny hop technique. “For instance, if you have a 6-inch bunny hop on flat ground, then a bump jump can double that height! It’s super fun for clearing trail obstacles and finding flow in technical situations.”

Proper bike setup is crucial
Are certain kinds of mountain bikes more well-suited for jumping than others?
“My favorite bikes to jump are short to mid- travel trail bikes,” Stone said. They’re balanced, efficient, and forgiving! My trail hardtail jumps great as well. Strangely enough, my least favorite bike to jump is my dirt jumper. Probably because I’m tall enough that I feel like a circus bear when I ride it!”
Whatever bike you own, Stone says there are some important things to do when it comes to setting up your bike for jumping. “First, get that seat post as low as it’ll go! Whether it’s a dropper or not, get it out of the way!”
Next, Stone tells riders to make sure their baseline suspension settings are solid and balanced. “Make sure you’re running the recommended sag for your frame and that your fork is set right as well (usually 25-30% sag).” The rebound settings should also be balanced between the front and rear. “If the rear is too fast, it can really buck you when you’re jumping! If it’s too slow, it may feel dead on takeoff and really lack any kind of pop.”
Stone doesn’t advise riders to lock out their suspension when jumping. “I always have my suspension open. I rarely use the lockouts and I encourage people to practice the way they ride!”
Lastly, Stone mentioned that tire pressure is important for all types of riding, including jumping. Stone suggests riders set their tire pressures at 20-25psi to start. “If I’m really going for it on a jump session, I may even run my tires a little extra for more rolling speed between hits.”

Start practicing on small tabletops
In Stone’s opinion, jumping takes time and patience and is best learned on a tabletop where riders can start small and work their way up. He provided a simple, step-by-step process for doing a jump.
First, approach the jump while “thinking about keeping your head and torso ‘quiet’ and letting the bike and your limbs do all the movement. The key is to keep your eyes and elbows up, and relax your limbs so they can absorb the bike. Work this technique through a range of speeds. Oftentimes I can absorb a jump at the same speed or more than what it takes to jump it. This gives me a sense of control and takes a lot of guesswork out of it.”
Second, test ride the jump letting the bike take limited flight and land on the deck or table. This is where the bulk of practice will be for newer jumpers, and where a tabletop is ideal for learning.
“As you absorb the jump [when going up it], you’ll feel where the bike wants to get light and take flight. This is what’s called the ‘lip.’” Stone tells riders they should start letting the bike pop a little bit at the lip as they absorb it. “Do this as many times as it takes to feel safe and controlled.”
Third, do the jump. “The key here is to release that compression with the lip. Remember that bump jump? Think of the lip as your bump or root. This is the exact point where you want the front wheel then the rear wheel to release and take flight. As you get comfortable, add more pressure through your feet and the bottom bracket to really feel the pop of the lip.”
Finally, once you’re in the air, “absorb the bike into your body like you’re in the low ready position then place the bike on your landing by pushing it down through the bottom bracket with your feet. This helps give you that nice arc in the air so you can match the grade of your landing with both wheels.”

Doubles and gap jumps use the same techniques, with minor variations
Stone’s advice on doubles and gap jumps comes from both his experience testing them as a professional trail builder and his background as a motocross rider. “The key to hitting doubles is first having the skill set to time a jump and take flight with control and power.”
Additionally, Stone says riders should have a certain mindset when approaching doubles or gaps. “THERE IS NO GAP! Don’t even look at it, don’t even think about it. Coming up short is NOT an option! You’re much better off going too far than coming up short, especially if you anticipate and plan for it.”
Stone says riders need to give themselves the speed and compression necessary to have a controlled jump that will get them to the landing or further. “You’ll find that often you can place the bike down when you’re ready. The key is to plan for it and take control of the situation before you ever roll in.”

Other things to note when jumping
When it comes to finding the right speed, Stone believes it starts with the mind. “To find the right speed for jumps, you must first calm yourself and fully respect the fact that you can add a little, but it’s hard to take any away.”
If riders find themselves or their bike going to one side or the other when jumping, then Stone says it’s often a sign of them yanking the bike on takeoff. “It means you shortcutted the compression or loading of the body. The power for lifts/flight comes from that pressure you put through the bottom bracket with your feet.”
Stone tells riders to keep themselves strong when jumping by taking breaks. “It’s easy to get sloppy when you’re tired. You’re never allowed to say ‘one more jump.’ That’s when bad things happen. Train yourself to say ‘another [jump]’ and then take a break before you do something sloppily.”
Finally, Stone suggests riders try to put both fear and hope aside. “Your biggest enemy with jumping is going to be fear, which causes us to get stiff and shuts down our range of motion. The other worst-case scenario is trying to operate on hope alone. You need to have a plan and some baseline skills to keep your body active and help you follow through.”


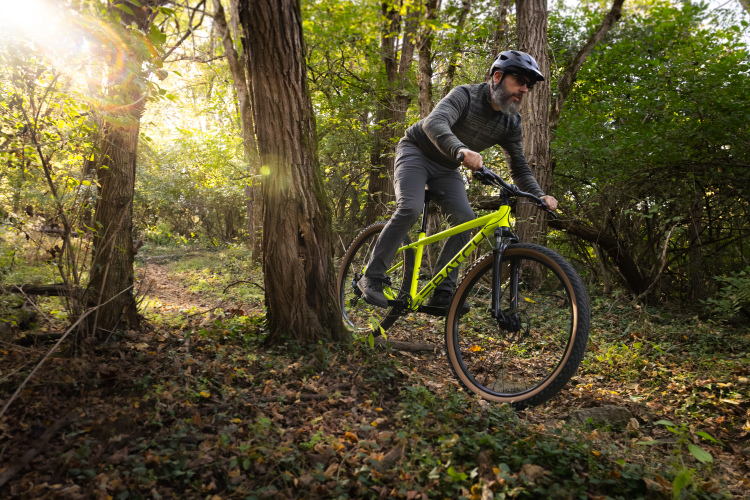
Giving it a turn myself
Pushing my fear aside, I went to our local jump trail, Kudzilla, and picked out one of the smaller tabletops to try jumping. My riding partner and personal photographer, Bryon Dalton, and a fellow coach for our local NICA team, Michelle Bull, joined me too.
I made several passes at the tabletop. The dropper post was down, my elbows and eyes were up, I compressed into the jump, and … I barely left the ground. It was underwhelming to say the least. I’m certain I’ve caught more air on a bunny hop than I did on the tabletop.
In reviewing the photos Dalton took, I noticed that I was releasing the compression before I hit the lip of the tabletop. Bull also observed that I didn’t seem to have enough speed going into the jump. That made sense because I could feel myself getting nervous every time I approached it and I tapped my brakes just a bit.
Dalton then made a couple of passes at the tabletop while I took photos. He was much better with his speed and timing than I was, as evidenced by the pictures. He perfectly timed releasing the compression with the lip of the jump and did a sweet arc over the tabletop, landing smoothly on the other side.


Give it time
My failed attempts at jumping weren’t due to Stone’s tips. I’ve never done jumps on a regular basis. As I learned during my first session, it takes a lot of patience and practice to get the speed and timing down. I will say that learning the mechanics of jumping has improved my bunny hops and bump jumps, which I now do a lot more regularly on rides.
- Know how to spring load your body
- Practice front and rear wheel lifts, bunny hops, and bump jumps
- Dial in your suspension and tire pressure
- Start practicing on small tabletops, reinforcing proper form
- Practice timing and control for jumping doubles
- Remain calm, practice, and give yourself breaks


2 Comments
May 6, 2023
May 6, 2023