
Processing and Editing
Editing a photograph can be just as important as composing the perfect image. Adjusting color, contrast, shadows, highlights, and several other features can really make a photo stand out. Going beyond the “auto correct” function found on most complimentary editing software, and understanding editing basics, can significantly improve the quality of your images. Whether you use a PC or a Mac, you have free access to basic editing programs, including ones pre-installed on most systems.
In addition, you can purchase near-professional quality software for less than $100, with upgraded features and tools. The photos illustrated in this article incorporate editing from either free Android smartphone apps, or Adobe Lightroom 4, an older and relatively-inexpensive alternative to the venerable Adobe Photoshop.
Editing Basics
Below is a list of ten helpful editing features found on many (free) software platforms. Most of them can also easily be mastered in a darkroom if you still experiment with film.
1. Cropping
Undoubtedly the single most important editing tool for most photographs is cropping the subject so that you can achieve a better composition. Try to cut a photo down to follow the rules of composition outlined in my previous article. Simply cropping a photo so that the subject follows the Rule of Thirds generally makes a better photograph. Cropping wasted space/sky/land in a photo so that the subject is closer, and easier to see, usually improves an image as well.

2. Color Correction
Most of the time, using the “auto color correct” feature in your editing software is sufficient. However, sometimes this button produces funky results, and it may change the overall color temperature of the photograph–which may not be what you want. By selecting more reds, yellows, or orange in your editing program, you can give the photo a warmer tone. Do this if you want to increase the dramatic tones of sunrise or sunset. On the other hand, by selecting blues or greens, the photo takes on a colder, softer tone. Do this if you want the photo to feel more wintery or distant. As with any color correction, too much of anything gives the image an over-the-top feeling, so make slight, subtle changes slowly.
3. Contrast
Contrast controls how dark shadows are and how light highlights become. Maximizing contrast can make your subject and background appear as a silhouette (usually undesirable). Gently increasing contrast, however, can accentuate shadows and highlights and give an image more “punch.” Changes in contrast are usually even more dramatic with black and white photographs.
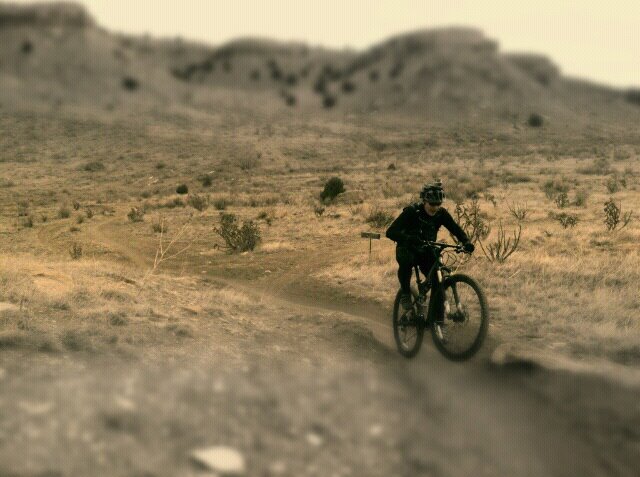
4. Manipulating Shadows and Highlights
By lightening the shadows or increasing the highlights, it is easy to give light to an otherwise darkened subject–especially when a flash will not reach. Before the shadows were lightened in the photo below, the face and body were dark, and there were few distinguishable features. This technique looks better with brighter photos with higher contrast, because lightening the shadows can sometimes make a photo appear flat.

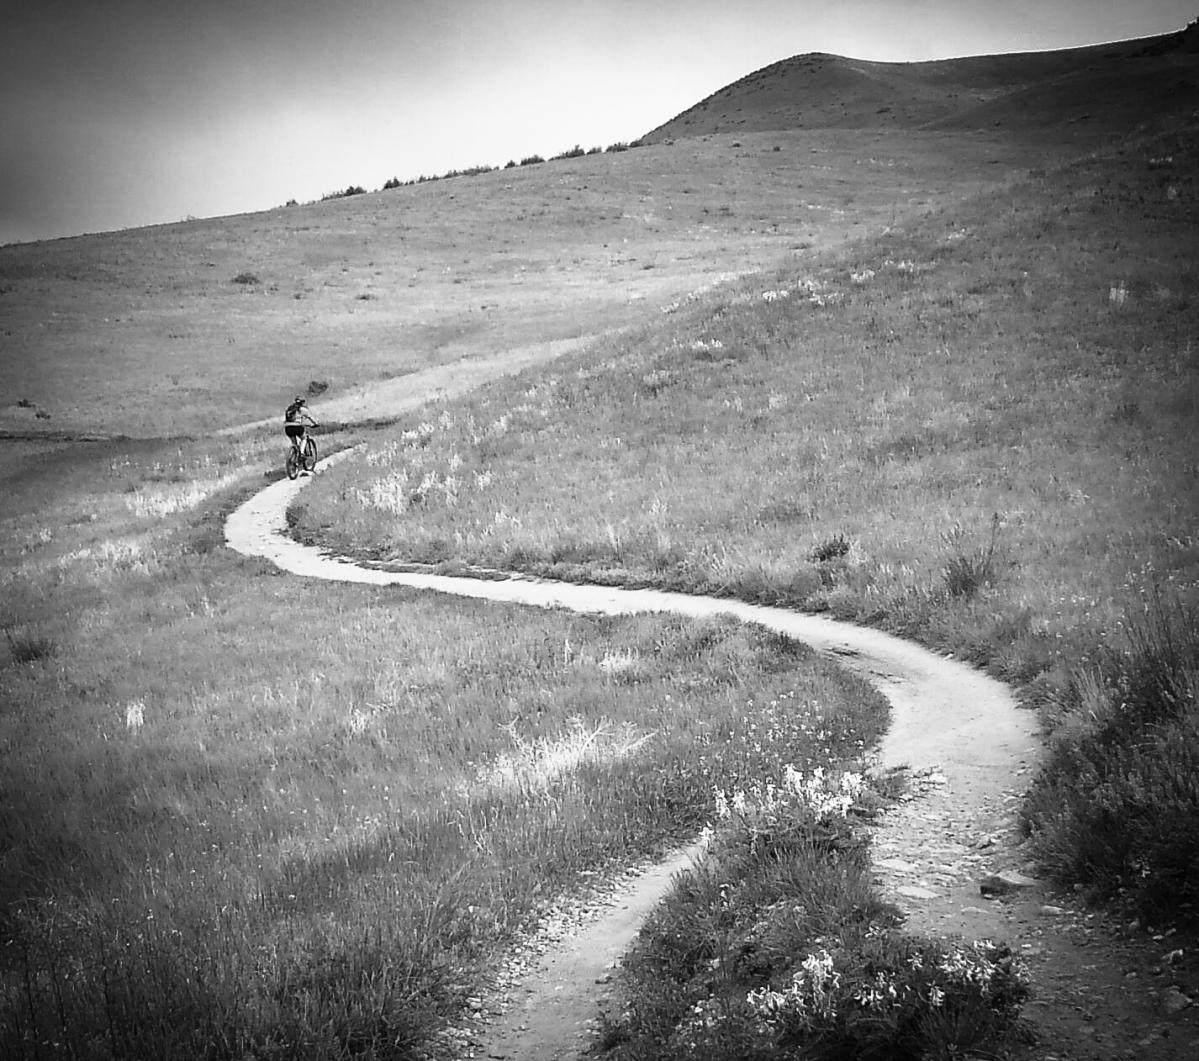
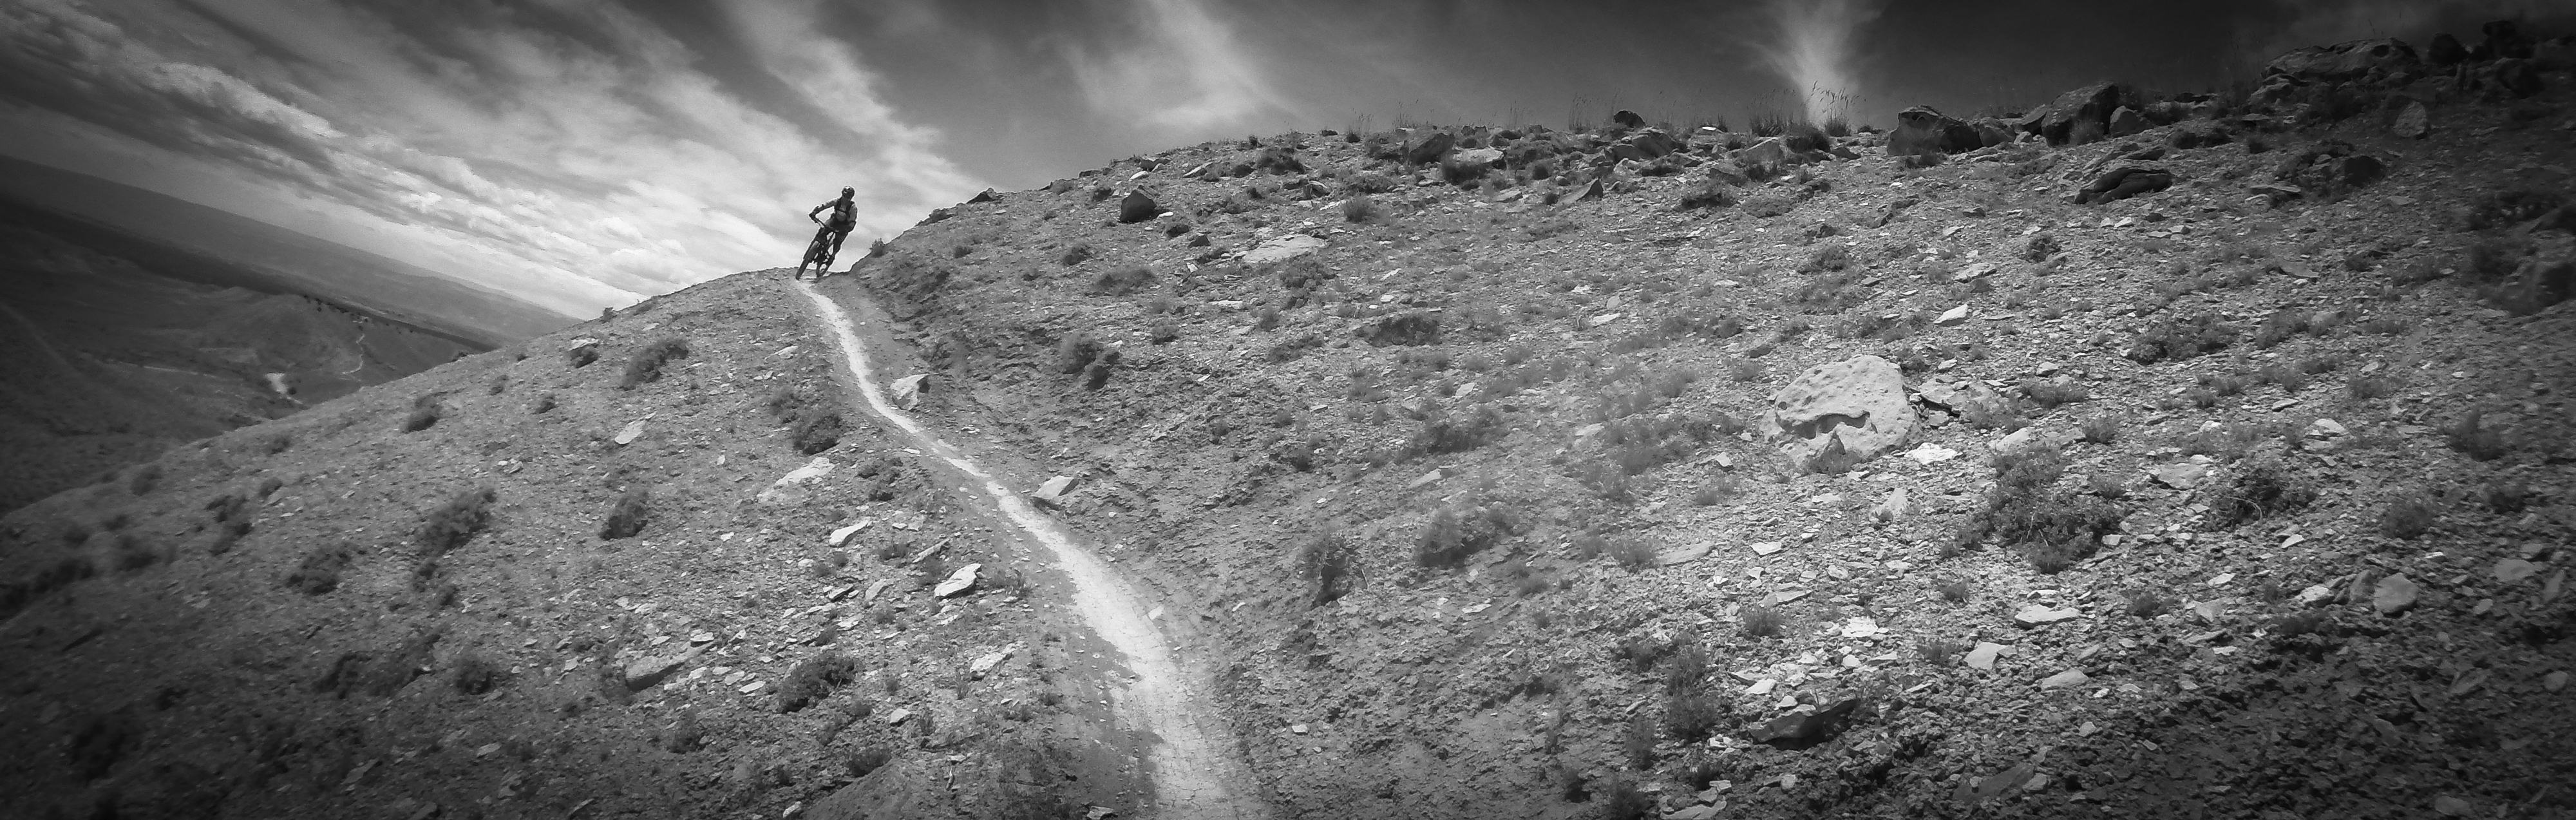
5. Color versus Black and White
Black and white mountain biking photos are not very common, but are beautiful when done correctly. There is no simple set of rules that define what make a black and white photo great, so convert your color images to black and white, and try experimenting with your editing software to see if an image looks better without color. Images with a lot of contrast, or with a lot of demure or earth tones, may look more dramatic in black and white.


6. Rotating Images
Sometimes, taking a photo at an askew angle can exaggerate the steepness of a climb or reduce the monotony of a flat horizon in all of your photos. You can also try rotating the photo 90 degrees left or right for square photos for a different angle. Adobe Lightroom even allows you to rotate the actual image within the frame (changing a flat horizon to a slanted one). Rotating landscapes 180 degrees alters reality but may make a better image.
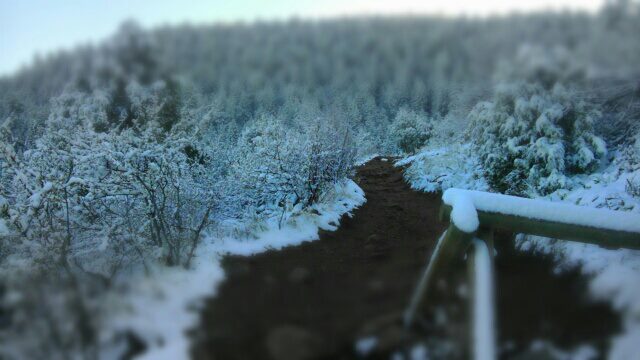
7. Tilt-Shift or Simulated Tilt
Modern editing software can simulate what is known as “tilt-shift” effects, once only found on special cameras that altered the lens in relation to the film plane. The result is a linear area of focus with everything else in the frame blurred out of focus. Unlike the film cameras of yore, software allows you to fine tune the effect, choosing the area of focus and the degree of un-focused portions in the frame. Mostly artistic, this edit can create surreal and interesting images by creating a focal plane that draws your eye immediately to your subject.
8. Vignetting
Admittedly, one of my favorite editing techniques is the art of vignetting, or darkening the edges of an image. This is a very old-school technique, seen commonly in the 1800s, and is very easy to do with a computer. Vignetting darkens your sky and foreground, diffusely frames your subject, and simulates more edge color depth. Depending on the program, you can control the area of vignetting, amount of feathering (how sharp the inner edges are), and the intensity. Try changing these vignetting variables to see what helps make your subject stand out a little more.

9. Filters
A filter is simply an app or a function of the editing software program that uses a pre-defined set of values for color adjustment, contrast, and other variables to achieve a common effect, such as the “vintage photograph” look. There are filters to give photographs a cold tone or a warm tone, make photos more grainy, convert images to a negative, etc. There are hundreds different filter effects out there for computers and phones. One of my favorites is Aviary. Filters are fun to play around with, especially if you have a photo that is otherwise a little boring and needs something to help it stand out.

10. Special Considerations: Pre-Editing
Mostly likely, you will be using a smartphone, action camera, or small point-and-shoot to take the majority of trail-side photos. Many of these have editing programs built into them, but unless you need to edit and upload/publish them immediately, it is usually best to spend some time adjusting them. Some editing considerations begin before you ever even open the file to change one single pixel. Consider the following:
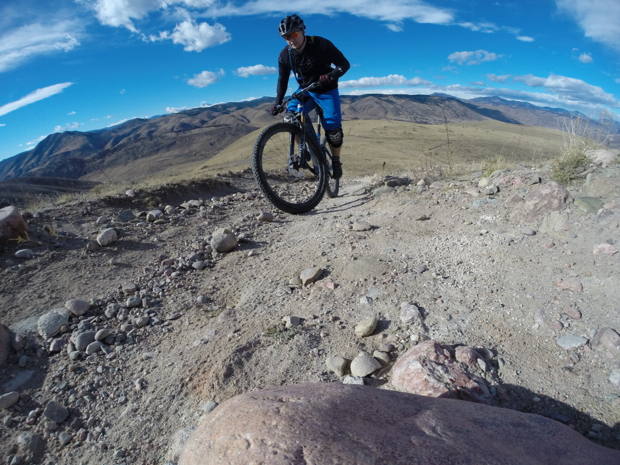
Using a GoPro camera or other action cam: these devices use wide angle lenses to capture the most from a scene, which has both benefits and drawbacks. Wide angle lenses will often distort an image–preferable for some images–so if you have a device such as a GoPro Hero3, you can connect it to the WiFi on your smartphone and use the phone as the viewfinder, which is a great way to “pre-edit” and see which angle is best. These cameras also allow you to take multiple images (up to 30 per second), which means you can capture a lot of photos and delete the ones you do not want. The same is true if you set up the interval self-timer and take photos of you and your friends riding along a section of trail. I use a tripod and set mine to snap every 0.5 seconds, then ride slow past the camera to prevent blur. Later I delete the ones I don’t want–another great way to “pre-edit.” You can also capture stills from video that you shoot, but quality suffers. Remember though: if you use an action cam to take trail photos regularly, you will likely be cropping heavily to get the best possible composition. If this is the case, my advice is to use the largest memory card your device accepts, and shoot at the highest possible resolution so that cropping later doesn’t degrade your images/video too much.

Using Smartphones: Smartphones are great for taking photos, but are usually limited by several factors when using them to take trail-side photos: most gloves do not work well with touch screens, most are not weather resistant, they are cumbersome to use with a tripod, many are slow to turn on and get to the camera app, many have lagging shutters, and most are limited to 8MP or less. The benefits, of course, are that most top-tier smartphones do take excellent photos if they are not enlarged very much. They also allow you to see what you shoot instantly, and allow you to edit your images on the spot and upload them. Keep in mind that if you routinely take action shots, then you need to capitalize on every rule of composition in order to reduce the burden of editing and preserve maximum resolution: get close, fill the frame with the subject, use the rule of thirds, etc. Handily, though, you can use one of the many apps to edit and add flair to your images!


2 Comments
Oct 28, 2014
As for editing programs, I have a few I use on my computer, but for people shooting and editing on mobile devices, I highly recommend Camera+. It has great features for shooting, or if you shoot with the normal camera you can import your photos and edit them right in the app. Some of the filters and effects are so good that occasionally I'll import a photo from my GoPro or DSLR to edit on my iPhone (but that's pretty rare).
Oct 28, 2014