I loved the performance of the 2009 Manitou Dorado Pro, which provided very precise low and high speed compression controls. I was again reminded of the great control over my front wheel that the Dorado Expert provides, when I reviewed the 2013 Norco Aurum 1 Dorado. Well, I caved in and picked up the latest Manitou Dorado Pro for my Santa Cruz V10C.
Specs
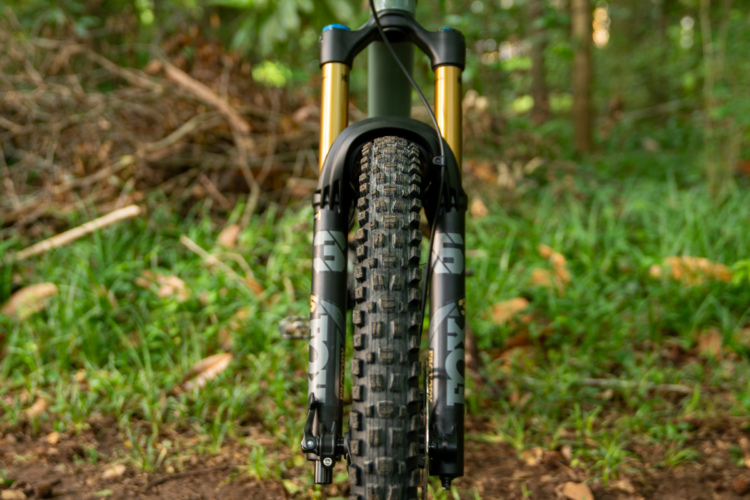
The latest Dorado’s most obvious changes are on the outside, with new lower stanchion boots. This time around, they are more robust to help reduce the chance of cracking. A new black, white, and gold-trimmed decal is also new.
Internally, things remain essentially identical with the same well-tuned TPC+ damper unit. What has changed is the HS Shim stack, firming things up a bit in the mid stroke. The spring rate in the TPC+ unit was also upped to engage the TPC+ piston a bit later in the stroke, all allowing for a more active beginning stroke over rough terrain.
This Dorado Pro comes in just a touch below 6.55lbs, which is a .45lb reduction over 2009. Going over the fork with a fine-toothed comb, I noticed that Manitout took care to remove as much unnecessary material as possible.
Manitou used a long path twin tube design, which allows the fluid to flow inside the damper freely and prevents any air that is in the fork from entering the dampen area. The TPC+ damping essentially controls the wheel four ways. Low speed adjustment is essentially a tapered needle that is velocity-dependent. Dampening force responds significantly with stroke velocity, controlling the amount of oil passing the needle opening.
High speed compression is spring preloaded. Because of this, the system works best under pressure. So basically this system is a pressure-sensitive circuit forcing fluid against a shim stack.
The second piston assembly is the TPC circuit control. Simply put, it is an energy dampening circuit. This circuit takes a considerable amount of fluid flow, as well as pressure, to engage.
Lastly, the bottom out control circuit, which only works later in the travel, changes dampening control depending on speed. This allows you to change the ramp up rate of your fork.
Installation
Installation of forks like the Dorado should only be attempted if you have all the correct tools necessary for the job. Since the steering tube must be cut to accommodate your frame, good measuring skills, a pipe cutter, or a Park SG-6 saw guide would be best for cutting the head tube to length. 4, 5, and 6mm Hex tools are the next important items for install the fork. A star nut insertion tool is a must, as well as a file or deburing tool.
With all new forks, it’s wise to read over all the literature before chopping away at the head tube. The Dorado is no different. Manitou wants the upper and lower fork crowns to be spaced enough that you can adjust the height of the fork a few millimeters up or down. There is a bulge on the fork legs that the lower crown clamps onto. The crown must reside on that bulge area.
When measuring for steering tube length, I placed the lower crown mid way, then I installed the lower race assembly, the fork into the frame, and the upper race assembly. I added a 5mm spacer, placed my upper crown, added another spacer, and then marked the steering tube. This way, I have enough room to add or subtract spacers, while still keeping just enough steering tube.
Once I had the mark, I removed the fork, mounted it securely in my bike stand, and then cut it using the SG-6 saw guide and a fine-tooth hacksaw blade (32T). That leaves a nice cut that requires very little filing and deburing. I then installed the star nut, wiped the fork down one last time to remove all traces of metal filings, and finally put the fork on the bike.
I added an additional 3mm spacer just to make sure that the top cap has enough room to apply a small amount of preload on the headset bearings. To test this, steer left to right and feel the amount of drag. There should be a slight amount, but not enough to stop the steering altogether.
I torqued the upper and lower crown bolts down to 10Nm, and I was done!
Installing the direct mount stem is a matter of following the stem’s torque recommendations. Depending on the bar used, you may have clearance issues. 35mm bars, for example, require a small riser spacer in some cases.
Out on the Slopes
Setting up the new Dorado Pro is no different than the Expert or the older 2009 version that I had previously. In fact, I luckily kept the settings from the Expert that I had from my review of the Aurum. So, going off of some previous knowledge, I aired up the fork to 80 PSI (about 35% sag for my weight) to start. Rebound works best for me right in the middle setting (9 clicks) for Blue Mountain, while the TPC+ and high speed compression both run at 11 clicks. At these settings, I get supple front end control with good bottom out resistance (perfect for those days that I just can’t seem to center myself on my bike), and excellent control over square-edged rocks.
Currently, I think the Dorado is one of the nicest forks on the market for front-end control. No, the Dorado isn’t the lightest, nor is it the stiffest. There are other forks that claim those titles. But as far as all-around performance goes, the Dorado is one of the best. In my opinion, the Dorado’s best feature is its tuneabilty, with excellent damping control over big hits from drops and jumps, excellence in square edged control from rocks, and of course optimum control in berms.
 This fork does it all. Bonus points for the positive feel to all the clickers. With or without gloves, you can get to all the controls. The TPC+ and high speed compression are still a bit of a pain in the ass to get to, but hey, it’s not like you’re always going to be adjusting those settings.
During my review of the Pro, I did start to develop a slight amount of weeping off the damper side of the fork. But regular maintenance ensures it won’t get any worse. I could service the fork and replace the seals to shore everything up, but as of right now, I just wipe things down and check the fluid level every 25 hours of operation.
You can purchase the Dorado Pro for about $1,750, which is priced appropriately in my opinion. This level of quality, performance, and sheer coolness doesn’t come free. Check out Manitou’s website for more info.


2 Comments
May 15, 2014
May 15, 2014
And yes the Dorado is a very playful fork