
Insta360, a China-based sports camera brand, has been offering products to both consumer and professional audiences since 2014. One of its newest consumer products is the Insta360 X3, an action camera that allows you to shoot in stabilized 360-degree video while also keeping the ability to be used in 4K single-lens mode or 72-megapixel photo mode. The X3 is packed with impressive features and endless editing options that make it stand out from other cameras in the market.
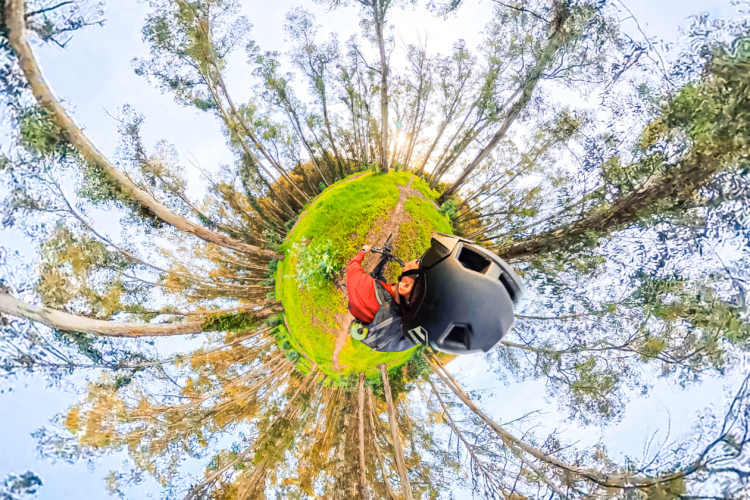
360-degree capture is a relatively new technology that has become a hot trend for shooting extreme sports, and you are likely to have seen footage from these types of cameras before. What Insta360 refers to as “Impossible 3rd person views”, The X3 captures 360-degree views by using two camera lenses, one on each side of the device, each capturing 180-degree video simultaneously. With the help of firmware, the cameras stitch each 180 degree view together while magically erasing the seam, creating seamless 360-degree footage. The real magic of this camera is not just capturing 360-degree views, but how the footage is then reframed and delivered to the viewer.
The process of “reframing” on the Insta360 allows you to choose which viewpoints to take throughout the full clip, since each 360-degree video captured contains all the data of your surroundings. The reframing process gives the editor the dynamic ability to rotate the view during the video, which is then saved (using view-locking keyframes) to create a more interesting viewing experience. The videos created using the Insta360 can enhance activities as simple as walking through your neighborhood to sending a 50-foot kicker at Whistler Bike Park. With the right accessories, the resulting footage is a blend of traditional camera and drone-like capture. These stabilized videos can be easily edited and shared on social media right from the Insta360 app.

Insta360 X3 camera specs
The first thing you’ll notice about the X3 camera is its shape. It’s longer, more rectangular, and thinner than a GoPro. The lenses on each side are also convex, exposing them to potential impact. Insta360 provides a rubber protector for when not in use, and they sell a lens guard separately that can be used while shooting. The camera has two buttons on the side (power and Quick Capture Menu) and two buttons on the back below the touchscreen for recording and switching modes. The touchscreen is a whopping 2.29 inches (measured diagonally) and takes up most of the back of the camera. This is a big increase over the Insta360 X2 which only had a smaller circular touchscreen.
- 5.7K Active HDR video
- 72MP Photos
- 8K Timelapse
- 4K Single Lens mode at 30 FPS
- 2.7K Ultrawide MaxView
- Flowstate Stabilization
- 360 Horizon Lock
- 2.29” Touchscreen
- Waterproof to 33’
- Desktop and app video editing
- Neoprene case, battery, charging cable, and lens cloth included with the standalone camera
Since the camera shoots both directions, it might be arbitrary to call one side the front or the back, but when switching lenses while shooting, Insta360 refers to the “inner” and “outer” lenses. The product is over 4 inches long, 1-3/4 inches wide, and 1-1/4 inches thick if you include the convex lenses. The profile is certainly unique and feels very high quality. Each access panel for both the charging port and the removable battery has a latching click, letting you know it’s fully closed. At the end, there is a threaded port to attach to all the accessory mounting devices.

Insta360 X3 mounting options and accessories
This review focuses on the bike bundle, which includes a helmet mount, chest mount, handlebar mount, an extension bar (which can be used with all mounts) and an invisible selfie stick. I also had access to the rubber lens cover, and an action camera remote (both sold separately but not in the bike bundle). While extensive tutorials on features and best practices are common on YouTube, this review will focus on each mounting device used to capture on-trail footage with the X3 camera (scroll down to see sample clips from each mount setup). All mounting methods produced high-quality stabilized footage with unique perspectives of the terrain and the rider.

Chest mount
Chest-mounted action cameras are a popular choice for capturing the best view on a mountain bike. When riding in a more aggressive and forward position, these one-way shooting cameras typically need to be angled outward from the chest mount to avoid recording mostly the top tube, stem, and dirt. The X3 camera can be mounted similarly on the chest, but thanks to its 360-degree view it allows for adjustment to be made during editing, rather than fine tuning the right camera angle from the chest. However, when shooting video in one direction like a traditional action camera, the angle and length of the camera can cause significant interference with the cockpit area. I mounted the X3 camera on two different bikes, and found that the bike with the longer cockpit worked better with this mounting method. I noticed this camera interference mostly during technical climbs when leaning forward to weight the front end. Taller riders will have less trouble, but at 5′-8″ it certainly had me looking for more effective mounting options without the interference.
Helmet mount
I tried the helmet mount next, which I positioned directly above my head, with and without the additional extension piece on a trail half shell helmet. This mount provided a good angle for seeing all surroundings including riders behind or in front of me. It also allowed me to experience the full 360-degree view and experiment with later editing angles, which is the magic of this product.
The downside of this mount is that the camera view showed my helmet rather than the cockpit, taking away from the first-person experience captured with the chest mount. Moreover, depending on the position on the helmet, the camera’s weight could cause discomfort or helmet-shifting while riding. I later found that a full face or DH helmet helps tremendously to support a heavier camera like the X3. Using a full face helmet provided better stability for the heavier camera, and gave enough counter weight distribution to have the camera mounted to the side. This side mounted position ultimately became the most successful method of my testing.

Frame mount
I then experimented with the camera mounted on my bike using the handlebar mount. The clamp can be used for handlebars with a diameter as small as 25.4mm (grip clamp area) or as large as some smaller tube bike frames (found on steel bikes in particular). The angles captured while mounted to the bike provided some unique footage, but when the view was changed back toward the bike, there was some obvious distortion of the bike part the camera was mounted to.
After adding the extension bar to the same angles, the camera was moved further away from the bike resulting in a more drone-like effect and this eliminated the distortion from the mounting location. In almost all scenarios the extension bar lacked enough rigidity to support the heavier camera especially when gravity mixed with rough terrain. The clamping mechanisms attached to the bike just didn’t have the required torque to keep the camera and the extension from falling out of the intended shooting position.
In the end of my experimentations, I chose to not use the extension bar as the disadvantages outweighed the advantages. All three mounts considered, for 360-degree shooting the camera works best placed further away from the rider all together.

Selfie stick
Enter the the invisible selfie stick, which is by far the most fun accessory included in the bike bundle. At full extension, the stick measures 45″ long, which puts the camera almost 4ft away from the user. This allows the shooter to change positions of the camera while shooting and get the camera very close to passing objects. The more you experiment with moving around, the more drone-like the resulting footage becomes. However, there is one major problem: it’s not really a cycling accessory. It cannot be attached to a bike securely and could be a safety concern when attempting to use it while riding. I found It works well for board sports, walking in interesting places, or taking photos like a selfie stick, but it’s not an ideal bike accessory. Nonetheless, it is the best application for this camera and, in my experience, makes the most immersive videos.
Insta360 action remote
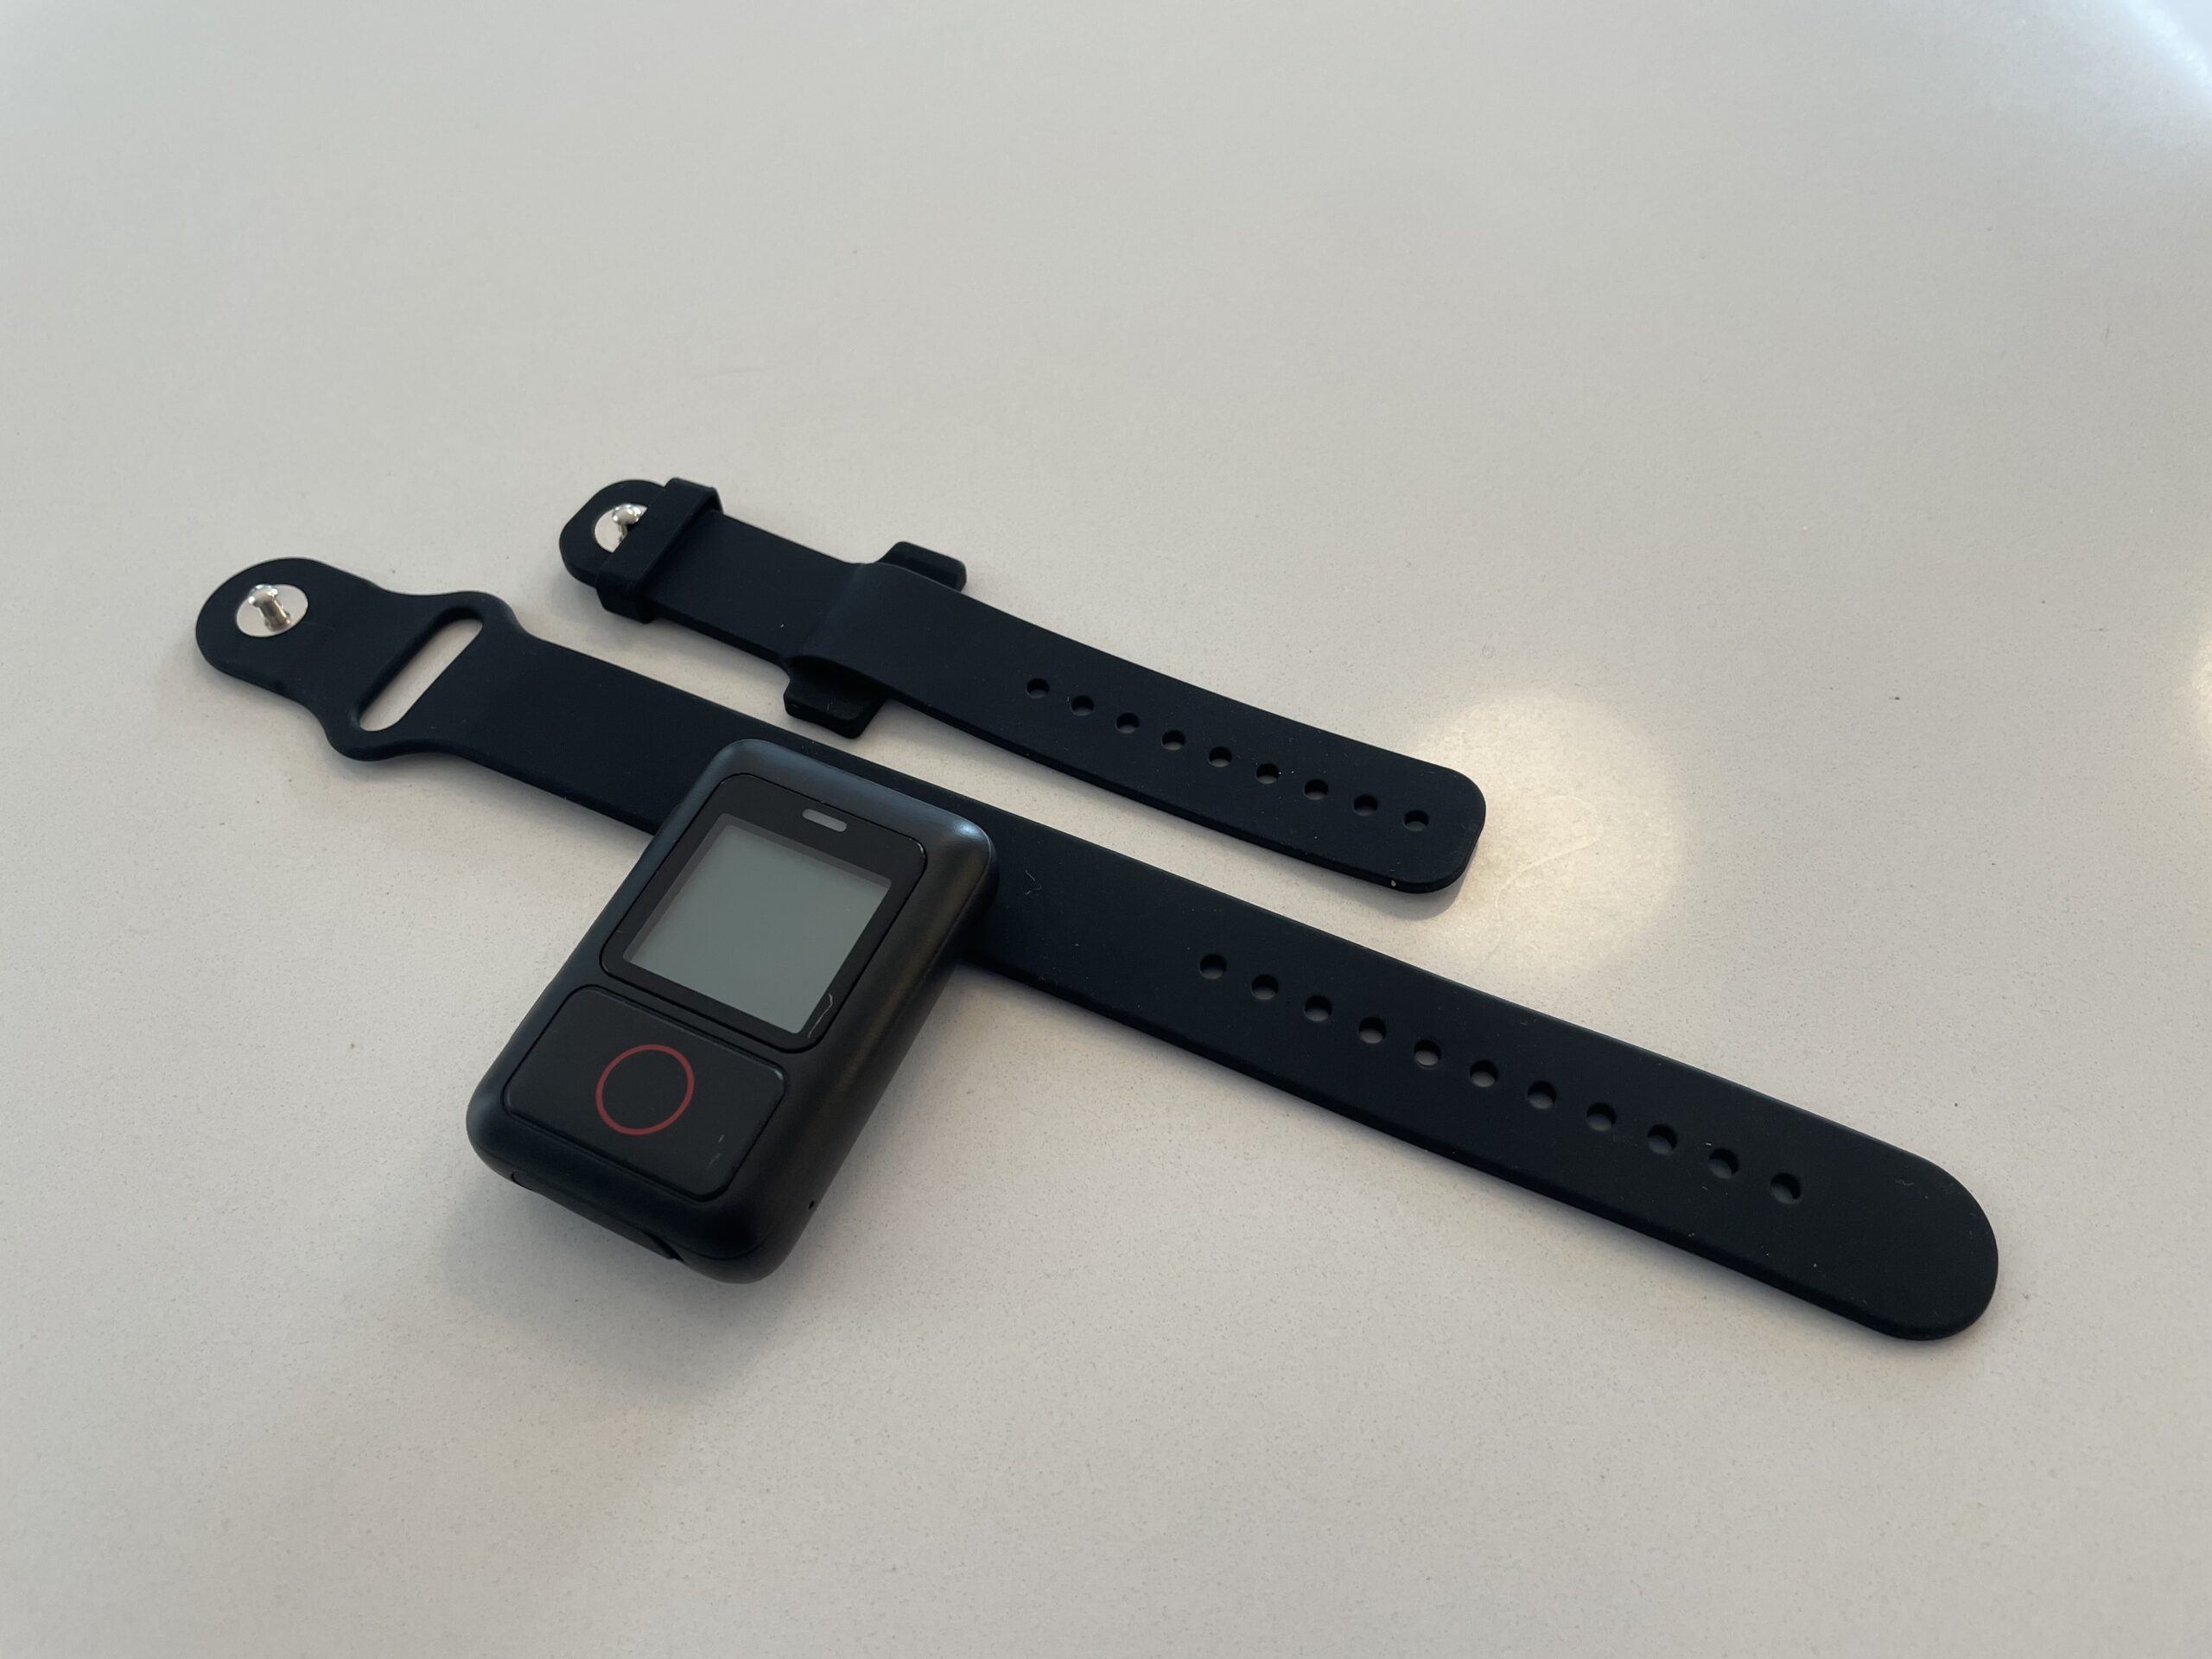
The action remote is not included in the bike bundle and must be purchased separately. While the camera can be controlled locally or via the Insta360 app, the action remote provides the easiest way to control the camera when it is out of reach. It beeps to let the user know when recording has started or stopped. The remote can be worn on the wrist or mounted on the handlebars. It has a small screen, a large rubberized start/stop button, and power and toggle buttons on the side.
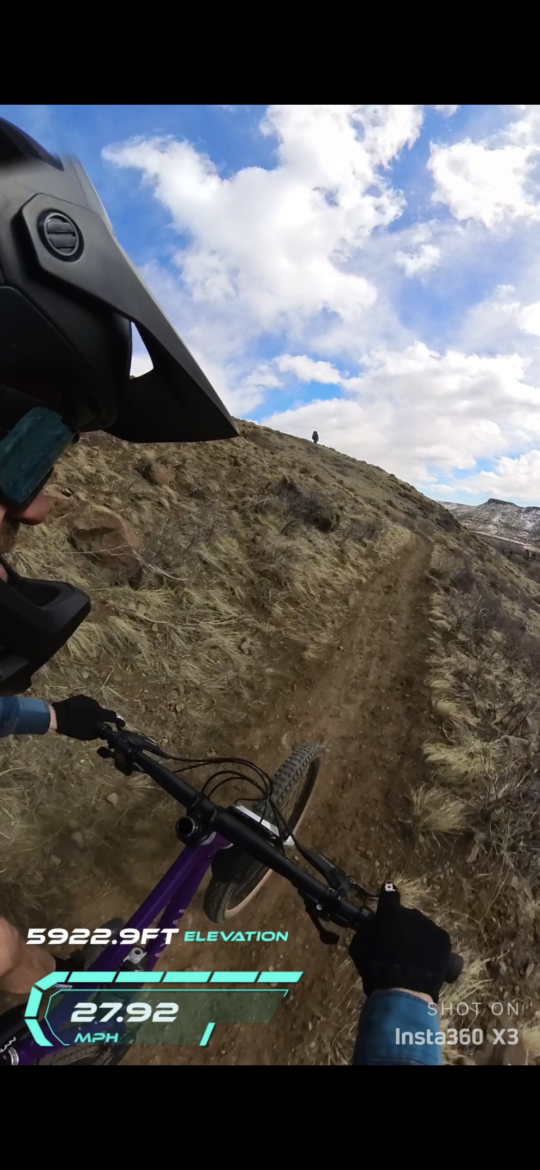
I chose the handlebar mount because I normally wear a watch on my wrist. Thanks to the large rubber button, it was easy to initiate recording even while wearing gloves. If you prefer not to wear anything on your wrist or handlebars, the remote can be kept in a pants pocket or pack. Once connected, the remote can toggle between camera modes, start and stop the camera, and provide GPS data to track speed, elevation, direction, distance, slope, and route. Location stats captured from GPS can be displayed during the editing process.
It is important to ensure that the remote is correctly paired with the camera. The small screen displays the mode the camera is currently set to, so you can verify the pairing. I encountered some issues re-pairing the remote to the camera after the initial sequence, but I resolved the issue by deleting the remote from the camera and repairing it. I contacted Insta360 and they provided a firmware update, which was also required for the GPS feature to operate as intended.
After updating the firmware and re-pairing the remote, the connection happened automatically when both devices were turned on. The GPS signal can then be monitored on the upper left-hand corner of the remote screen. Later, when editing videos, the stat overlays can be displayed. It was helpful to verify my speed during the ride. The top speed recorded was within a few MPH of my Garmin GPS recording, which means it’s fairly accurate. However, I didn’t find the other stats very useful besides speed and elevation.
Reframing and editing process – “Shoot first, point later”
The reframing and editing process for the Insta360 X3 is designed to be user-friendly and intuitive. As the camera captures all your surroundings, the reframing process allows you to choose the best angle after the fact.
In the app, you can select different angles and viewpoints within the 360-degree footage, allowing you to create dynamic and engaging videos that capture all the action. The app provides a range of tools for trimming, cutting, changing views, adjusting speed, adding music, and making background adjustments, including special effects using the Shot Lab. The Sky Swap mode allows you to replace the sky in your footage with pre-programmed effects, giving your videos a unique and creative touch. Here is also where you can overlay those GPS stats, so your viewers know how fast you are really going, or how steep that climb REALLY is.
Insta360 also offers desktop editing software that expands on the capabilities of the smartphone app, and there is an Adobe Premier plugin available for more advanced users. However, in my experience doing everything from the smartphone app is easier and more convenient for uploading to social media. Extensive tutorials are available on the web to guide users through the editing process. Overall, the editing process is designed to be accessible to users of all levels of expertise.

Pros and cons of the Insta360 X3 camera and GPS remote
Pros
- Leading edge technology capturing your entire surroundings
- Well priced for the capability
- Great video stabilization
- Extensive mounting options
- Fun and limitless editing options and camera angles
- Easy to use app lets you post quickly to all social media platforms
Cons
- Camera size and weight limits traditional MTB mounting methods
- Extensive camera settings and editing capabilities can be overwhelming for less techy consumers
- Best-use accessory is not bike friendly
Bottom line
It’s clear that the Insta360 X3 camera is built on incredible technology, wrapped in a high quality package particularly for those looking to create immersive and high-quality videos. While the mounting options for mountain bikers may be a bit awkward, the overall functionality and features of the camera more than make up for it.
While using all mounting methods, the Flowstate Stabilization worked extremely well making very smooth footage. Additionally, the editing options available in the Insta360 app are robust and can help users create videos that are truly unique and impressive. For those looking for similar functionality in a more compact package, the Insta360 ONE RS camera is a good option. All in all, the Insta360 X3 is a great investment for anyone looking to create high-quality, immersive videos.


4 Comments
Mar 20, 2023
Mar 20, 2023
Mar 21, 2023
Looking for another camera since my GoPro went AWOL. Thinking it would make sense to look at the options and see what is out these days.
Apr 4, 2023