

I always enjoy seeing manufacturers improve their products when they see a need.SRAM recently saw a need in the gravity scene and took the opportunity to improve shifting performance and durability while keeping weights as low as possible.
Cranks
Truvativ (a SRAM subsidiary) did a great job last year reducing overall drivetrain weight by introducing the Descendant cranks, knocking off a good 240 grams compared to the OCT Holzfeller. Well they have done it again this year with the introduction of the SRAM XO DH crankset. The XO crankset comes in at 765 grams (including BB), which is amazing considering that it is designed to take all the abuse that a DH course can throw at it.
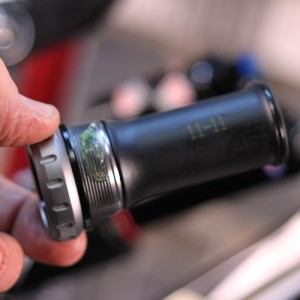
The new XO DH crank comes in a few different spindle options, allowing for GXP and Press Fit 30 bottom brackets and spindle widths of either 73 or 83mm. Included is a new 7075 CNC-machined chainring with your choice of 34, 36, or 38 teeth. I opted for the GXP bottom bracket, 165mm crank arm length, and 36-tooth chainring.
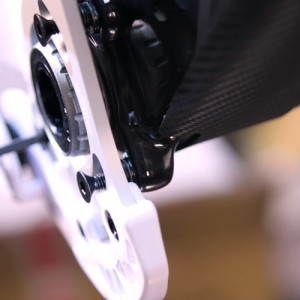
Construction of the XO DH crank features the same carbon arms as previous XO cranks, but it also features a DH-oriented forged aluminum spider.

Chain Guides
Another great thing SRAM/Truvativ decided to do was to vastly improve their chain guides. Collaborating with MRP, a well-respected brand that has been around since 1996, SRAM designed their version of the G2, simply called the XO chain guide. The XO guide is made from 5mm-thick alloy and is available in BB mount, ISCG, and ISCG 05.
What makes this guide tough is the three-point attachment of the skid plate to the back plate, spreading the load on impact. Both the idler pulley and the upper guide are adjustable to ensure proper operation. The lower guide utilizes a sealed cartridge bearing to keep things running smoothly and quietly for a long time. On a technical note, the upper guide, which totally wraps around the chain, is a split design, allowing for easy removal of the chain come service time.

Rear Derailleur
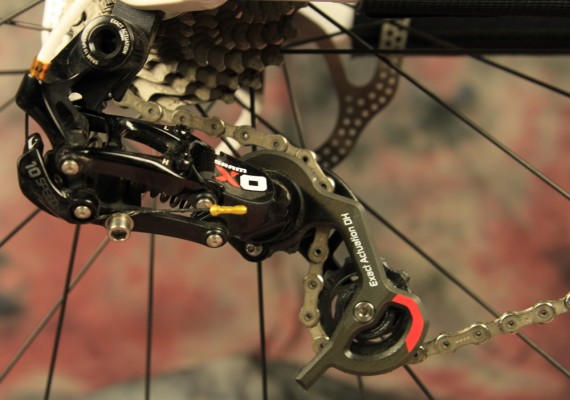
In order to improve the XO line and expand its capabilities, a redesigned rear derailleur had to be introduced for those who use tight gear ratios in the back. Most gravity bikes have ratios that range from 11-21T to 11-26T. Due to the tight range, a traditional rear derailleur designed to run a wider range (11-32T – 11-36T) doesn’t track as well.
Enter the new XO DH rear derailleur. The new DH derailleur is not just a namesake or marketing ploy but is actually a reconfigured XO designed to track a tight cassette closer than a regular derailleur could. Built with the same materials as an XO, the XO DH has the signature carbon outer cage and the mix of titanium and stainless steel hardware and pins to keep it lightweight and corrosion-free. To ensure that the XO keeps shifting well, both the inner and outer links are forged aluminum, and the “B” knuckle is redesigned to track the cassette with more chain wrap.
Brakes
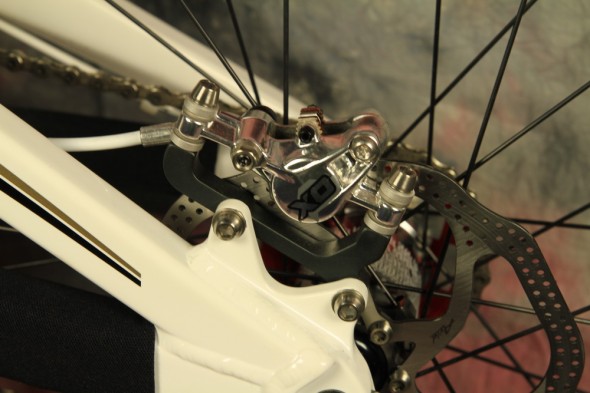
The polished-silver Avid XO really steps up and blings things out right! I got my hands on a new set of XO brakes and tossed them on my new DH rig (Santa Cruz V10C).
Coming in at a scant 395 grams up front (complete with 200mm rotor and hardware) and 370 grams in the rear (complete with 180mm rotor and hardware), I think these are the right balance between weight and sheer stopping power.
In case you’re not familiar with the XO brakes, these are a full-featured set with a host of adjustments and goodies! For one thing, these brakes allow you to adjust both the contact point and the reach, allowing them to fit to your bike and your anatomy perfectly. That alone offers numerous options as to how and when the brakes apply force and where the lever is in relationship to the bars.
I am one of those guys who likes my levers far from the bar and I nestle the lever in the second bend of my finger. One of my good friends, on the other hand, likes his levers practically touching the bars. Rest assured that the XOs can accommodate either position.
Along with these adjustments, Avid has made small improvements to the contact point adjusters. The addition of the new HS1 rotors will further improve the performance of these already top-notch stoppers.

Installation
Installing the chain guide and crank on my V10C was a piece of cake. The instructions on both the guide and the crank are easy to follow with clear illustrations to get things done right the first time. When installing both items, the only special tool that you need (if you don’t have it) is a bottom bracket tool like the Park BBT#19 (if you’re installing a GXP). Other tools required include 4, 5, 6, and 8 mm hex keys and a torque wrench. Having a vernier caliper is nice, but a tape measure will work almost as well.

- First, make double sure the threads are clean with no damage. A quick visual inspection is all you need.
- Follow the instructions for the placement of the spacers. (For the V-10 C I needed one spacer per side to square things up.)
- Next, add a bit of quality synthetic grease to the threads and then hand turn them in to double check that nothing is wrong with the threads.
- Then, torque both cups to 40Nm. Be careful, as there is a drive and non-drive side.
- The next step would be to install the crank, but the addition of the chainguide requires that the back plate and spacer washers are installed first. It is easier to remove a washer than to try to get one in between the ISCG tabs when the back plate is installed, so the addition of a washer temporarily is key to save time.
- Once all three bolts are snug, installation of the crank and non-drive side crank arm is next. Using 45Nm of force on the hex bolt will snug things up. (On the V-10 C the single spacer washer was fine for spacing out the chain guide.) See installation instructions for more info.
- Torque down the three tab bolts to 8Nm next, making sure that the guide is oriented correctly.
- You’re done!
Installation of the XO brakes was easy and required all of about 45 minute for both of them. I have already written about the installation in a previous intro article.
The most important thing to remember when installing brakes is to avoid contact with brake fluid on rotors, pads, and paint (if you’re shortening or bleeding brakes). Contamination will kill the performance of the system.
Another point that I would like to remind everyone of is the Tri-align system. Make sure you squeeze the brake lever firmly while snugging up the caliper bolts evenly. Doing that will ensure perfect alignment every time. For more information on installation, check out the SRAM website and watch their great videos.
Out on the Trail
My first impressions of the new XO DH gear from SRAM is overwhelmingly positive. Despite having limited time on the XO gear before winter finally took hold of the slopes, I did get some time to play with it. I was impressed with how smoothly everything ran. The XO guide and cranks worked very well together with no noise or drag in the drive line. The XO crank held up well with no issues yet. Despite glancing off of a few rocks on the first run, the cranks were no worse for the wear.
Shifting is the big improvement in this year’s rendition of XO. The original XO installed on my Banshee Legend II is noticeably slower than the new DH-specific rear derailleur. I also found that it took less time messing with the “b” screw on the new derailleur to get it to shift correctly. As far as the shifter pod, there was no change in performance, which is to be expected since it’s the exact same part. I still got a satisfying, crisp shift every time.
Based on the limited time that I was able to put on the brakes, I would personally like to see a bit more force. I did change over to sintered pads with metal backing plates but haven’t had a chance to test yet. The stock pads are the organic compound with aluminum backing plates, which is perfectly fine–I run them on my trail bike. However, I felt that I needed more bite since the DH rig travels faster, especially since I know that that I will be hitting the bigger slopes this year.
Modulation is still top-notch, and the braking force does come on progressively. The new HS1 rotors are an improvement, with much less vibration than previous models–so much so that I converted my other DH rig to run the same rotors. Up here in Canada, each rotor retails for about $37 and adapters run $10, but they are well-worth the money.
Bottom Line
SRAM has addressed some key issues for DH riders with their latest drivetrain and braking offerings which will please the weight-minded performance crowd. All the gear is DH-worthy and will definitely perform well. Check out SRAM now and see what else they have in store.
Many thanks to SRAM for sending out the XO DH group for review!


8 Comments
Mar 9, 2012
I'll have to look them up :D
Mar 9, 2012
I did have Spanks on but for this build (going gold) I switched to these.
Mar 9, 2012
Mar 9, 2012
Mar 9, 2012
Are those the Spike Spank pedals?
Mar 9, 2012
Mar 9, 2012
Otherwise they sell the PG-1070 is what you would be using...
Mar 9, 2012