

Confession time. I don’t always do the things my mother taught me to do. Sorry Mom, it’s true.
For example, mom always said, “Don’t talk to strangers.” I pretty much break that rule on a daily, if not hourly, basis. And it gets worse: now I’m going to encourage you to meet a stranger.
In the year and a half Maryann and I have been riding mountain bikes we’ve been fortunate enough to visit several different trails. At a lot of these trails we’d see this guy hanging around the parking lot, the skills area, or the trailhead. Near the Vortex in Santos and at Chuck Lennon he looked a little down on his luck. At Poston Park he looked like a million bucks.
Chances are he hangs out someplace near where you ride as well. He seems pretty non-threatening, maybe a little silly, so I guess we shouldn’t be surprised that he tends to attract mostly young kids.
Eventually I couldn’t resist so I went to see what his deal was. The “guy” I’m talking about is the pump track. “The what,” you ask?
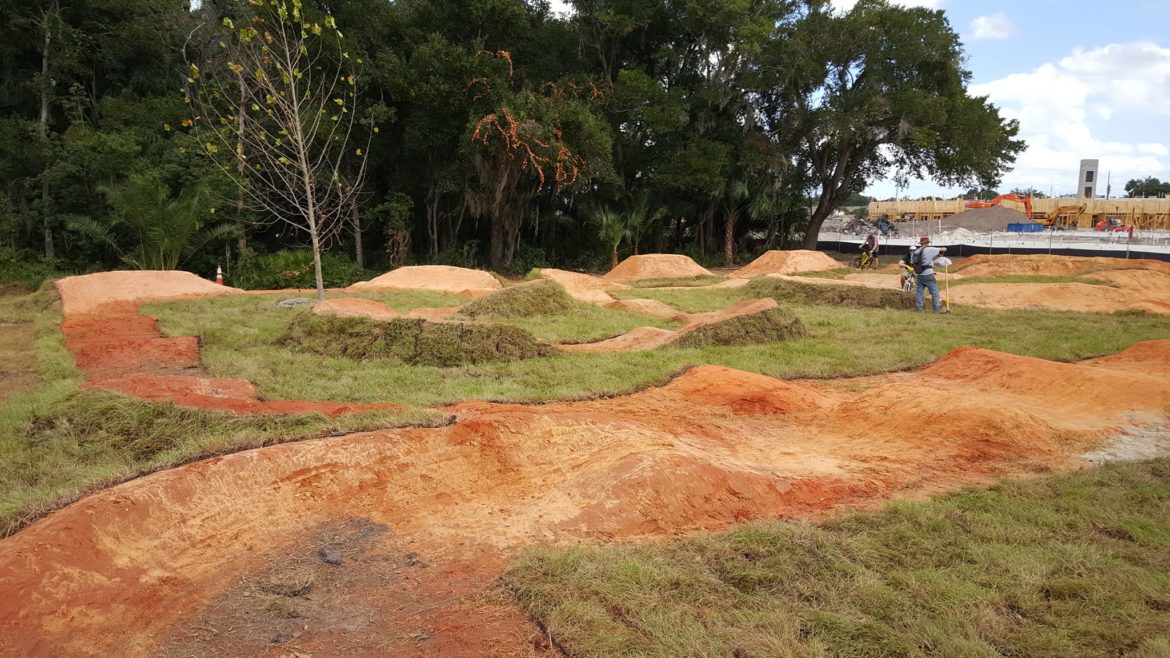
As Foghorn Leghorn might have said “That’s a pump track son!”
Have you ever wished you could get some mountain bike coaching? What if I told you the pump track is an excellent coach and the only charge for lessons is time and effort? The pump track is The Bike Whisperer. Technically it should be The Mountain Bike Rider Whisperer but that just doesn’t roll off the tongue.
How to use a pump track
If you watch really young kids on a pump track, they often pedal furiously, struggling up the humps, careening down the backside, heads and bodies bobbing about like a rubber duck in a stormy pond before falling over in a high banked, tight radius corner.
This pretty much describes what Maryann and I looked like on our first visit to a pump track. She made it pretty clear that she thought the pump track was difficult and frustrating, and she failed to see how it was going improve her trail riding. Okay, that may not be the exact phrasing she used, but you get the idea.
And yet, Maryann is no quitter. She now credits the pump track with giving her the skills to ride faster and smoother on the trail while having more fun. She will tell pretty much anyone who will listen that skills acquired there have allowed her to approach jumping with confidence. Oh, she definitely drank the Kool-Aid.
 .
.
Giving up on the pump track after your first rubber duck experience reminds me of the old joke about the guy who goes to his doctor for a follow up.
Doc says, “Hey Joe, how you feelin?”
Joe says “I don’t know doc, for all the good them suppositories did me I might as well have stuck em up my butt.”
I’ll warn you in advance, whispering only applies when you are doing things right. When you get the rhythm down he’ll welcome you to the magic carpet ride. When you do things wrong, he’ll yell or put a hurt on you.
Let’s take a look at five very basic lessons The Bike Whisperer will teach you in short order.
And before I forget: put your seat down. Get it as low as it will go.
Maryann and I didn’t have droppers when we started so we just pulled saddle, post, and all and threw them on the ground. Pro tip: don’t forget you did that if you decide to take a rest. ‘Nuff said.
1. Pedal position

This is definitely a yelling and not a whispering lesson. If you try to pedal around the pump track you will soon learn what the term “pedal strike” means and why you want to learn to avoid it. The humps located along the track are shaped such that a pedal at the bottom position will almost certainly hit the top of the hump. When it does, one or two things will happen. At the least, you will tear up the top of the hump, and you don’t want to be that person.
At worst, you’ll get a surprisingly powerful kick to you and your bike transmitted through the crank when the pedal contacts the hump. Like sticking your tongue to a frozen pole, you won’t want to do that a second time.
The key is to keep your cranks level when you are riding humps. The clever among you can already see how this lesson applies to the trail as well. Level pedals are much less likely to strike the roots and rocks that trail decorators place along the trail presumably to maximize our aesthetic enjoyment.
I can hear some of you asking, “how am I supposed to move forward while always keeping my cranks level?” Big hint: it’s called a pump track for a reason. More on that later.

The best way to get started is to pedal up to speed and enter the track at a trough between two humps. If you lose speed while on the track you can pedal, you just have to time it or use half strokes so that your cranks are level as they pass over the crest of the hump. You can also usually pedal in the corners, though keep an eye out for the occasional sneaky hump placed in the middle of the curve.
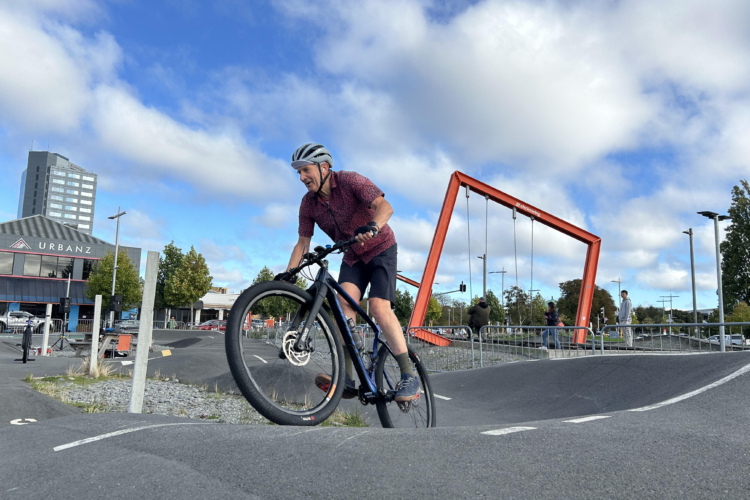
2. Body position
This is a whispered lesson. Nothing painful will happen to you or the pump track if you ignore body position, but your ultimate success depends on it. The sooner you achieve good body position, the sooner you will become a better pumper, better rider, and you’ll look dope. I have no idea what that actually means, but I hear all the cool kids say it.
As I have mentioned before, “light hands, heavy feet” (thanks Lee) is a mantra I try to incorporate every time I get on a bike. With your pedals level, your weight on your feet and your hands light, neither pulling or pushing on the bars, your mass is centered over the bottom bracket. For convenience we will refer to this as the neutral position.

You can be in this position relatively high, with your arms and legs mostly extended but not locked. You can also get into a lower “attack” position, with your chest near the stem and the saddle almost touching your tummy. For some riders, tummy on the saddle will not be all that low. The cool thing is you can pump while up high to work your quads or down low focusing on your glutes and hamstrings. Glutes is the scientific term for butt. Maryann never says “Move your glutes!,” in spite of that term being fairly scientific. I’m not sure why.

The importance of this body position is that it allows the bike, when looked at from the side, to pivot around the bottom bracket as it goes up and down all those humps in the track. Your body, seen from the same viewpoint, should no longer look like the aforementioned rubber duck but remain comparatively motionless in relation to the ground while the bike moves up and down underneath like a boat over a series of waves.
By bending and extending your arms and legs at the correct time you will be able to propel the bike forward. It feels pretty magical the first time you feel your bike accelerate on a pump track. Then you run out of breath and collapse alongside the track… at least that’s what we did. Some kid actually asked me if I had fallen and couldn’t get up. Smart glutes.
3. The Punch
Now the fun and the work begin. The easiest technique to learn on the pump track as a beginner is probably The Punch. Maryann was very enthusiastic about testing The Punch on my person when we first started visiting the pump track.
Get your bike onto the track, rolling at something above a walking pace. Faster is better. Get into the neutral position (up four paragraphs if your memory is like mine).

As your front wheel goes over the crest of a hump and starts down the backside, punch the bars down and away from you as if you were trying to push the wheel down the hill, which you are. Make sure you push the bars away from you and not yourself away from the bars. There is a difference. Remember I said earlier that your body should remain relatively motionless while the bike moves? Show those bars who’s boss.
If you timed it right and pushed neither too early, while the front wheel was still going up the face, nor too late, after it had already reached the bottom, you should be rewarded with a bit of acceleration.
Do the same thing on the next hump and the next one and the one after that. You can talk to yourself if it helps. Push…. Push…. Push. If someone gives you a hard time tell them you developed Lamaze and ask them what they’ve accomplished? It can actually help to have a partner call out the timing when you are first learning, which makes it even more like Lamaze.
As you improve you can actually get all the way around a well designed pump track using just The Punch. On the trail The Punch can help when riding down drops or getting up onto stuff, and will come in handy later if you do decide jumping is for you.
4. Getting heavy
A close second to The Punch is what Maryann and I call getting heavy. Sounds suggestive, yeah? Not so much, but still something fun to do in your chamois-lined shorts.
How in the world do you get heavy? According to the CDC most of us have that figured out. I’m only talking about simulating that kind of heavy and only for a second, on demand.
Imagine standing on your bathroom scale. You want to see it read the highest number you can without jumping up. You quickly bend your knees, letting your body drop and then stop the drop by locking your legs. The scale will read 150% of your body weight or even more for a very short period. You just “got heavy.” The nice thing about this kind of getting heavy is that you can use it to move your bike on the pump track or trail, and you don’t need to diet to make those temporary extra pounds magically disappear.
Get rolling, maybe do The Punch a few times to get a good pace going. Then relax your arms and get into the neutral position, fairly high, with arms and legs mostly extended. As you feel the back wheel come over the crest and start down the hump get heavy on the pedals.
Your arms should stay relaxed. You are riding with heavy feet, light hands, correct? If your timing is right you will feel the bike squirt forward with some impressive acceleration. Having someone call out the timing “Get heavy…. Get Heavy….” can help you to concentrate on the technique without worrying about the timing. You will know when you get it right as The Bike Whisperer says “ain’t that cool?” You will also hear him laughing at you as you slow down when you miss the timing.
On the trail you will begin to evaluate small depressions, roots and rocks for their “pumpability.” Getting heavy, known in the jargon as “pumping,” can be a particularly good way to keep the bike moving forward in an area where pedaling is impossible because of obstacles that would cause the dreaded pedal strike.
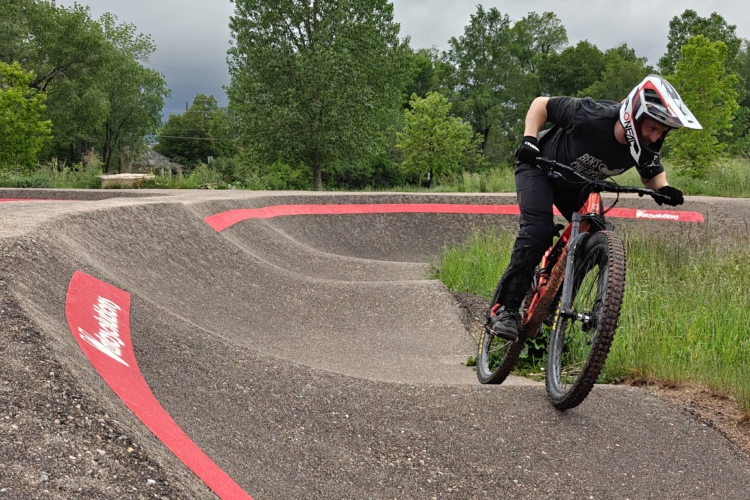
5. Lean to turn

Earlier I described Maryann and I falling over in the tight radius banked corners. We have since learned that those are referred to in the Lingua Franca as berms. Once you learn to pump it won’t be falling over that concerns you; it will be flying off the outside of a berm. Luckily the pump track is a great place to learn to negotiate a berm safely.
I distinctly recall wondering how I was ever going to be able to do laps on the pump track if I had to hit the brakes to keep from going over the top of the berm. Who knew bikes corner better at speed from leaning than from turning the handlebars? Of course you did, but I was a rank beginner. No one remembers to teach you stuff that seems so basic to them once they have experience.
A huge advantage of the neutral position, especially a low “attack” position is that it allows you to lean the bike over underneath while remaining relatively upright yourself. You can get your bike to negotiate a very tight corner at speed by leaning it in this way. The motion of the handlebars is more about sliding them sideways in the direction you want to turn rather than rotating them in that direction like you would on a tricycle. Maybe that is one reason mountain bikes don’t have three wheels. As your speed increases you can lean the bike more and go higher on the berm.
Get busy
Hopefully these ramblings will encourage you to seek out a pump track in your area or join the kids playing on one you’ve only given a passing glance to so far. Pump tracks are incomparable training tools and provide an excellent workout to boot. Don’t be surprised though if your friends don’t join you looking silly on the kiddie track, at least until they see you riding better on the trail. Did I forget to mention that?
The lessons you learn on the pump track have a surprising knack for working their way into your trail rides almost without your realizing it. The Bike Whisperer is waiting to share his secrets with you.


4 Comments
Jan 9, 2019
Jan 11, 2019
Jan 10, 2019
Jan 11, 2019