
Whenever I want to go backpacking, I run into a major roadblock that seems geometrically impossible to solve. At 5’7″, every time I try to run a seat bag on a size medium full suspension mountain bike, the bag rubs on the rear tire when the suspension compresses.
I’ve had this issue on 27.5″ bikes, and 29ers make it much worse. Not only that, I found that if I don’t keep my seat bag cinched up tightly, it can even bounce and rub on the tire of my rigid gravel bike.
I tried using a large backpack on a hut-to-hut trip that required carrying less gear, and I confirmed that there was no way that system would work if I had to haul a full sleep system and set of cookware.
As I prepare to bikepack the Colorado Trail in 2026, I’ve decided there’s no way in hell I want to ride that trail on a hardtail. The Colorado Trail boasts epic descents through challenging terrain, including massive boulder fields, slick root webs, loose scree, and so much more. While the Colorado Trail is an incredibly well-known bikepacking route, it is in no way easy: plenty of these descents get black-diamond ratings, and some sections exceed.
In order to best prepare for this epic adventure, I’m testing a different bikepacking solution: a rear rack system.
Rack systems have gained in popularity amongst bikepackers in recent years thanks to advances in the technology, which allow for more secure storage in rough terrain, and, as in my case, the ability to run some of these racks on smaller full-suspension mountain bikes.
The Old Man Mountain system
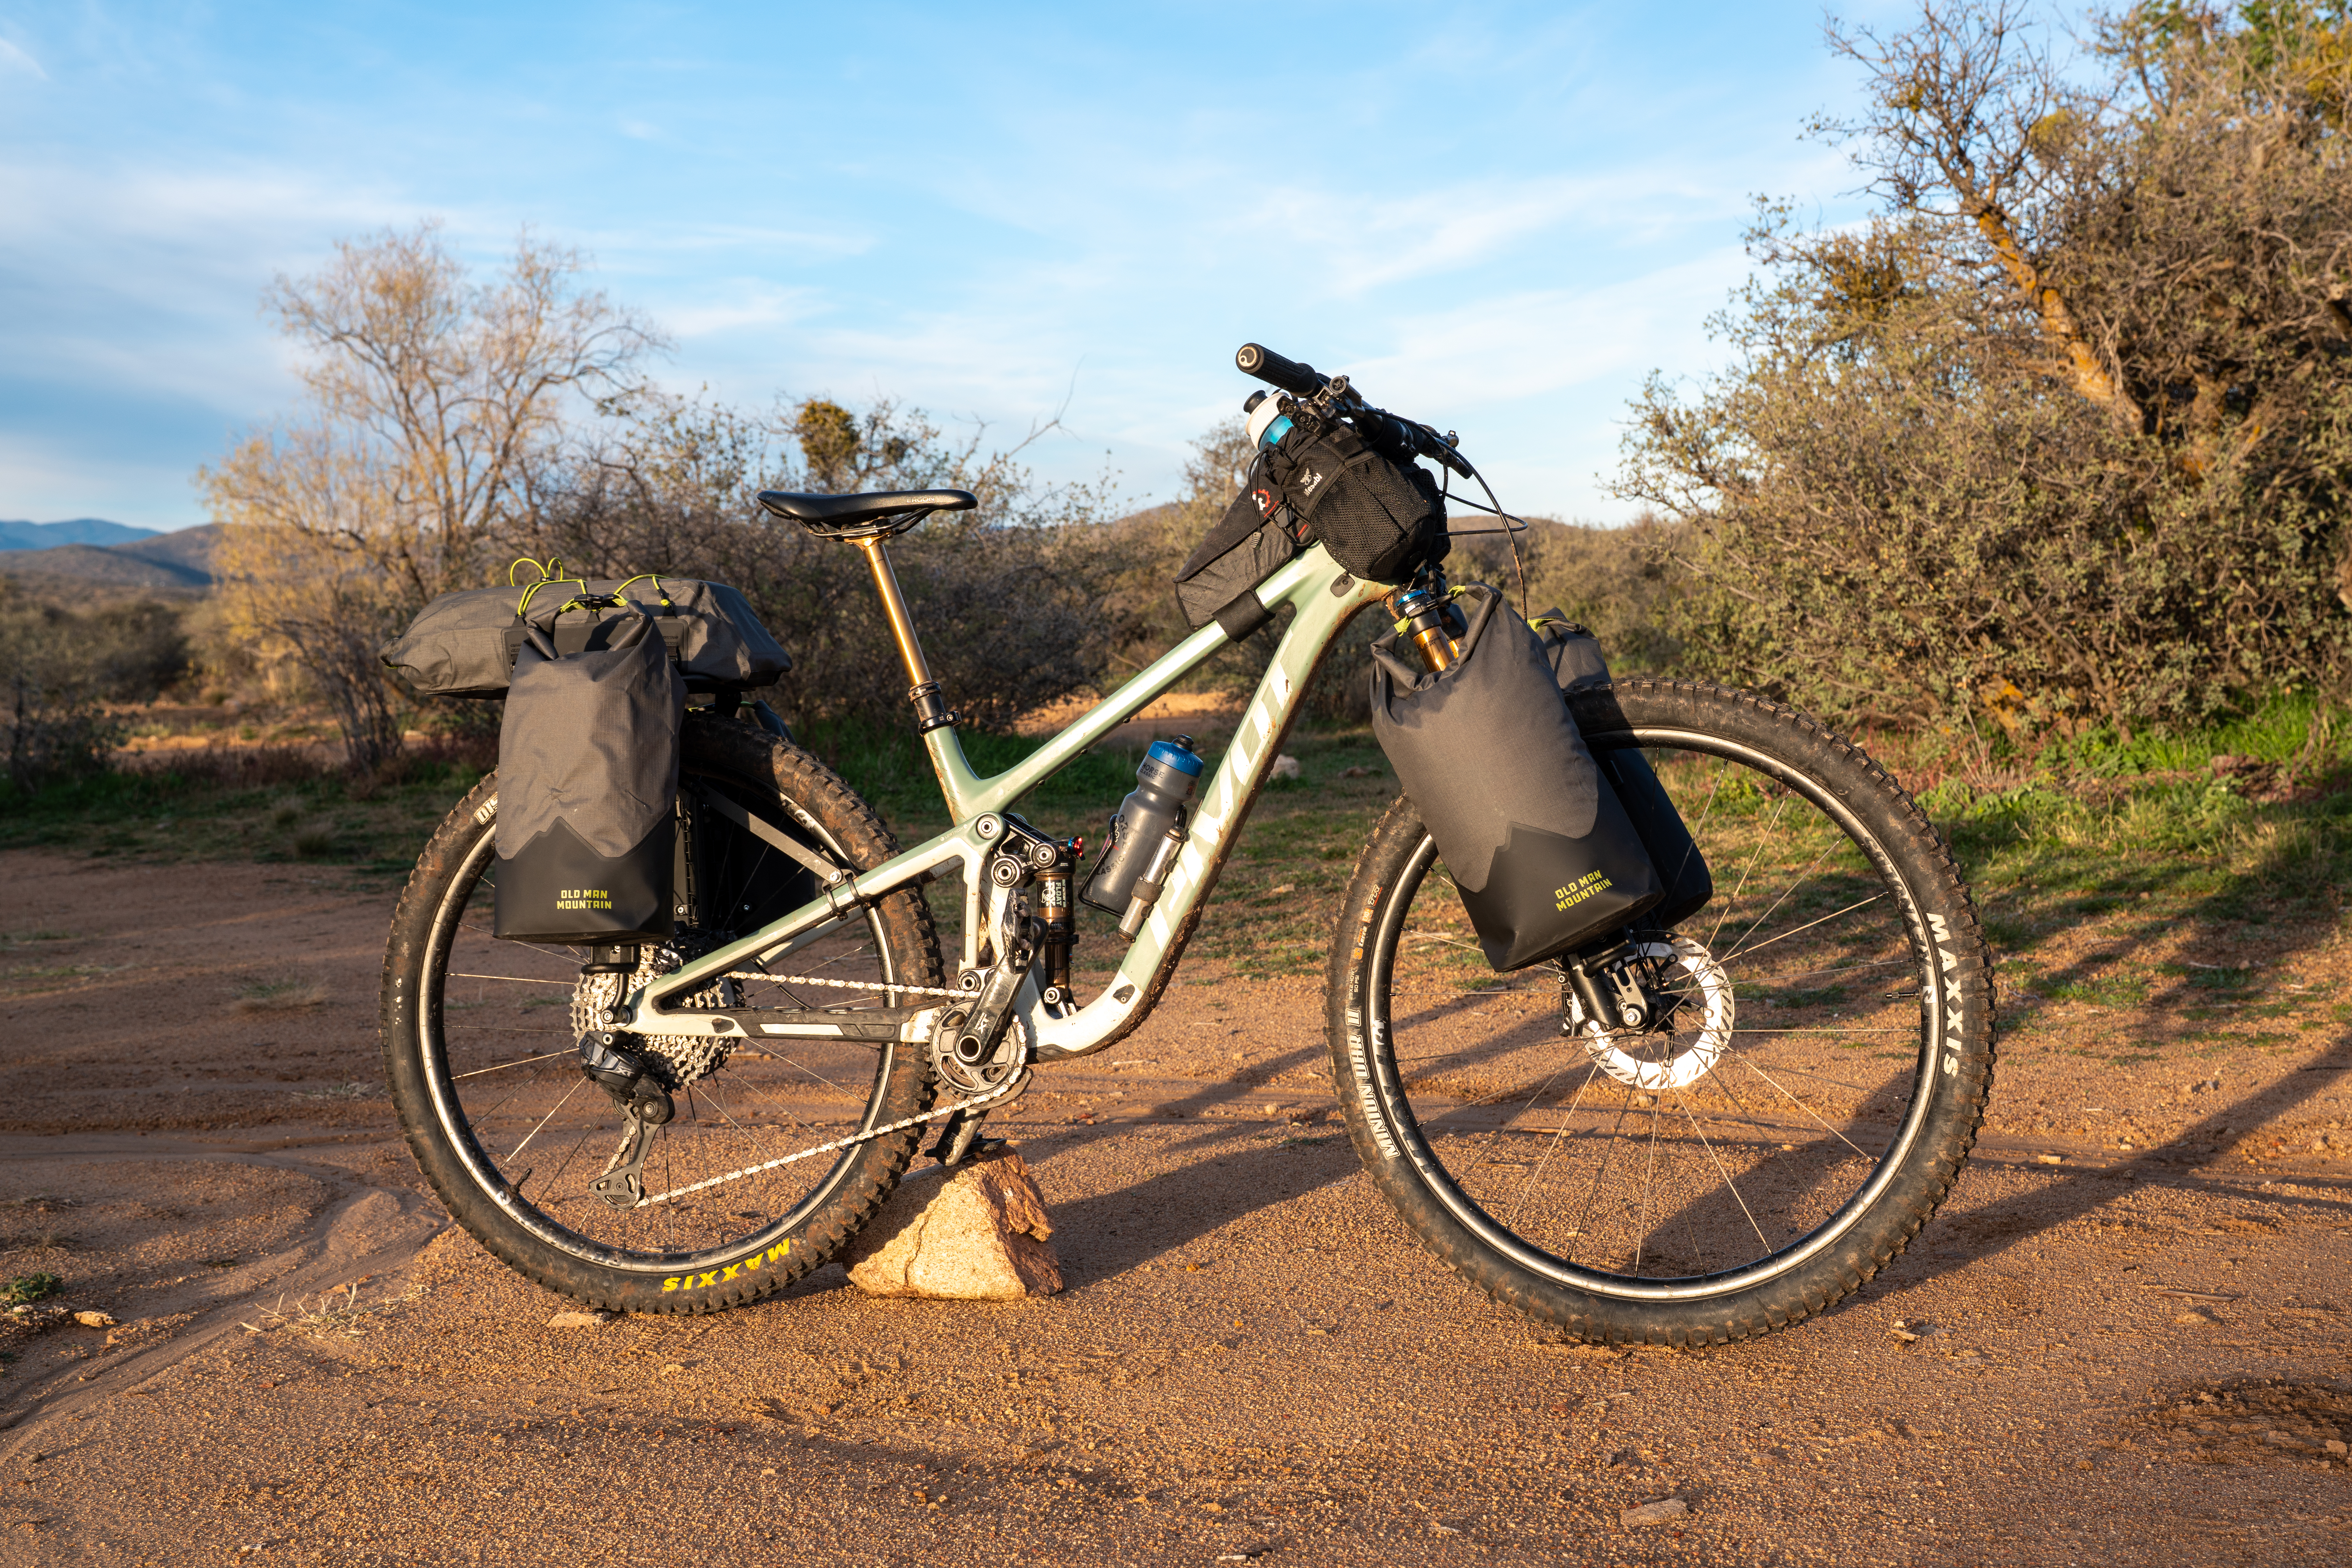
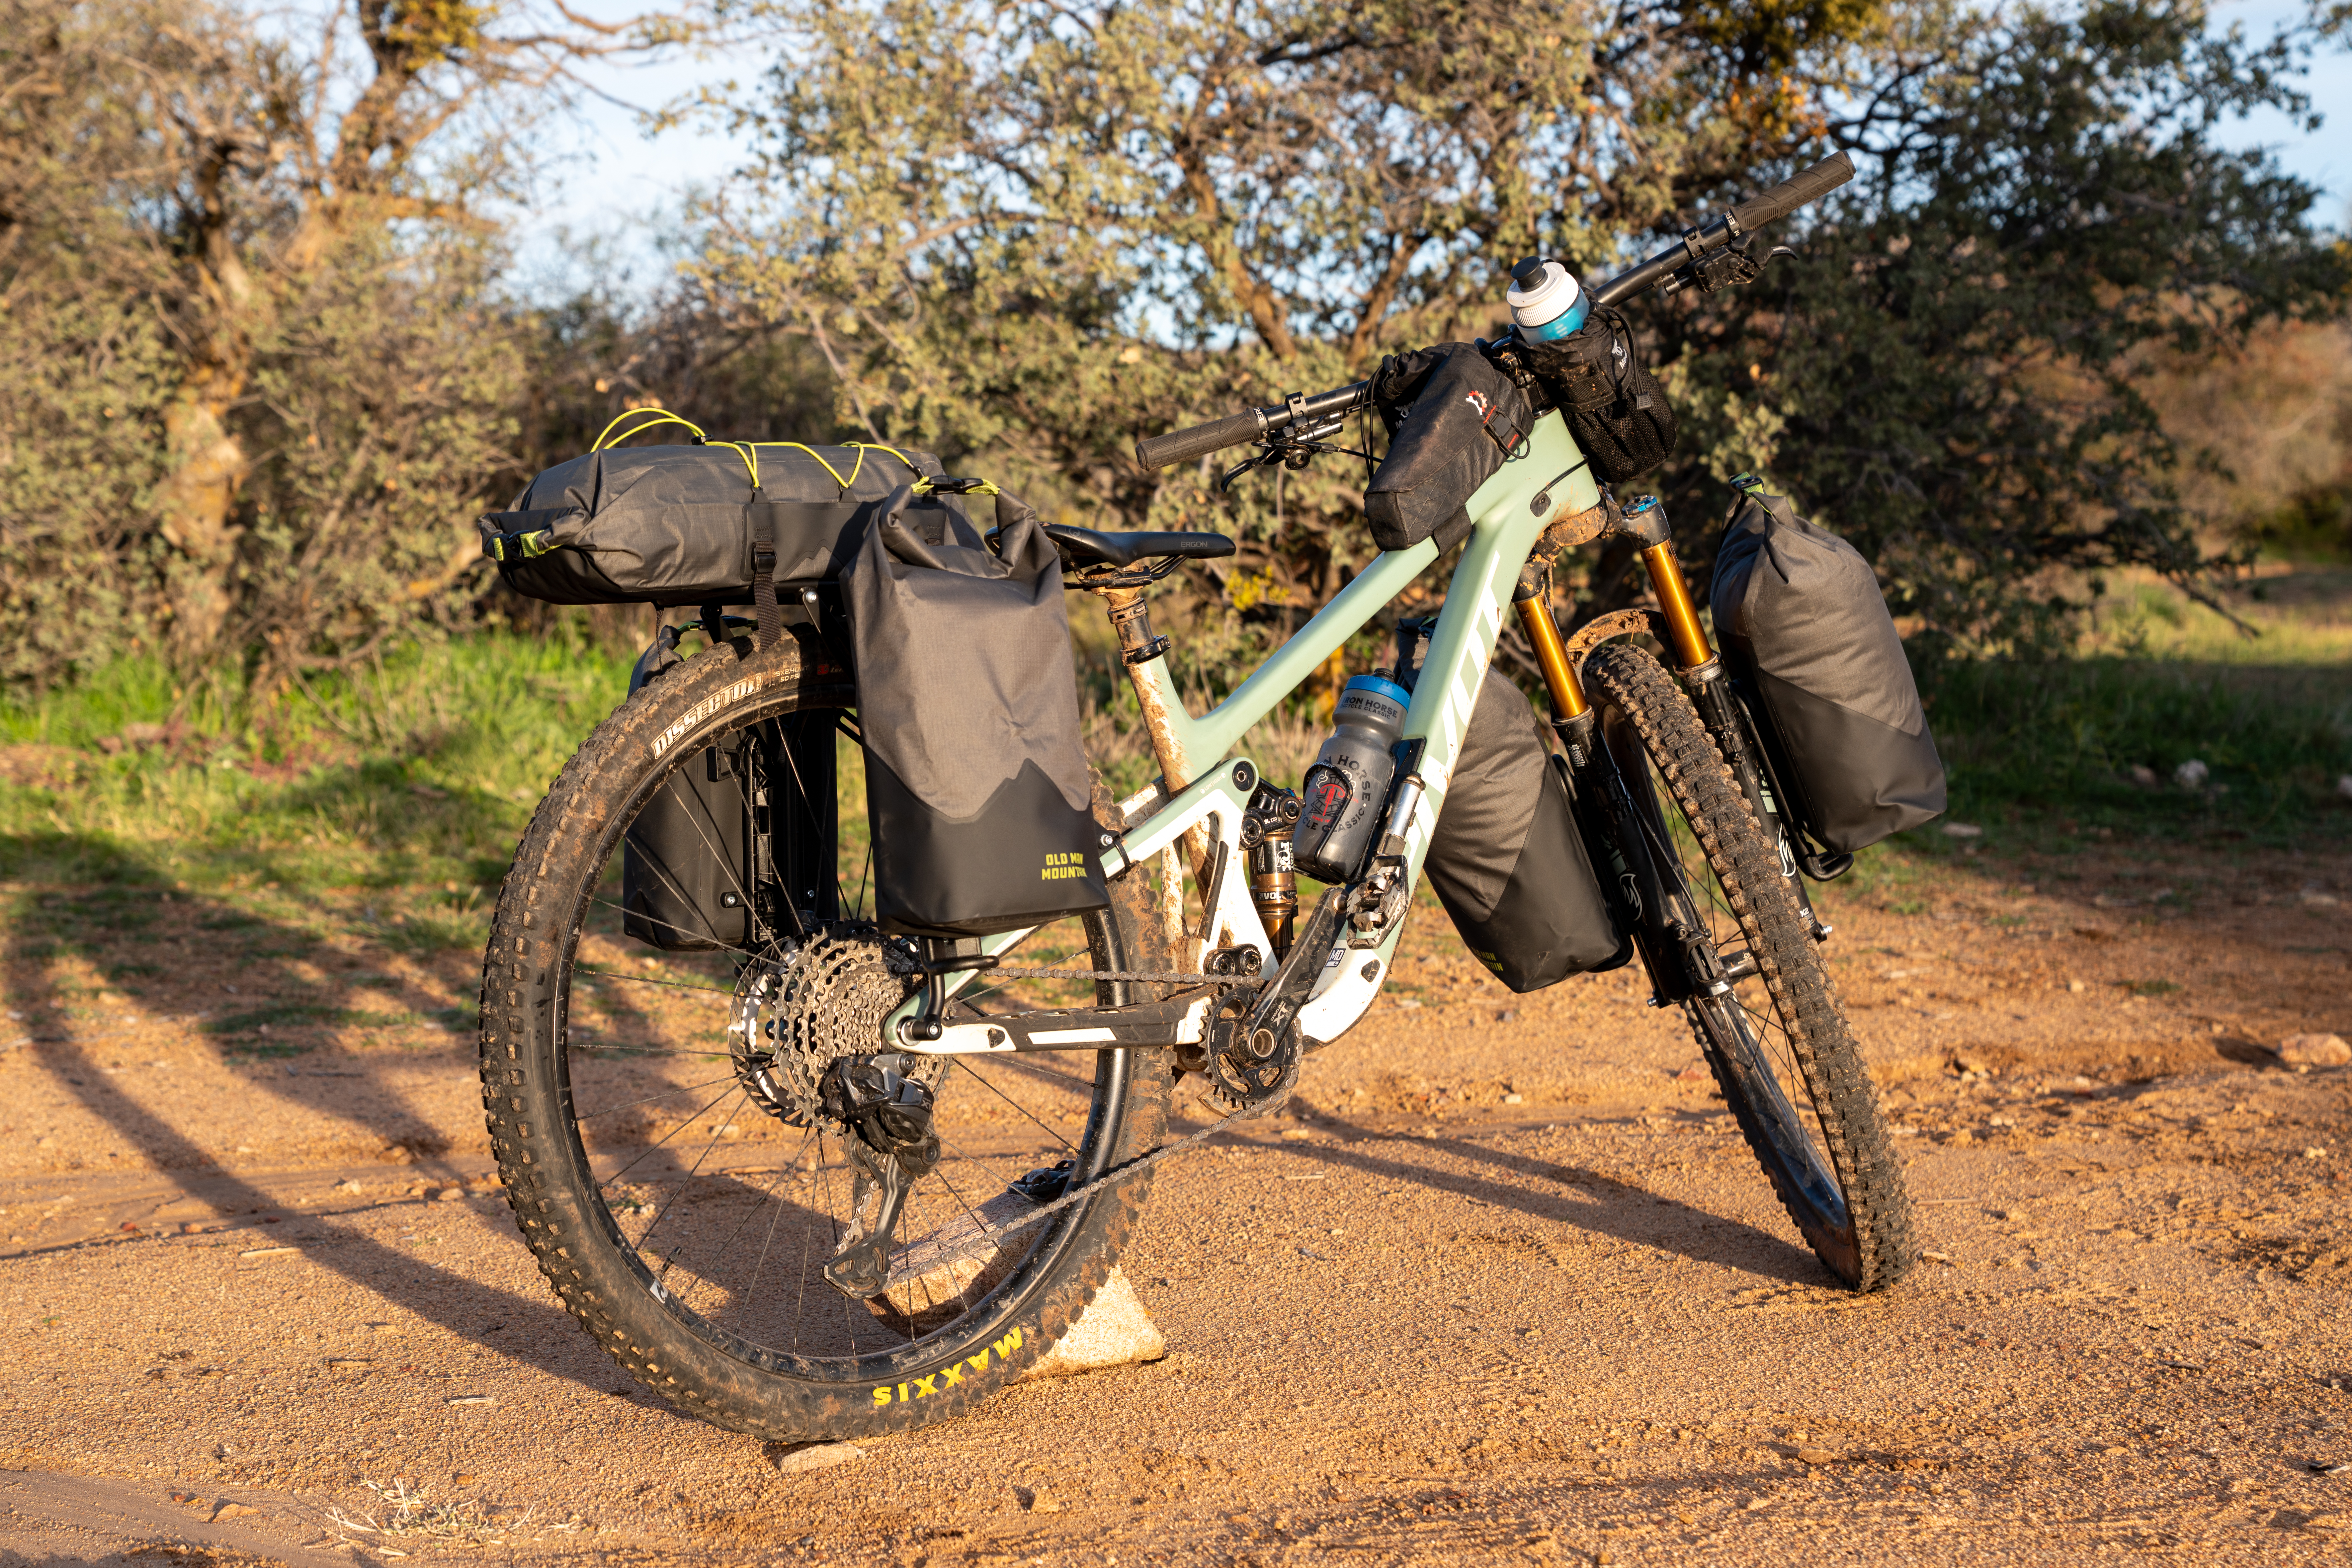
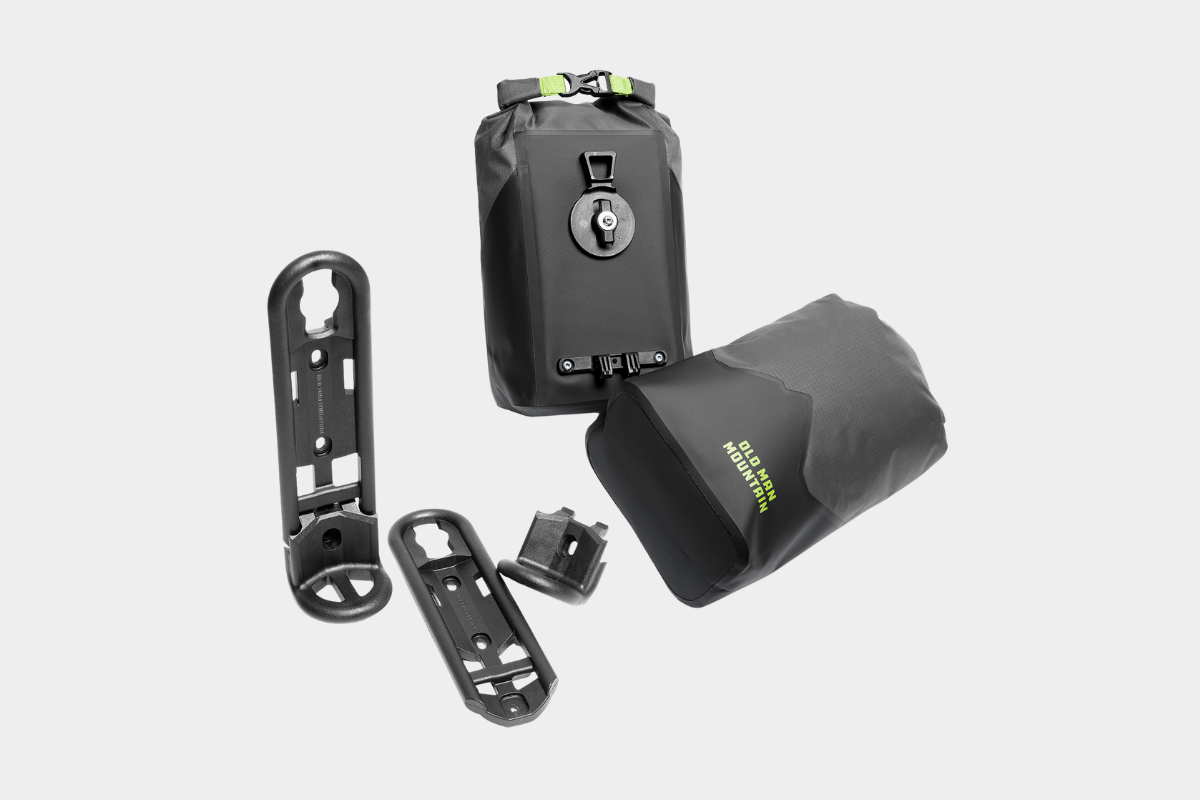
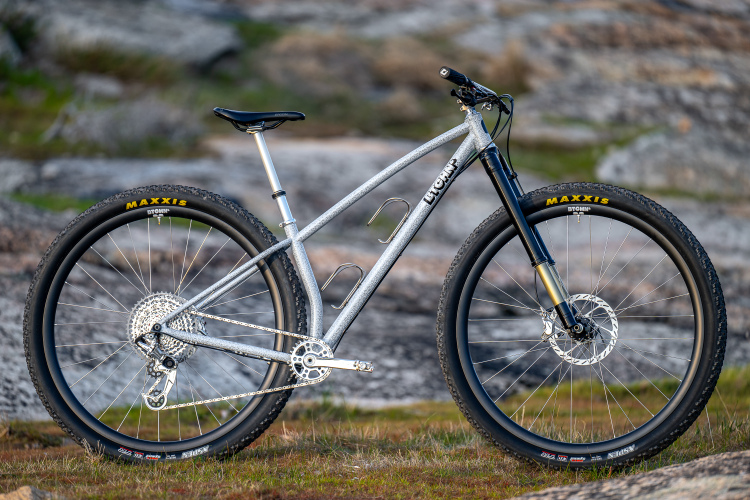
I reached out to Old Man Mountain (OMM) for advice on how to best create a bikepacking system that would work on my size medium Pivot Trailcat SL. They recommended that I try this setup.
- Rear rack: Elkhorn ($168)
- Front mounts: Axle Pack ($60 for the pair)
- Bags: 7L Hemlock with Flip Cages, x2 for a total of four bags ($175×2)
- Rack bag: 9L Atlas Rack Pack ($95)
- Front and rear fit kits ($68×2)
- Total cost: $809
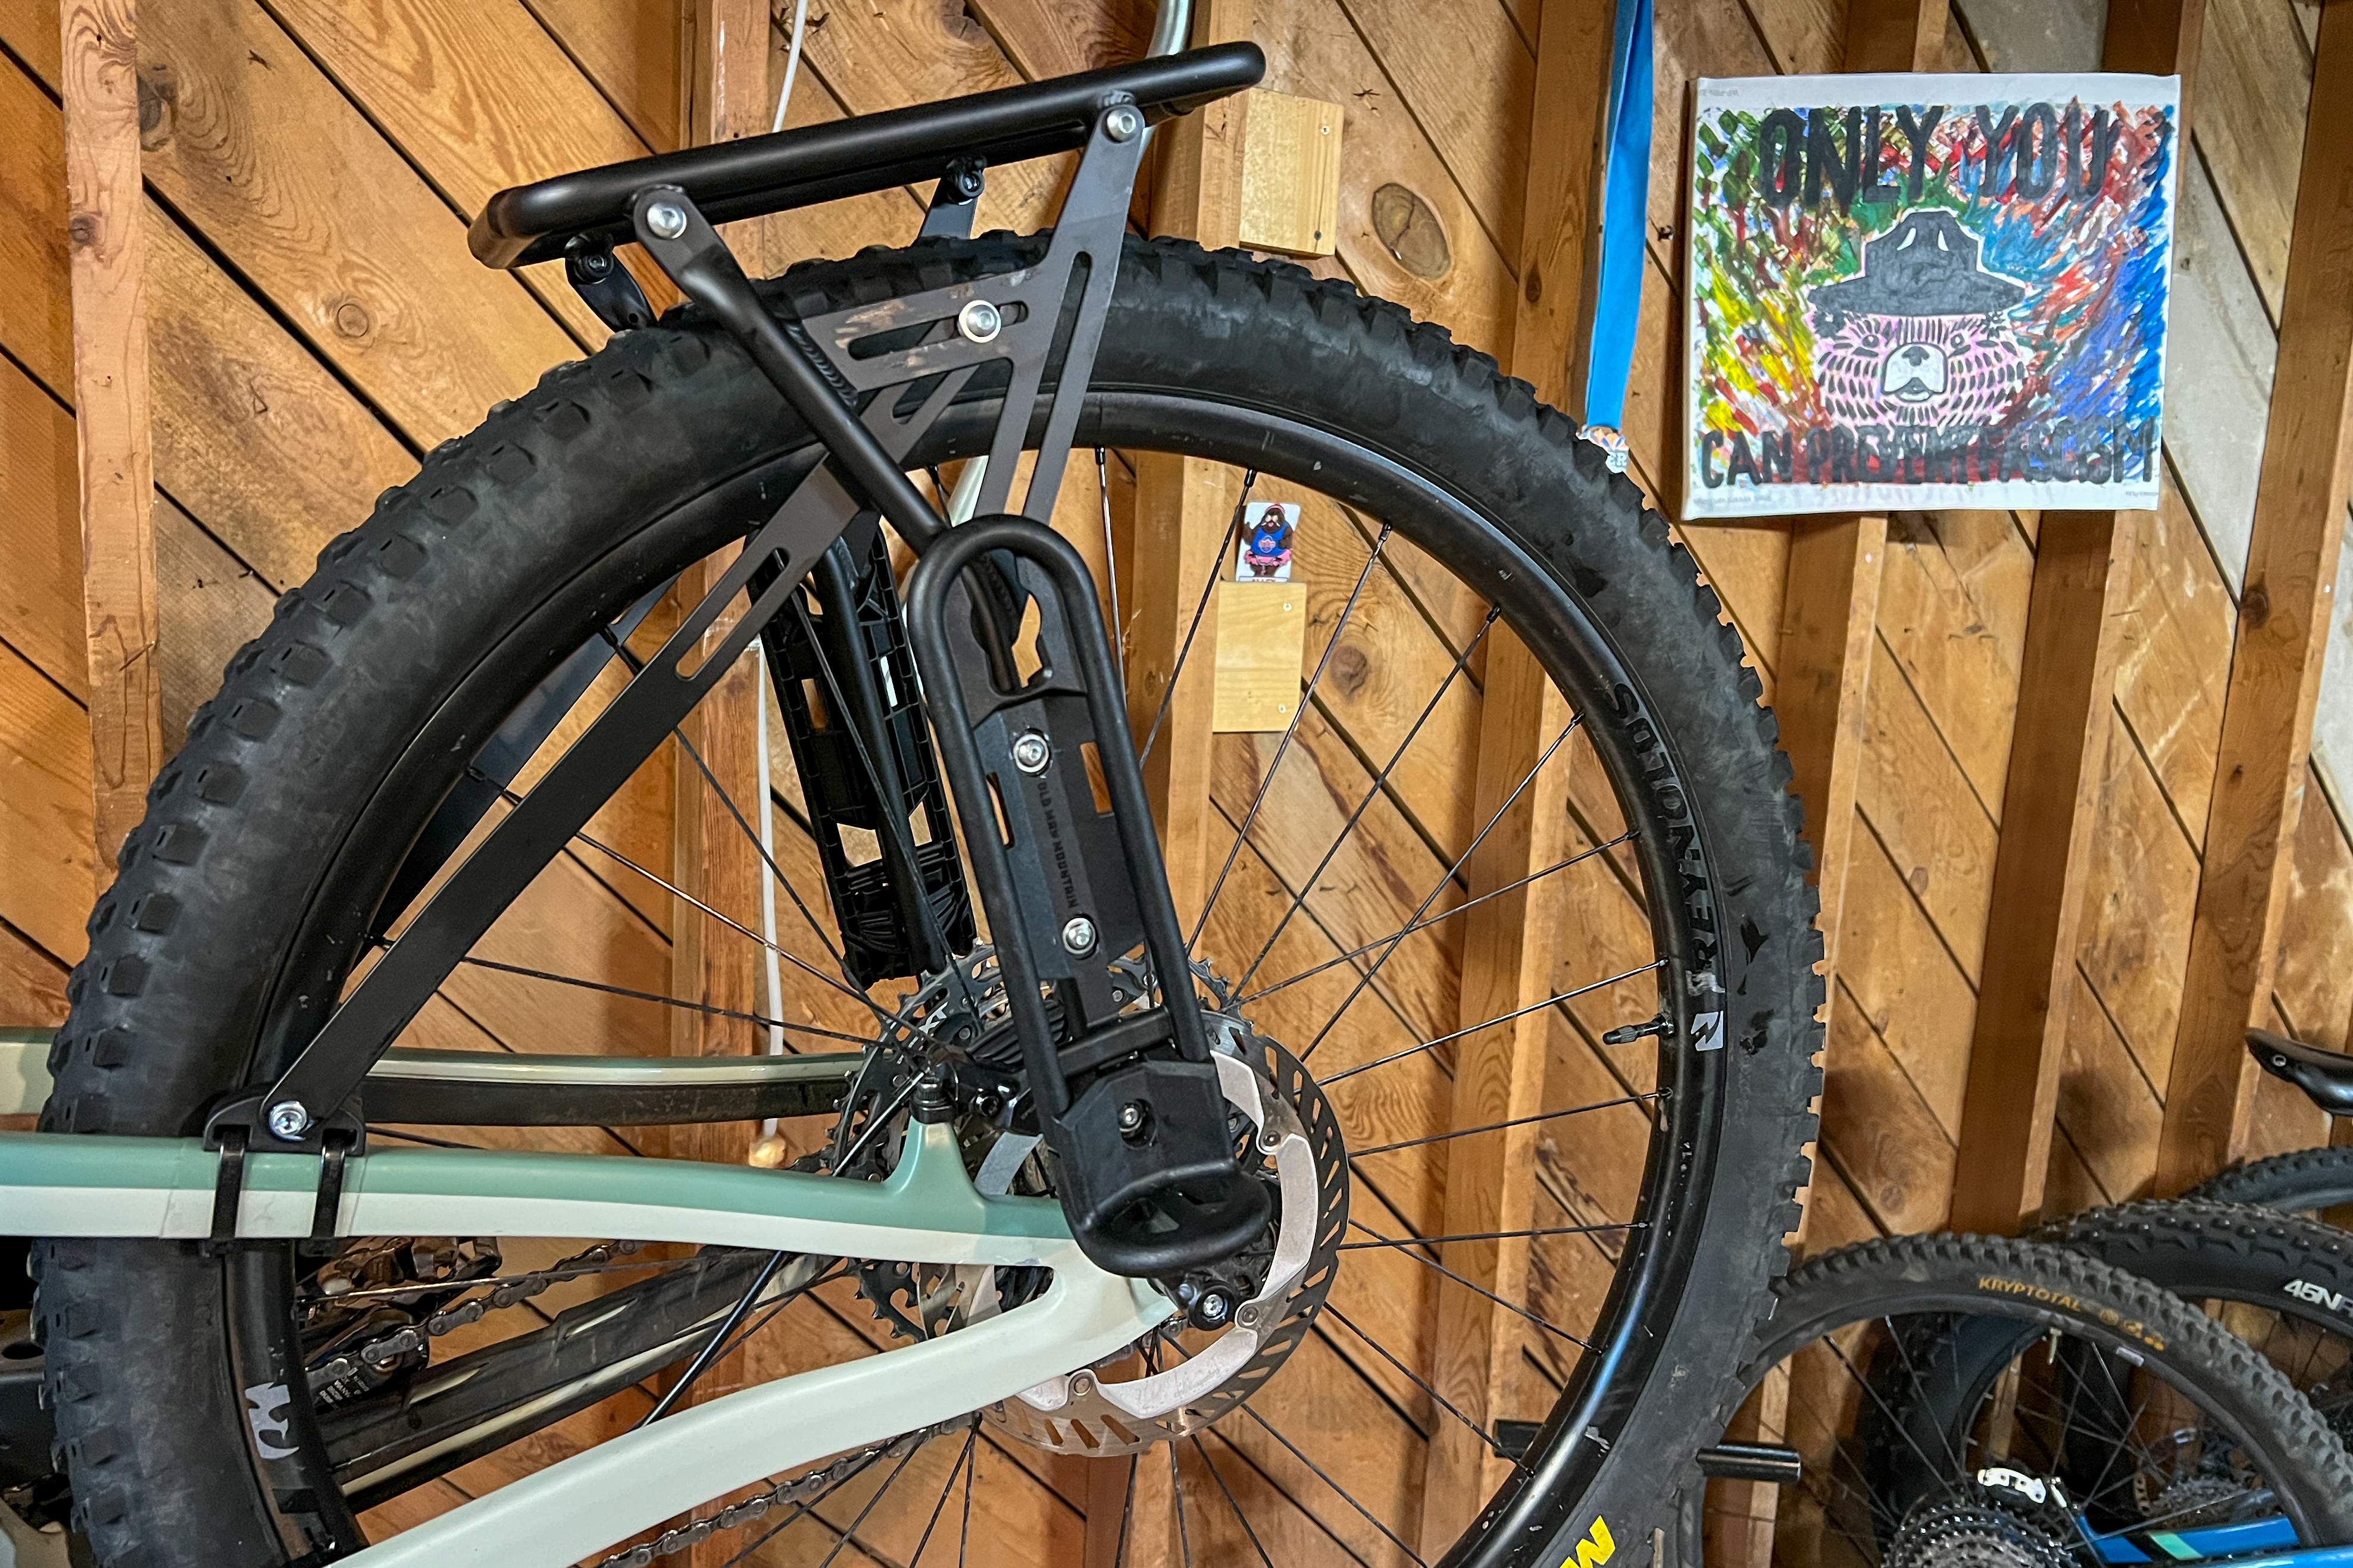
This is an entire bikepacking system comprising six different products, so to keep this review from being overly complex, I’ll try to review this system in its entirety. That said, OMM offers several different rack designs and sizes, and even a few different bags. The Elkhorn is one of the smallest racks they make, which I chose to give my seat the most room to move between the rack pack and the rear tire during full compression.
The Hemlock bags and Atlas Rack Pack can be used on most of the racks that OMM makes. The Divide and Impala Lowride racks are designed to work with OMM’s panier system instead of the Flip Cages.
Weights
Old Man Mountain racks tell a story of performance and robustness over weight. If you’re most worried about reducing the weight of your bikepacking setup, you’ll probably never buy these racks. But if durability and dramatically improved gear hauling capabilities are important to you, then read on for the damage.
- Assembled Elkhorn rear rack + flip cages: 1010g
- Each dry bag (4): 355g
- Front mounts + installed flip cages: 245g
- Deck pack: 290g
- Both axles: 225g (replaces existing axles)
Both of the axles, aka the “fit kits,” replace the current axles in your bike. While they probably add a few grams, the increase is fairly negligible. So, the total weight of this bikepacking system above and beyond a dry bike is 1,900g (4.2lb).
To compare this to your current setup, weigh all of the bags that this system would replace, do the math, and see what your weight penalty is. You could also run a standard frame bag, top tube bag, stem bags, and handlebar bags of various sizes in addition to this system from Old Man Mountain… but you probably won’t need all of that storage room.
Installation
Regular readers will know that I’m not the most adept bike mechanic, but even I was able to assemble and install all the components of this OMM system in my at-home bike shop, using the provided written and video installation guides. I found the process to be fairly time-intensive, so I tackled it in two different sessions. While there were a lot of bolts to twist and steps to complete, and making sure everything is properly aligned takes a bit of effort, all things considered, the install is fairly low-tech. The only tools I used were a hex key set, pliers, a crescent wrench, and fingernail clippers (for trimming zip tie ends).
Installation will vary depending on the bike and rack, but generally speaking, I found it very achievable for even a mediocre mechanic.
Technical details
Here’s how these various components mesh together.
First, the fit kits replace both thru axles, front and rear. These special axles provide new locations for both the rack and the Axle Pack to bolt to. The rear axle design also supports the weight of the rack and bags, transferring most of the load through the axles as unsprung weight.
For additional stability, plastic pucks are ziptied to the frame, and stabilizers from the rear rack bolt to the pucks. Pucks are also used for the upper connection of the Axle Pack.
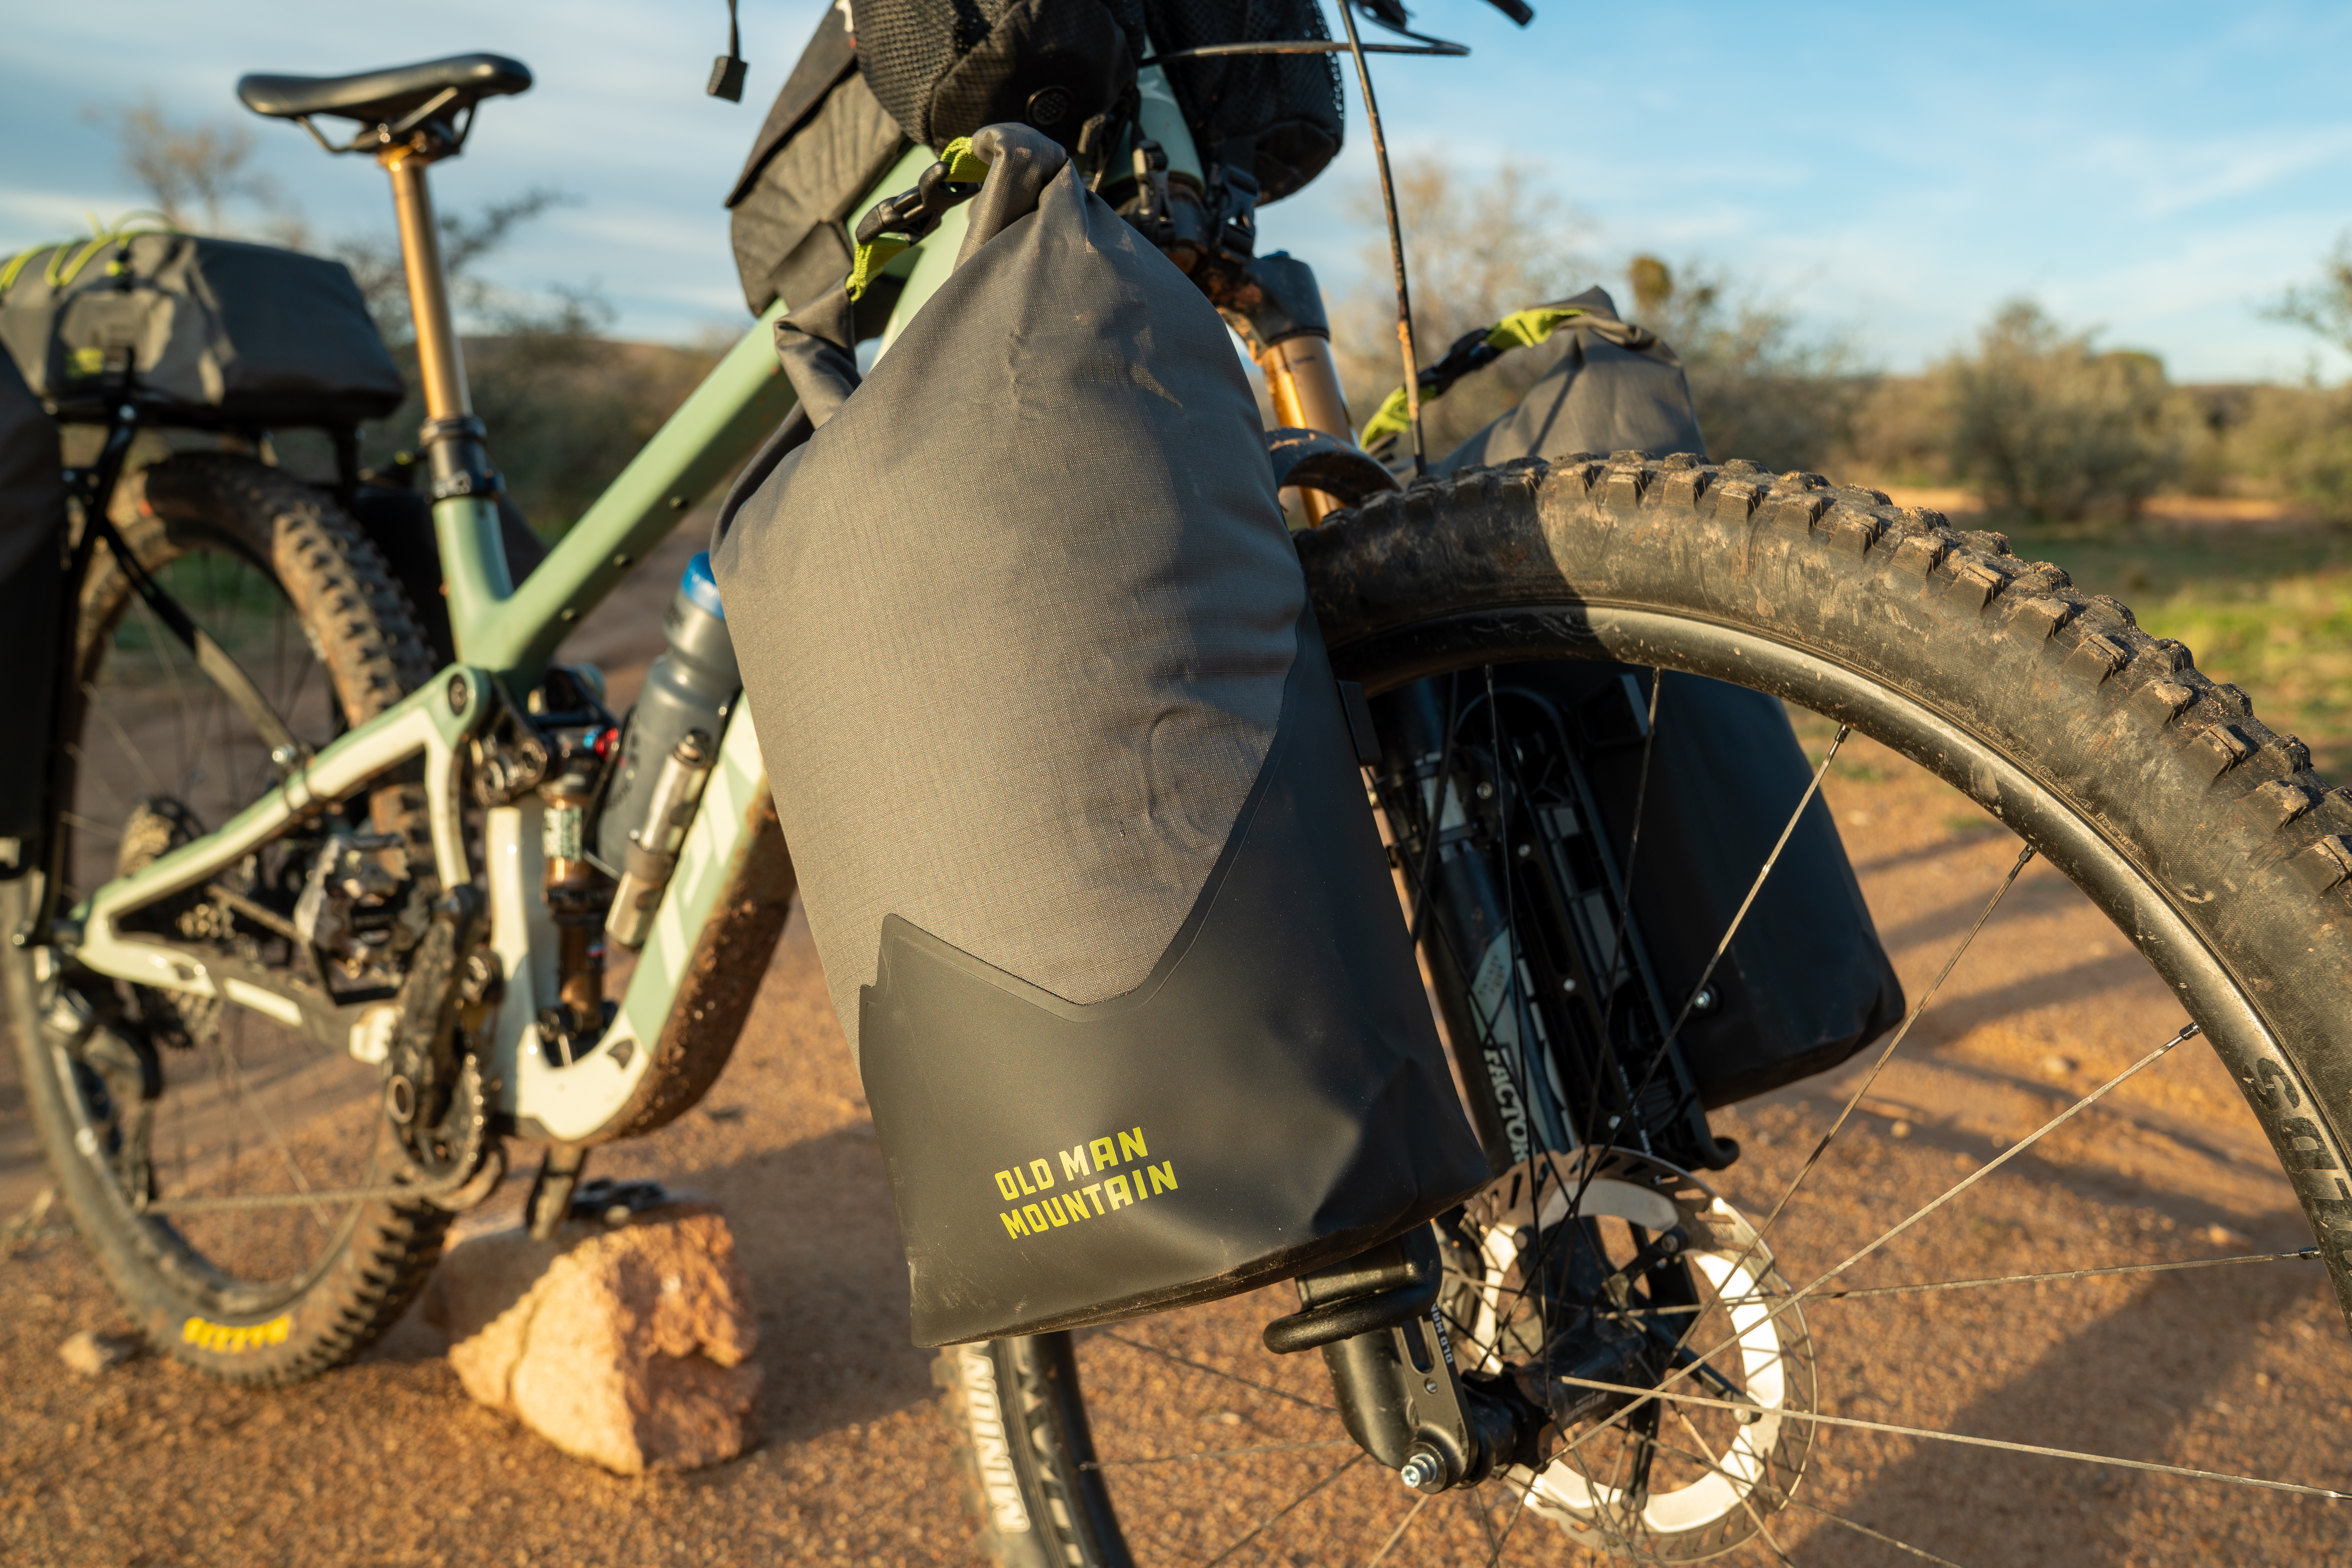
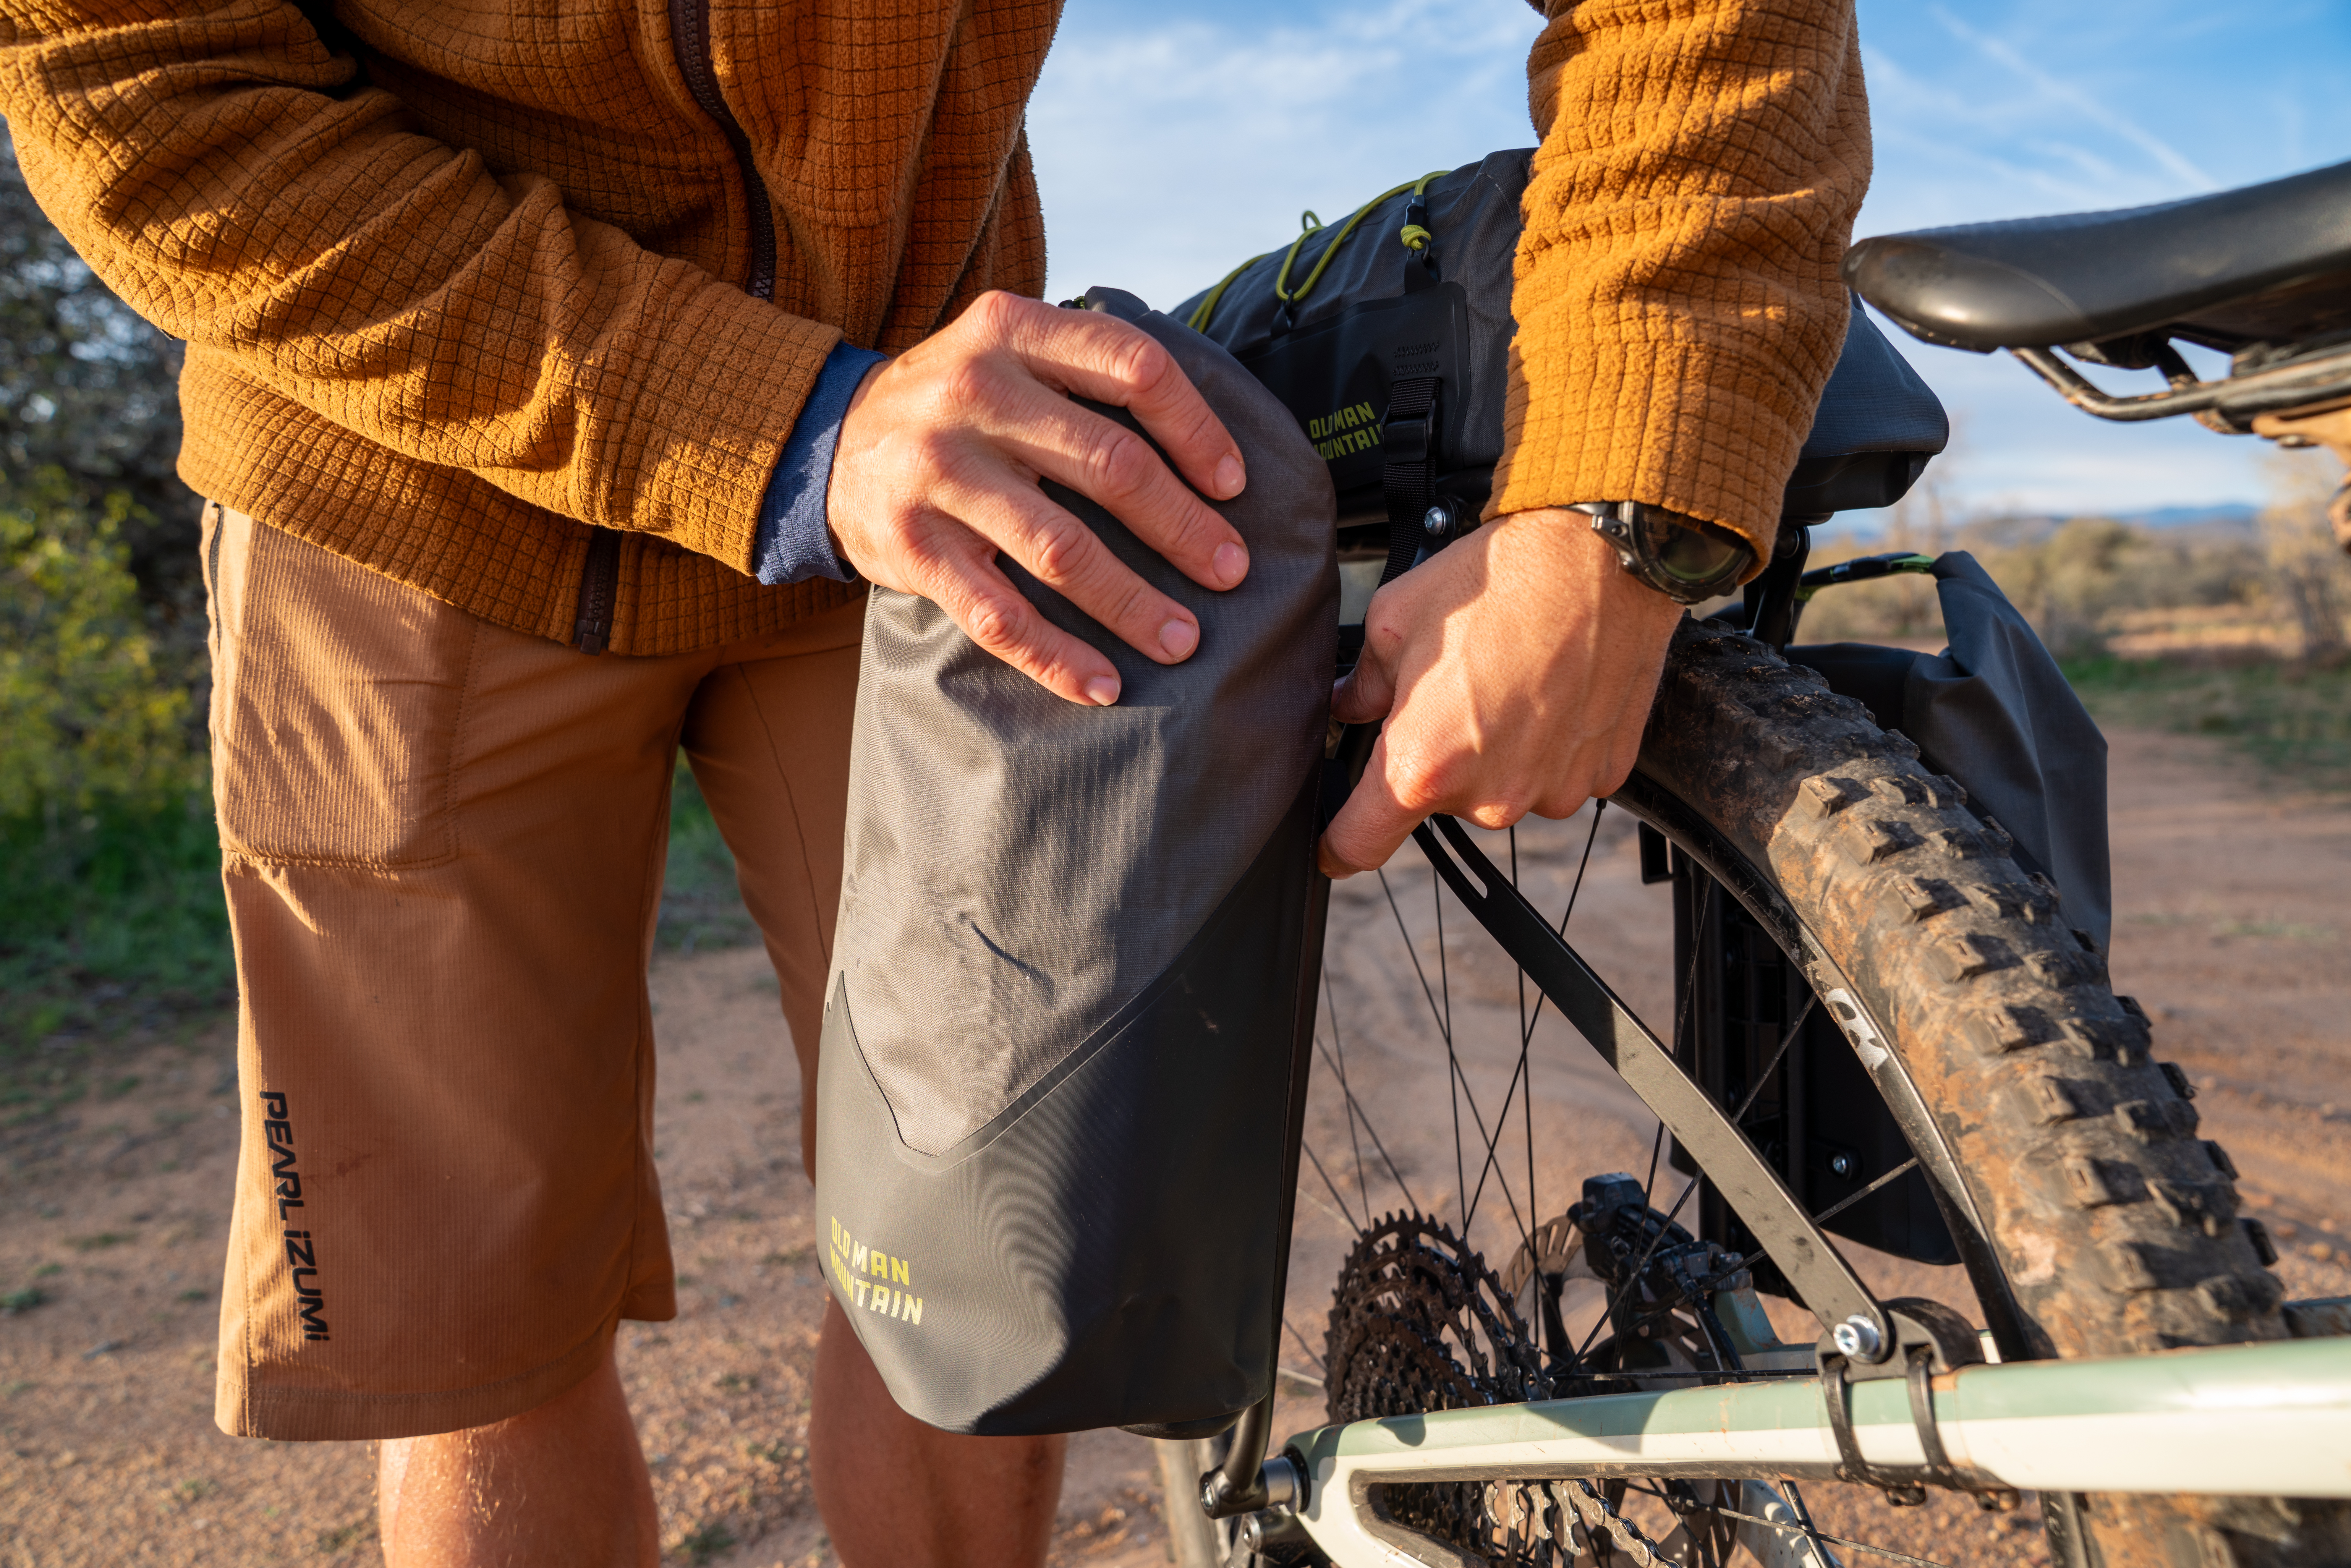
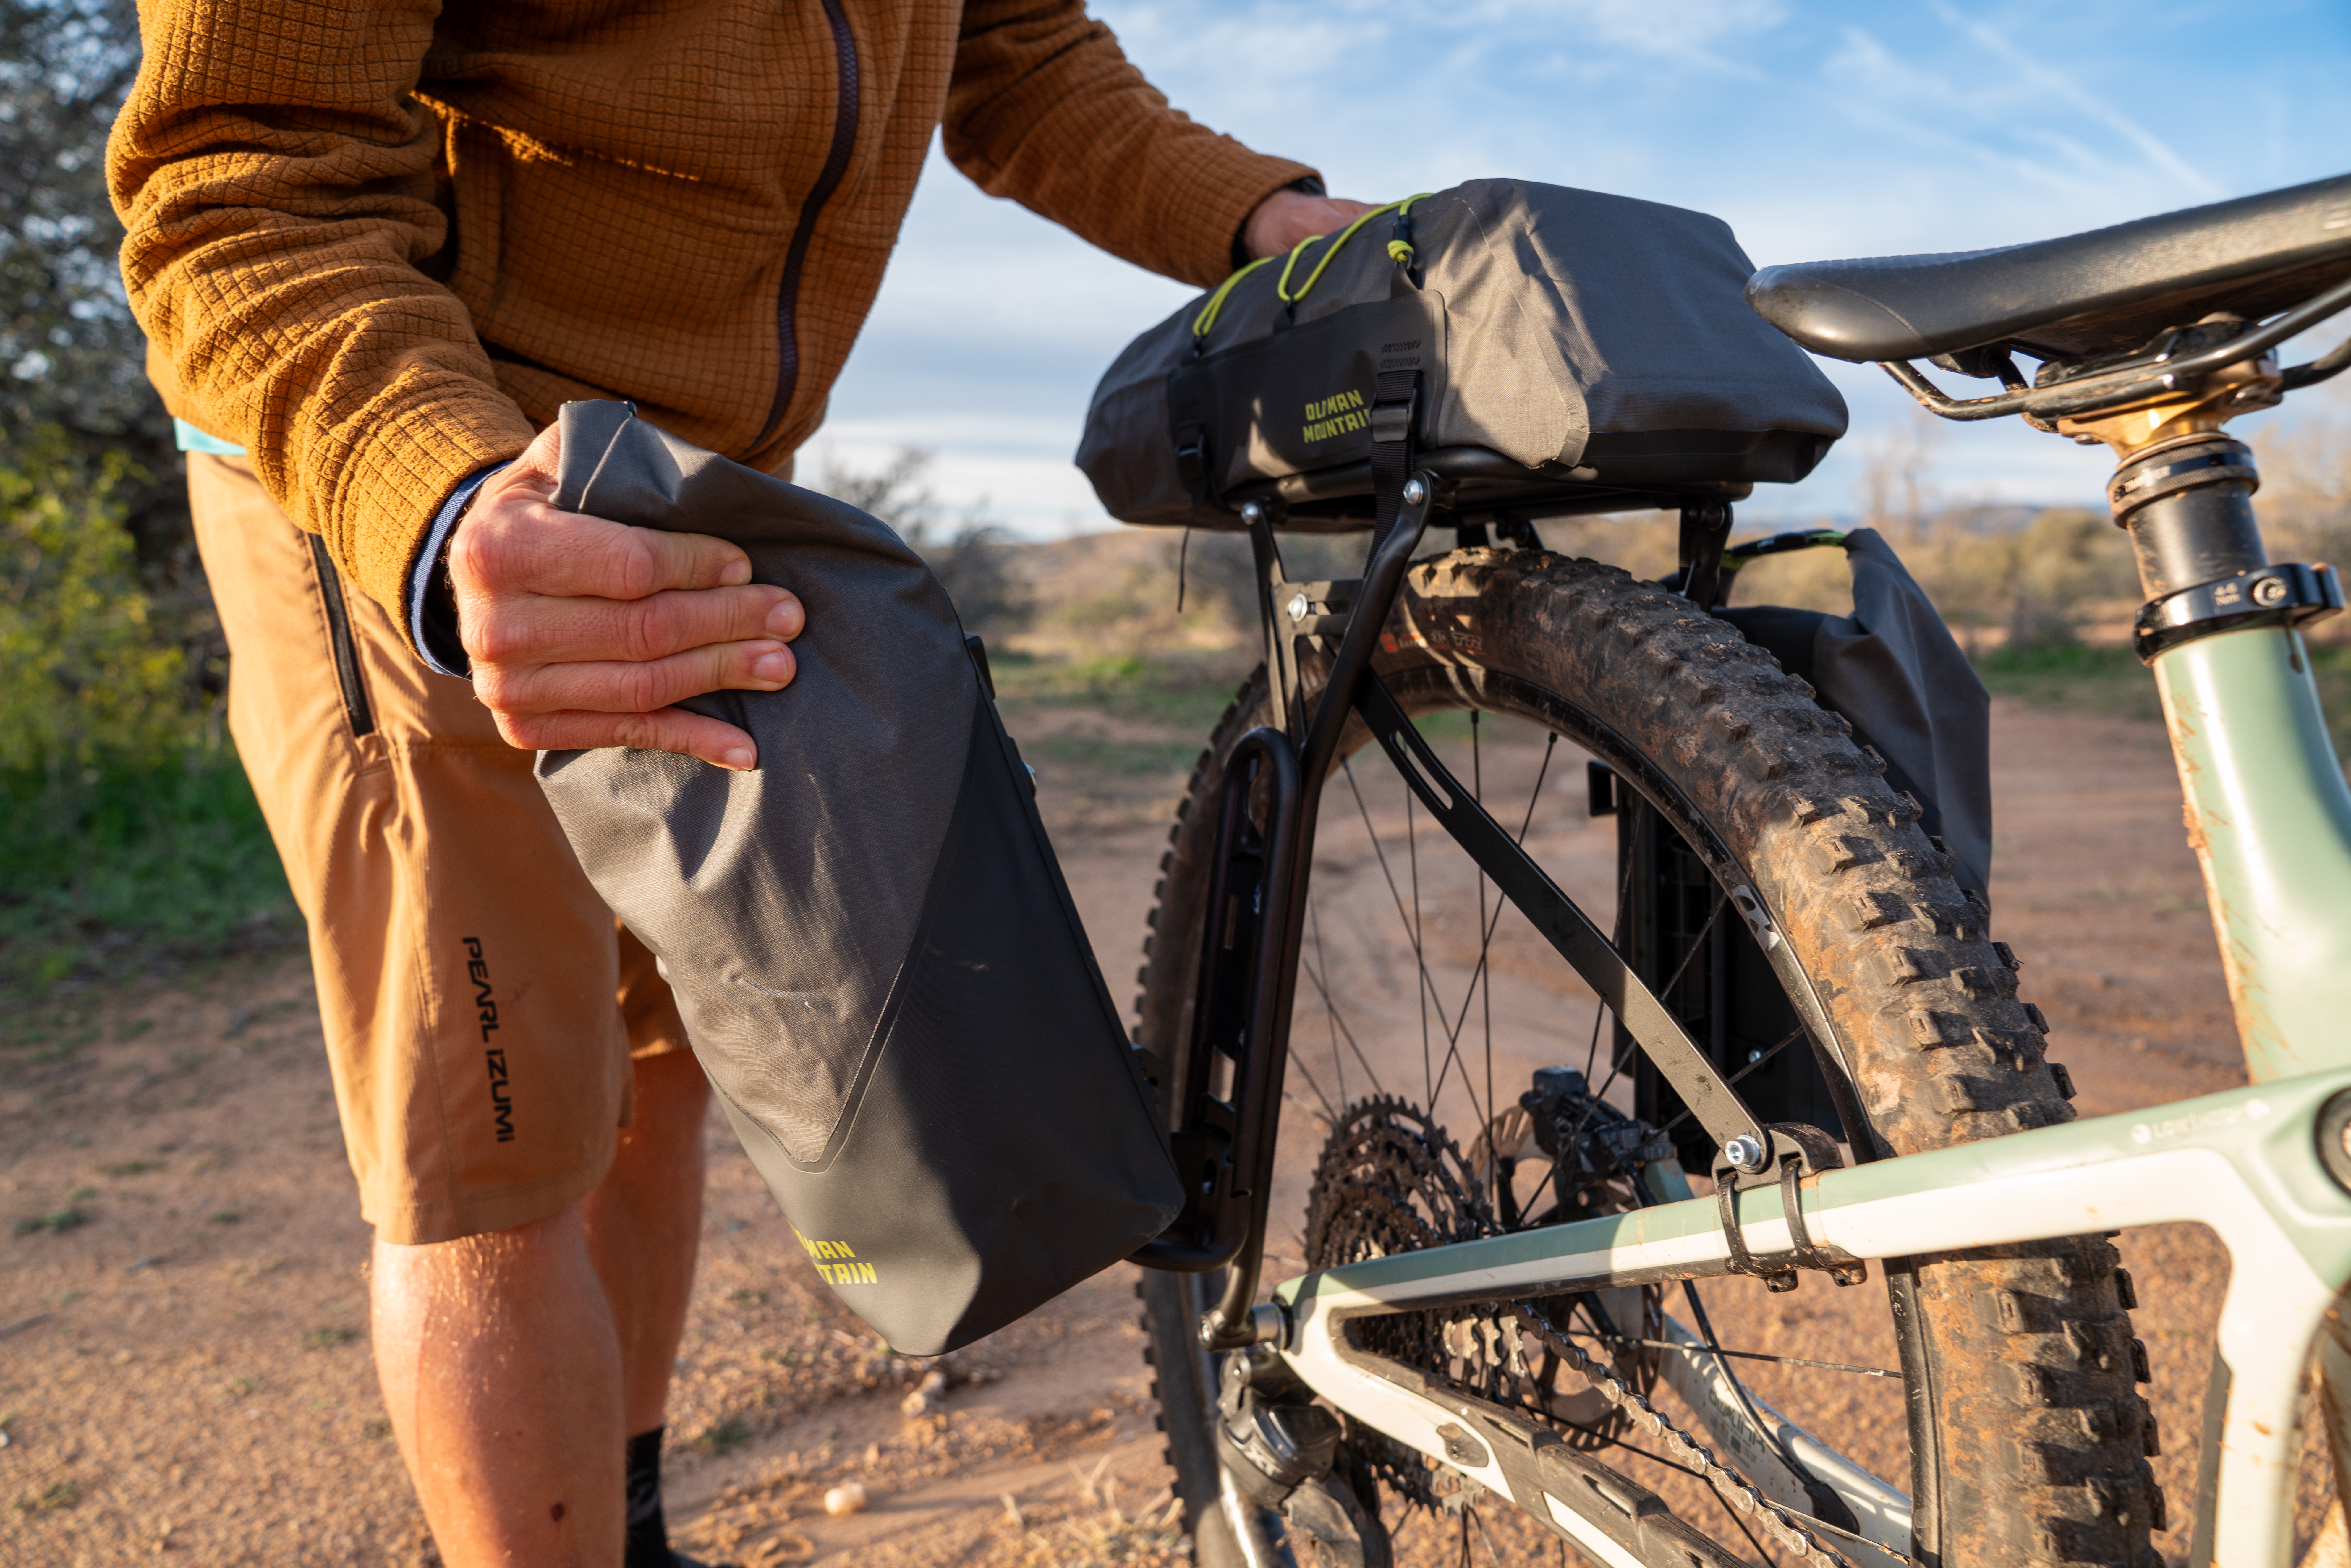
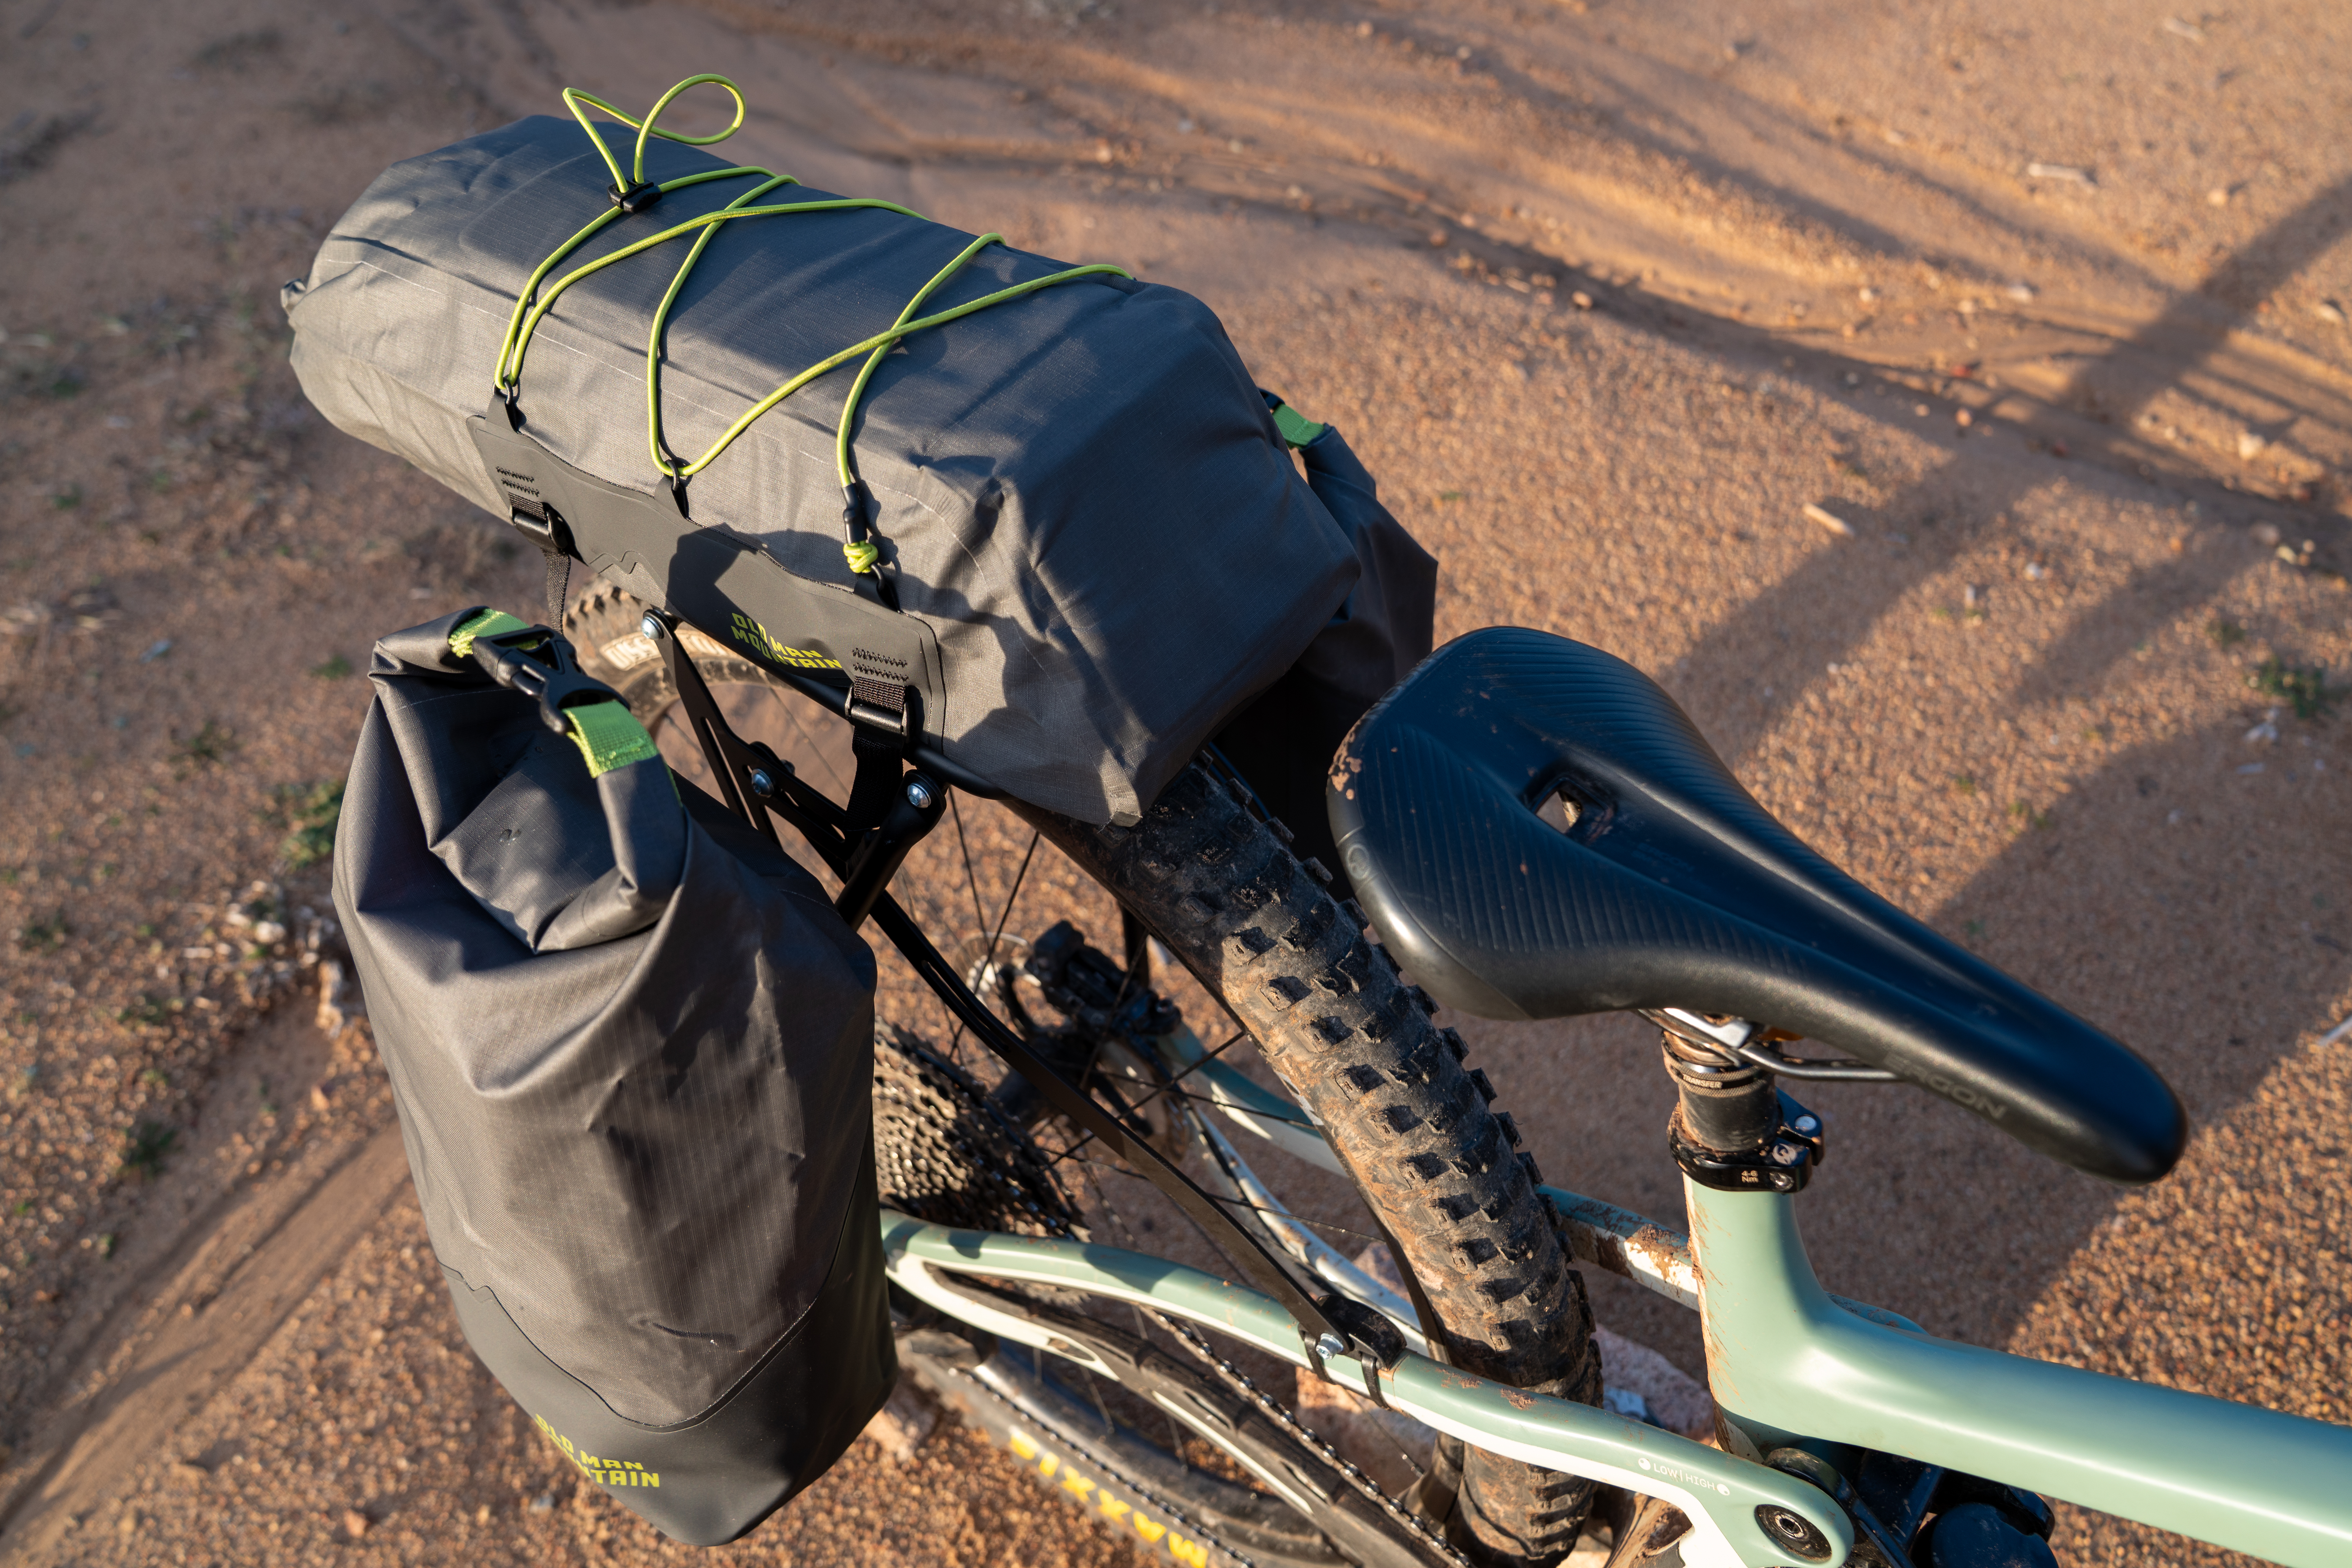
Once the flip cages are bolted on, it’s time to attach the specially-designed dry bags, and this is where the magic happens. The hooks on the back of the dry bags slot into holes on the flip cages. Then, the flip lock on the upper section of the dry bag slots into the cage, and with a turn of the handle, the bag is locked securely into place. There’s zero rattling or chance that a bag will come undone — it’s locked firmly to the bike.
The deck pack attaches to the deck with basic webbing straps.

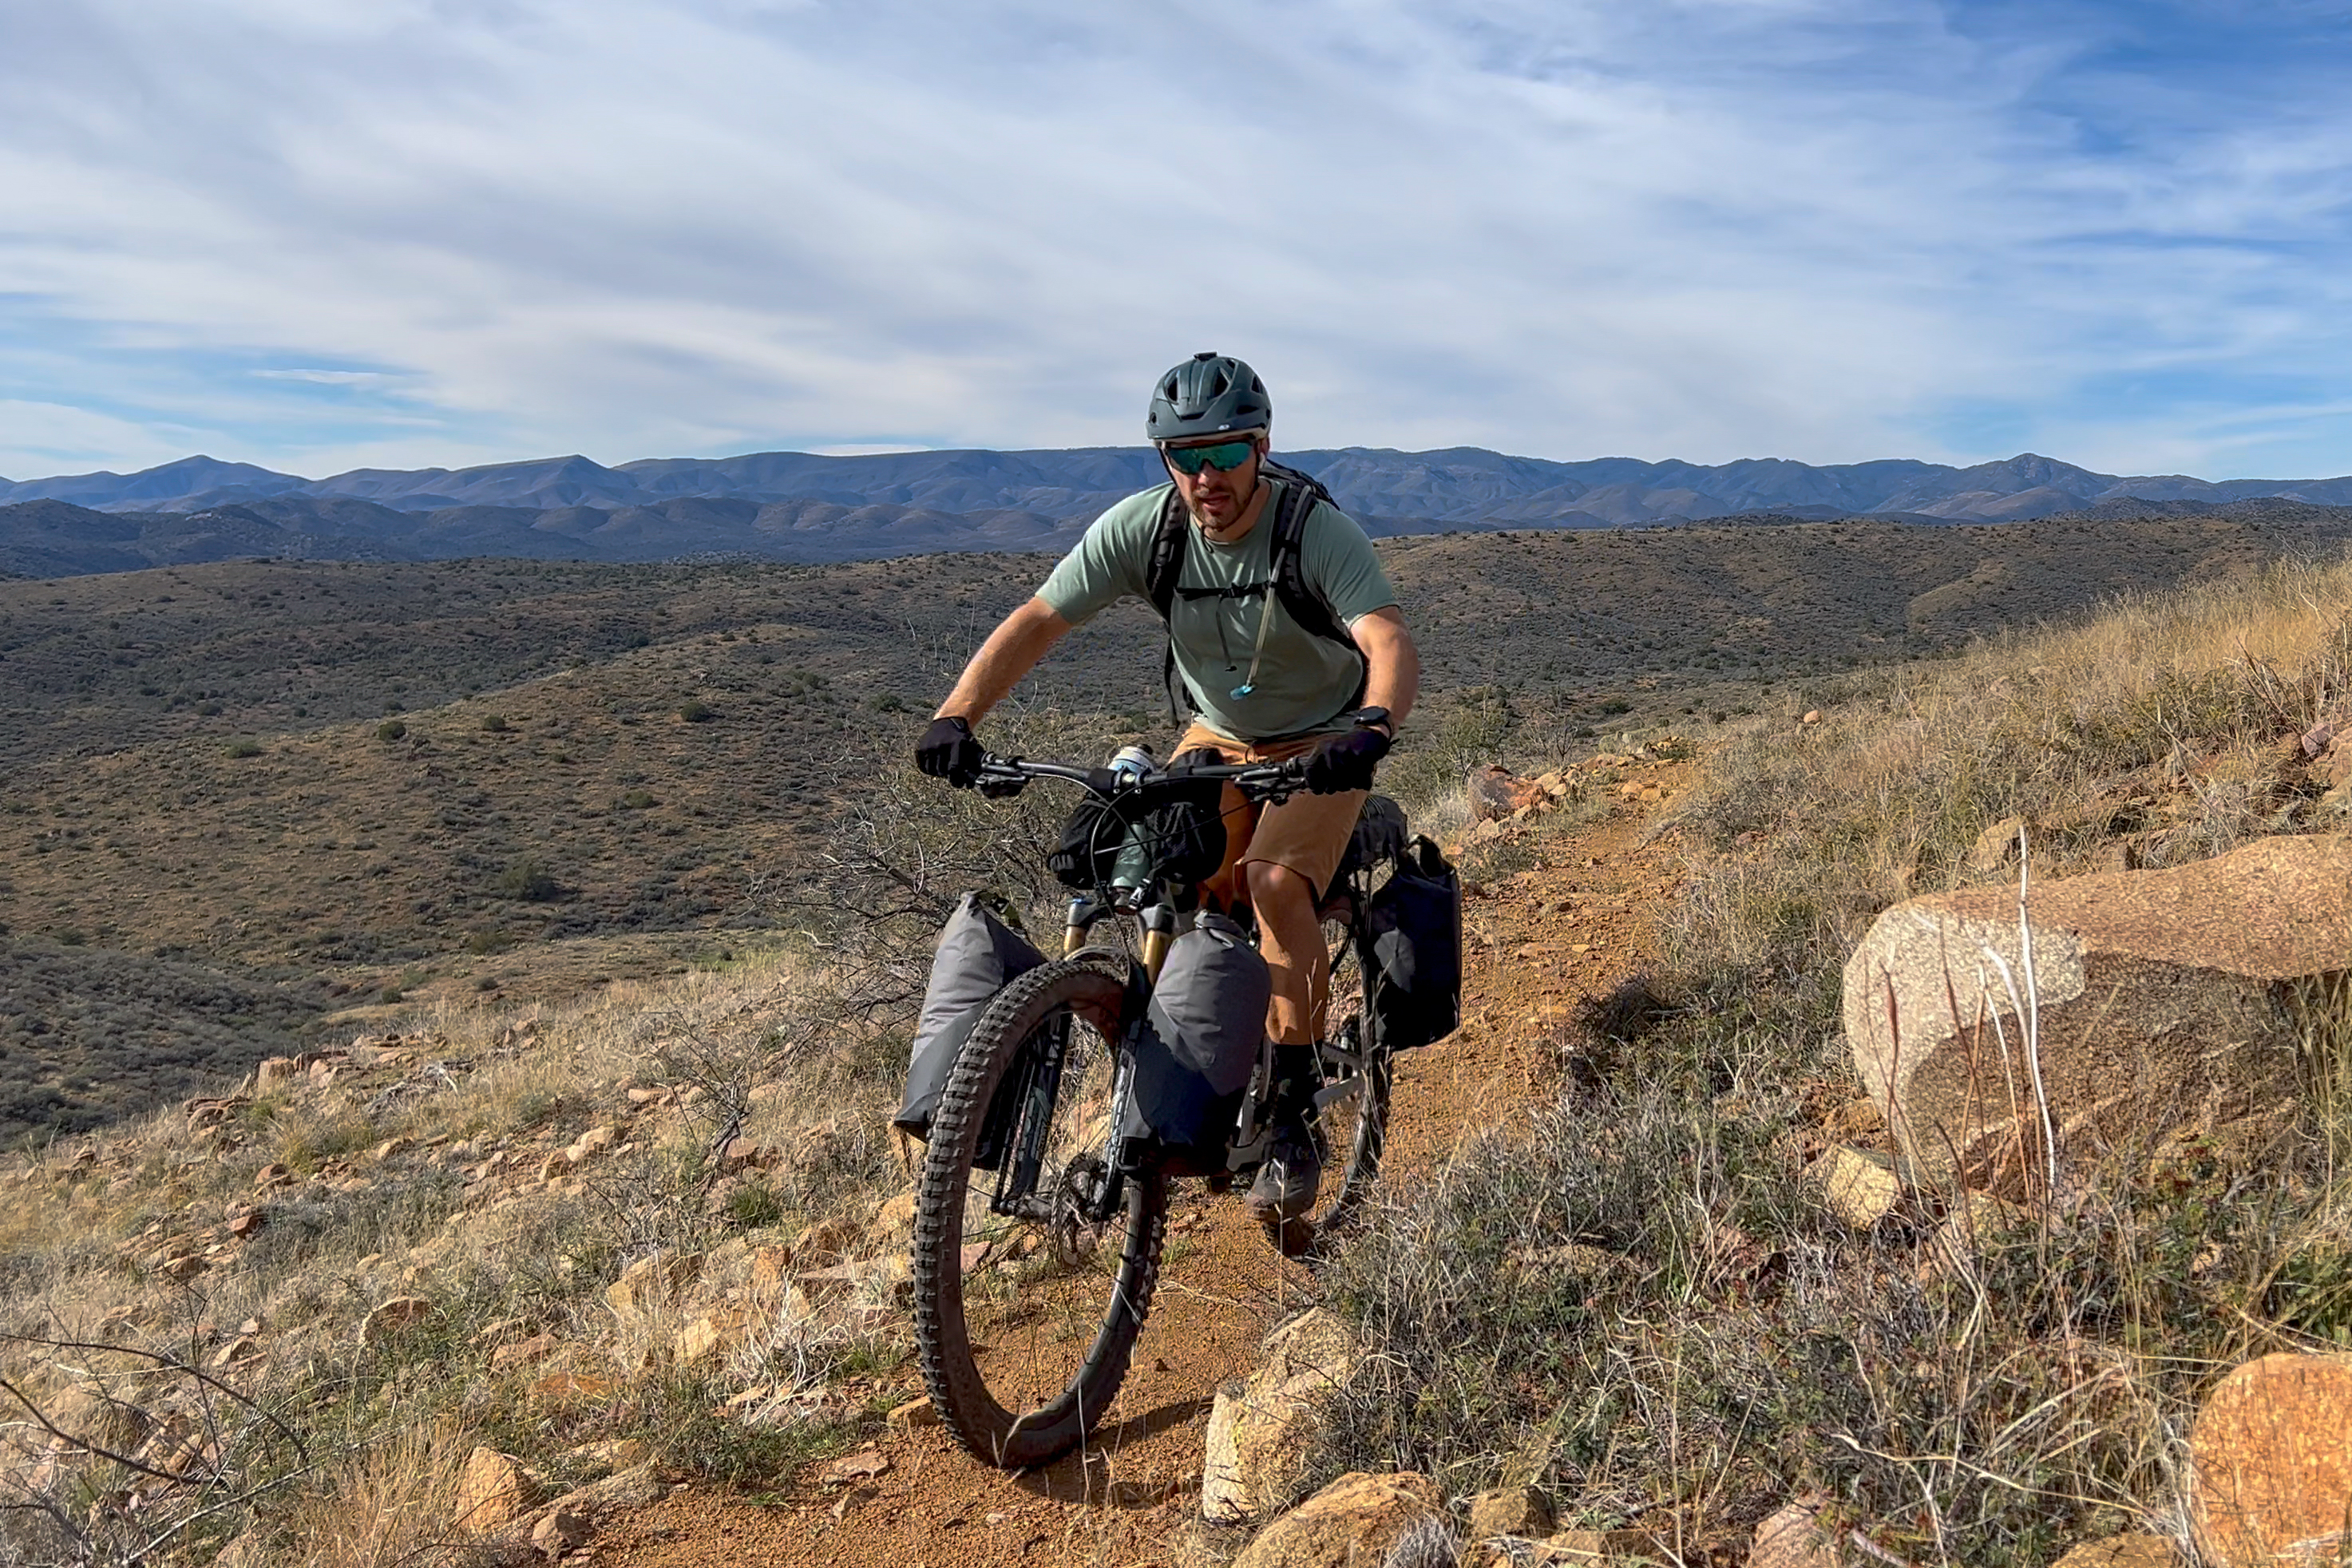
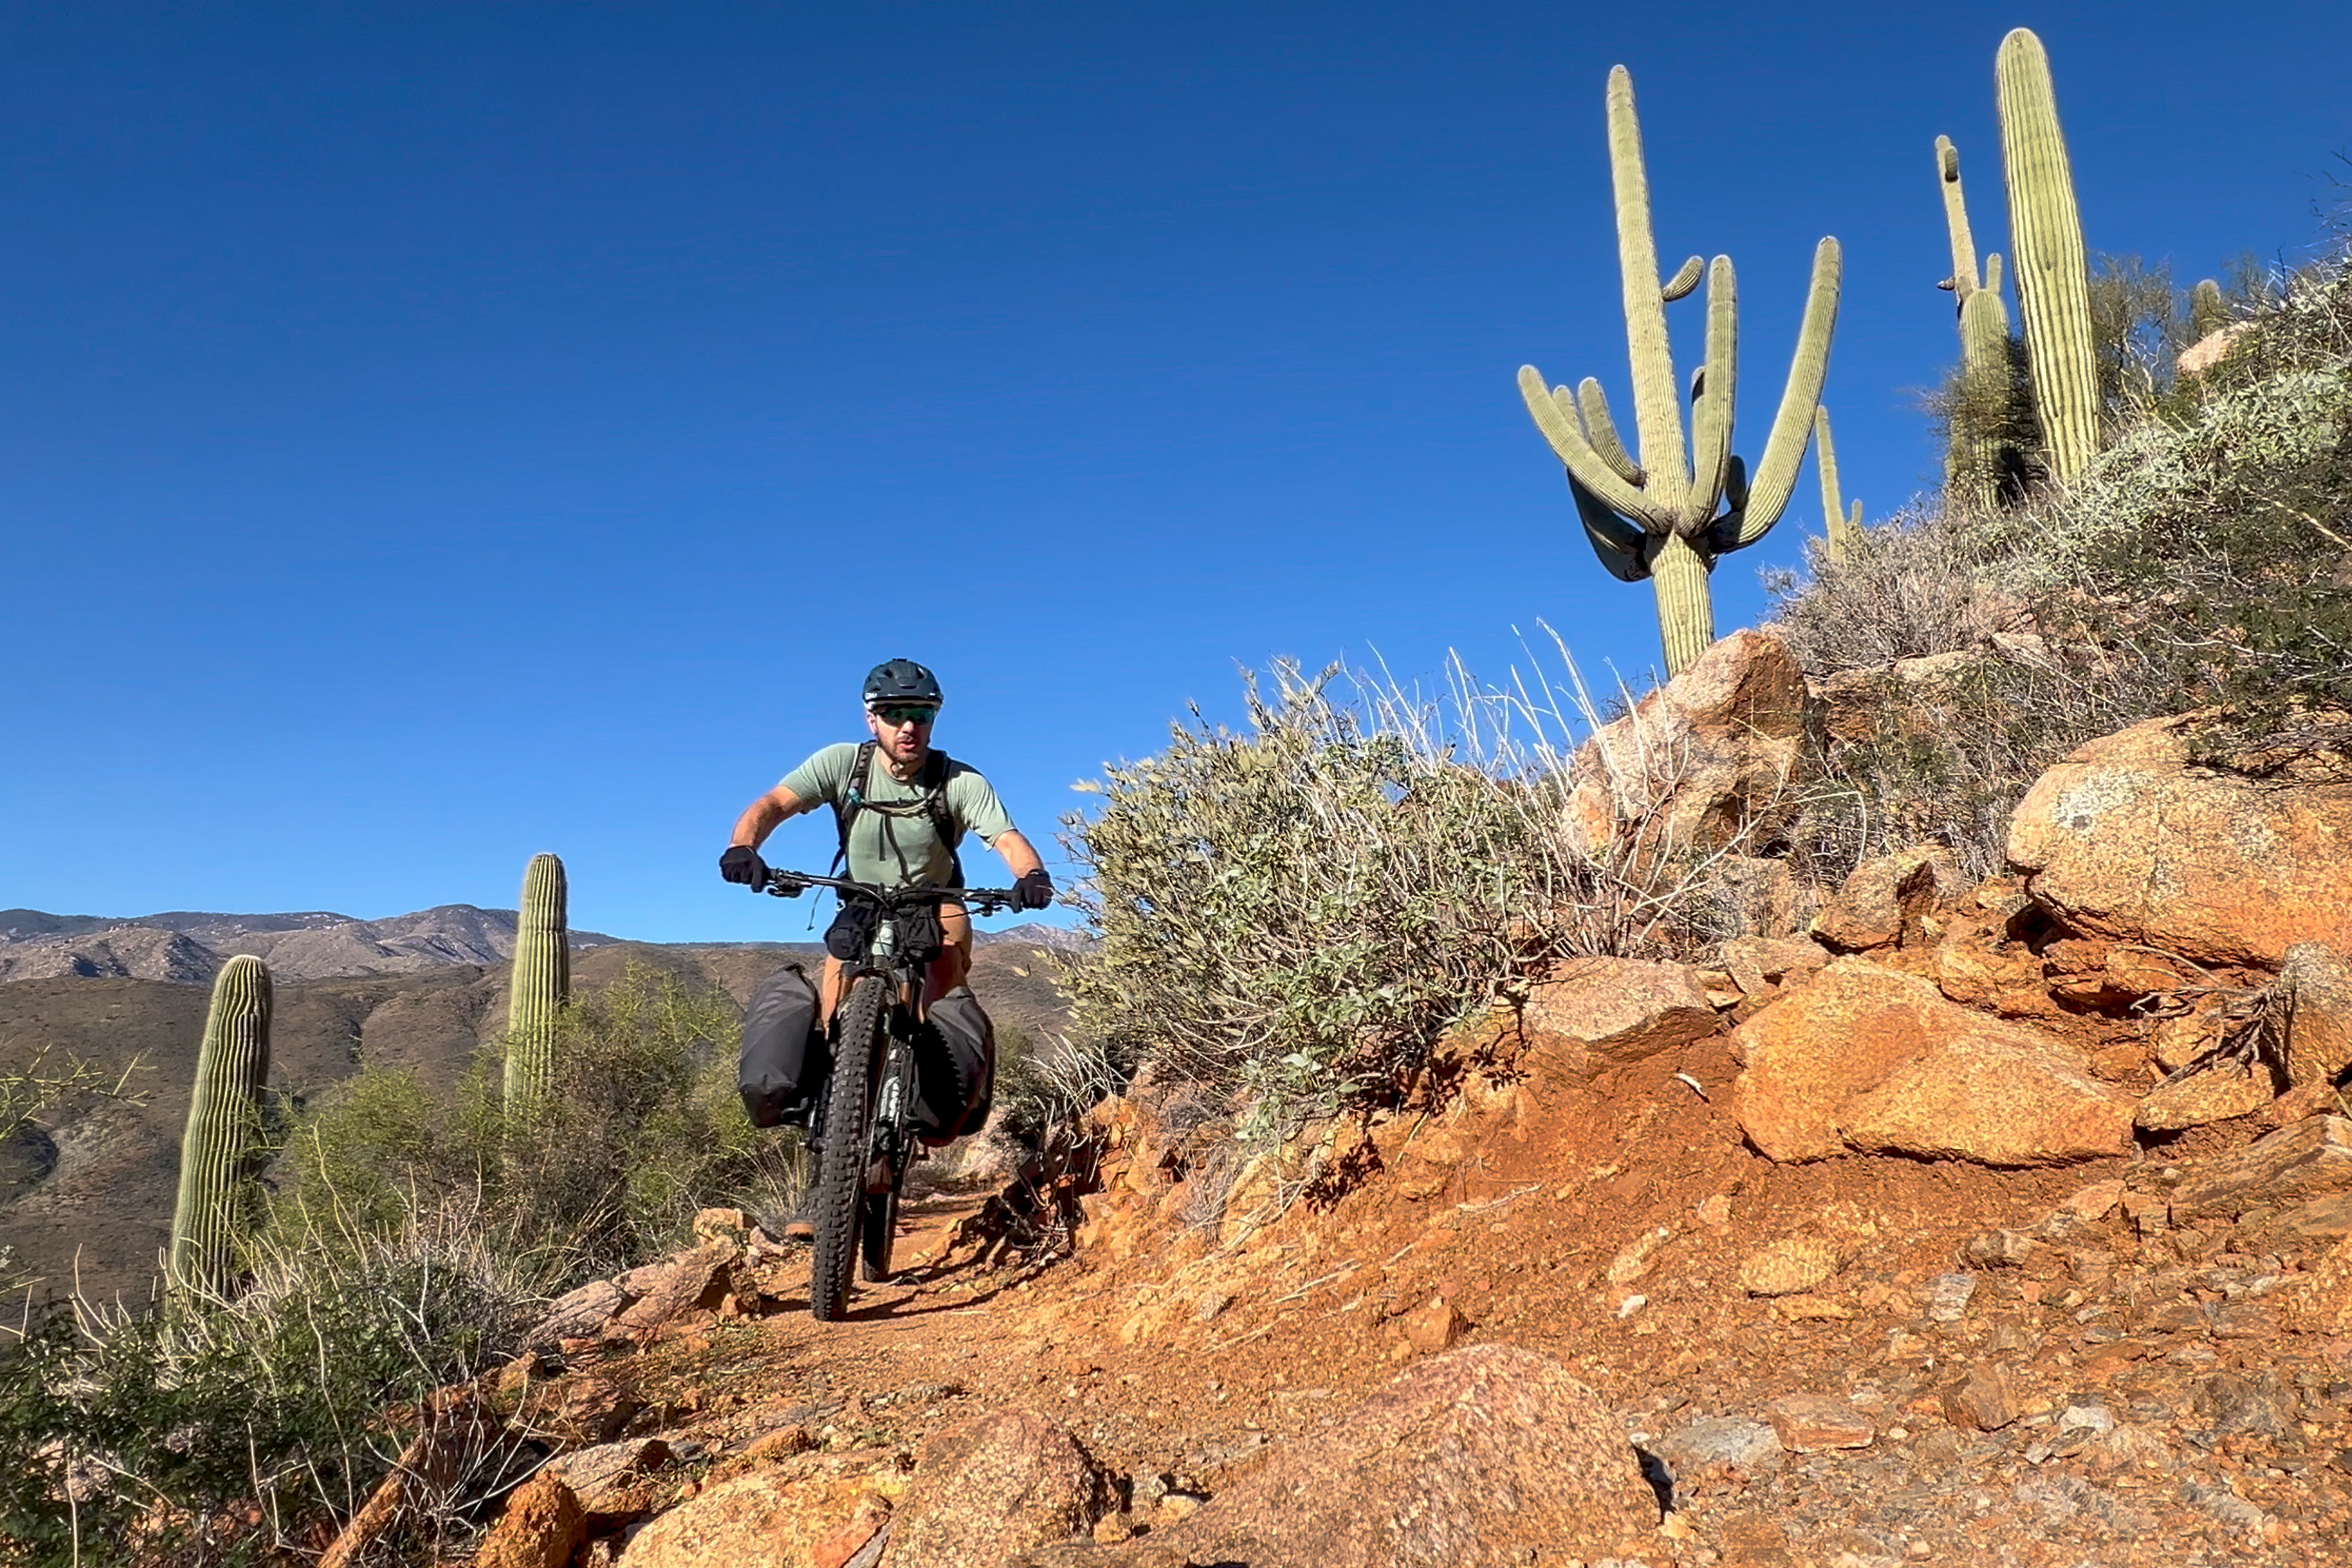
Testing the Old Man Mountain gear on the punishing Black Canyon Trail
The approximately 90-mile Black Canyon Trail runs north to south between Prescott and Phoenix, dropping into the eponymous canyon and traversing rugged, unrelentingly rocky Arizona backcountry. This trail had long been on my list for an overnight adventure, and it seemed like the perfect opportunity to put the OMM system through its paces.
While most people ride a roughly 70-mile stretch of the trail, I opted for the full shebang, which totalled 91 miles of riding over two days. I went into the trip expecting it to be tough, but damn, did the Black Canyon exceed expectations.
For starters, I had to bypass the first section, Osborne Spring Wash, due to wheel-stopping mud, even though I had waited for four days since the rain quit. I managed to pick up a rideable section of trail at the Russian Well segment, but I realized that the next 15 miles saw very little traffic, as the trail was downright grassy.
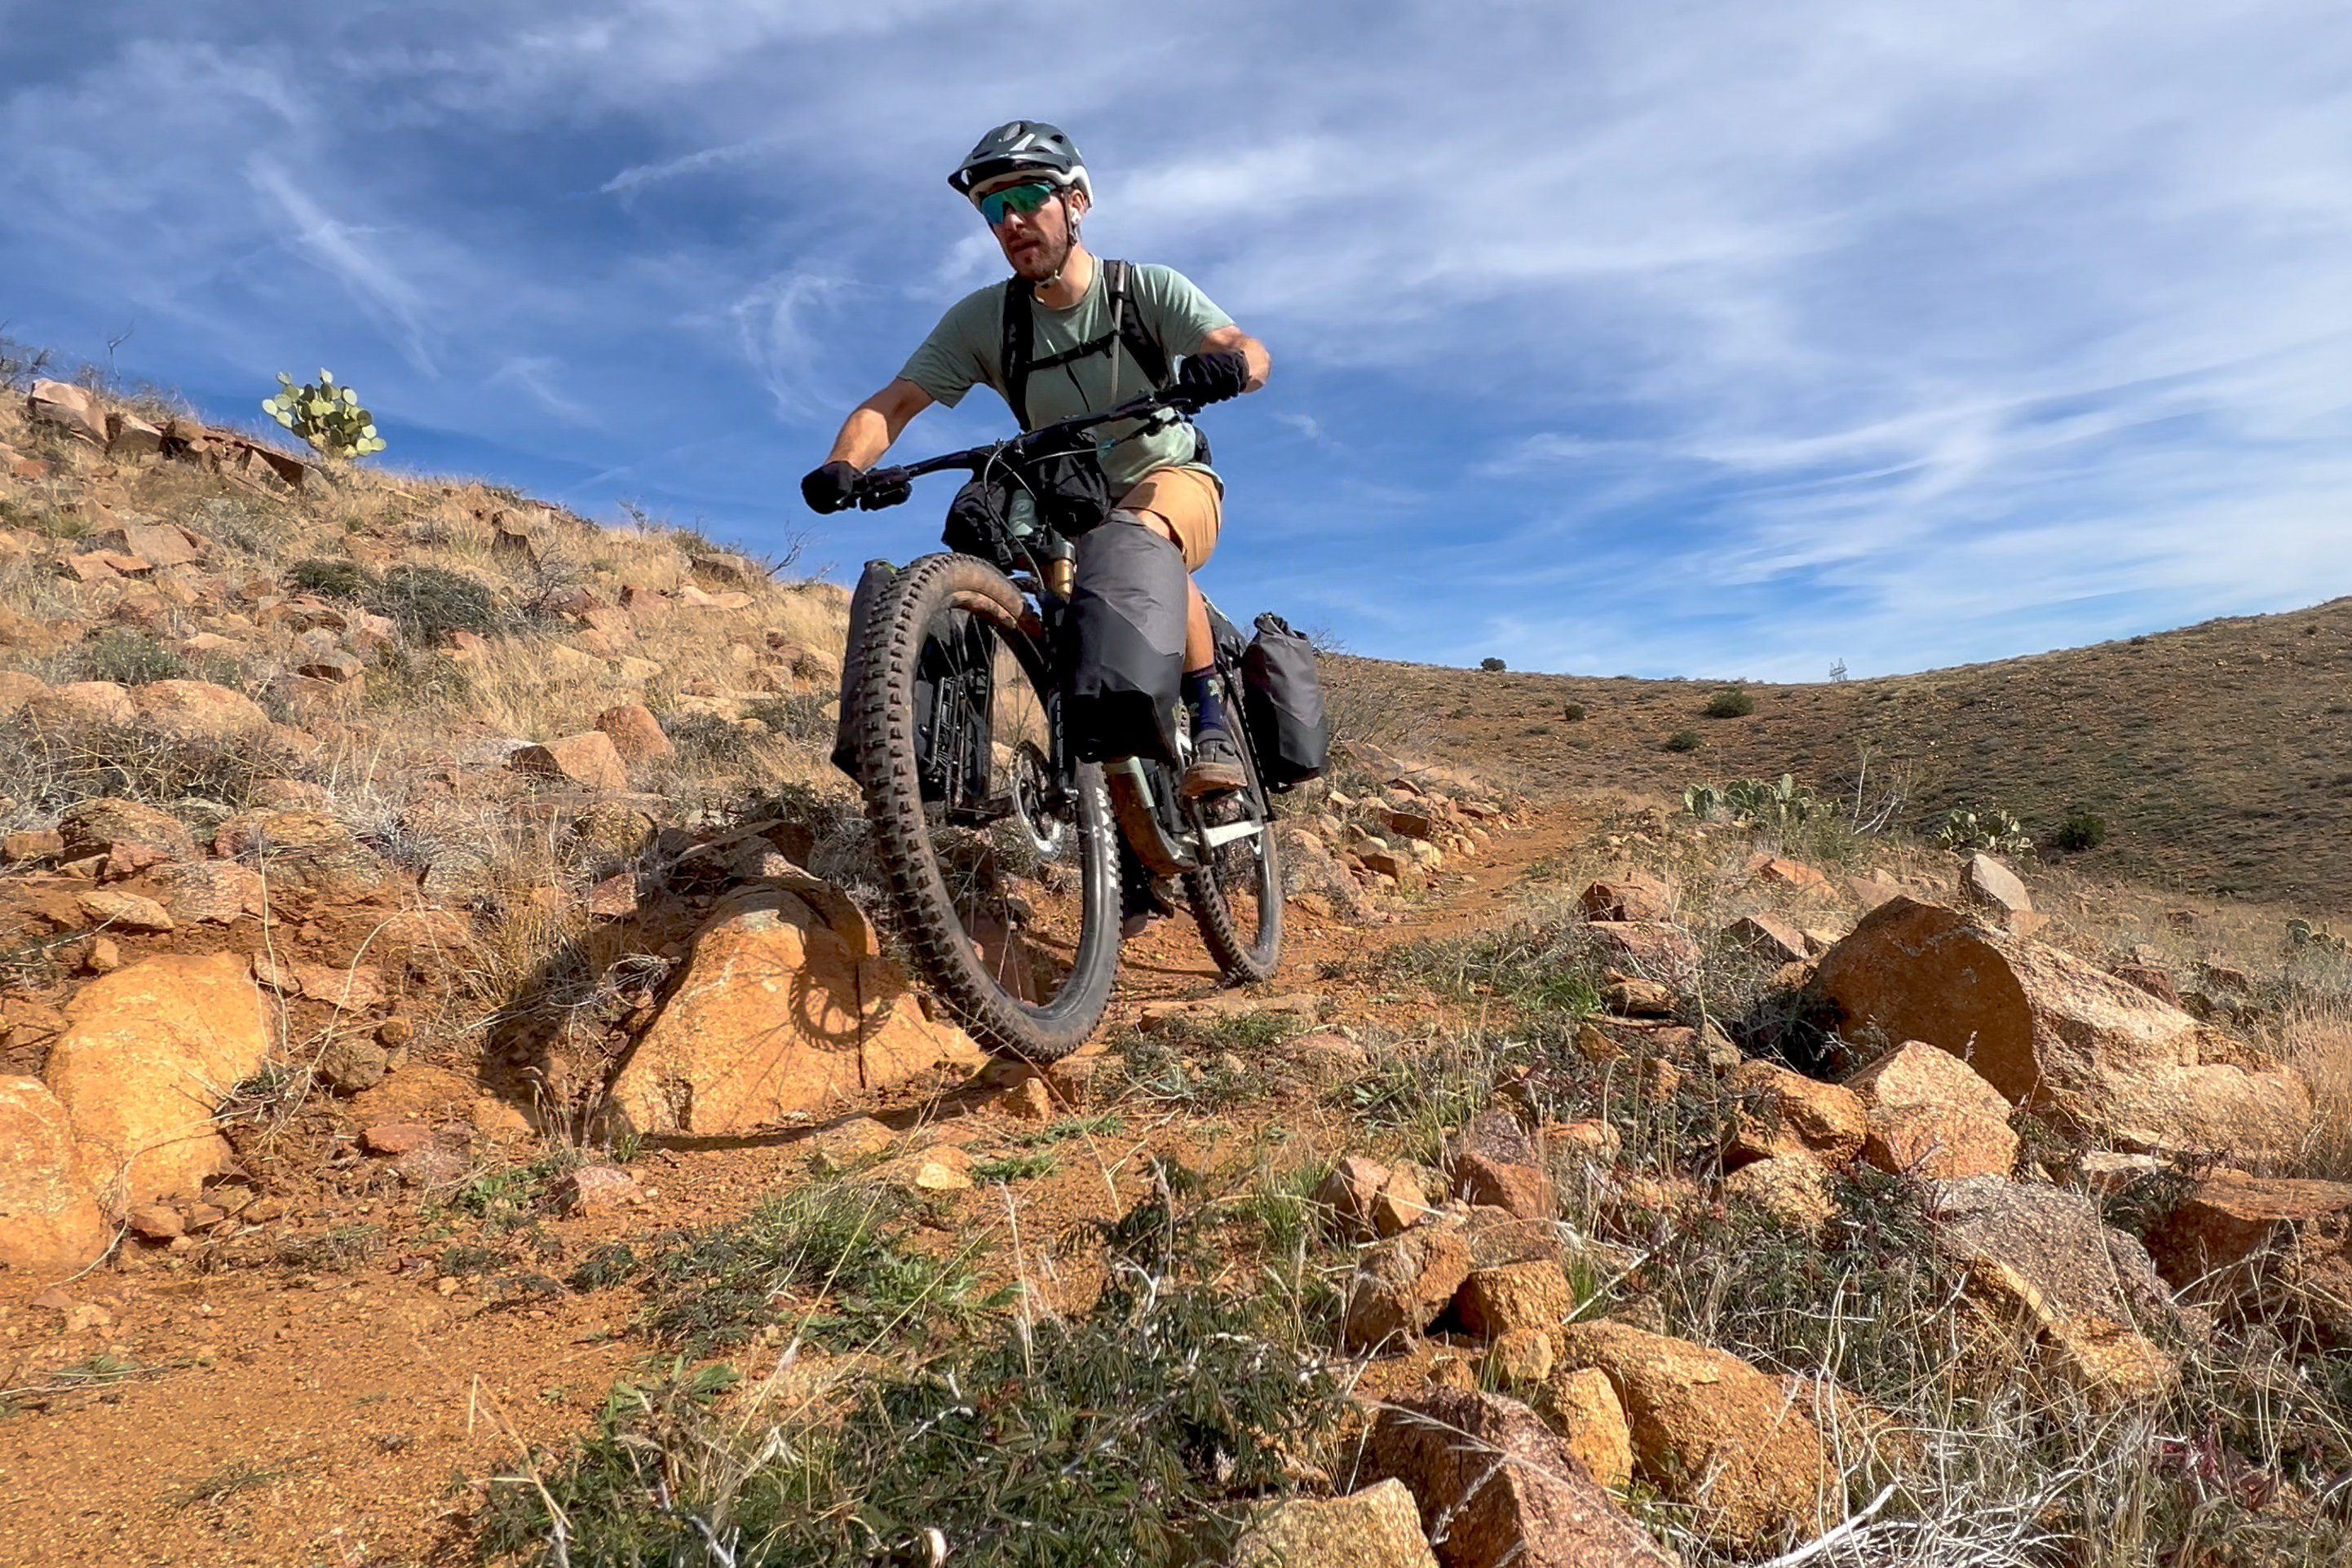
While the trail tread was a bit more beaten in after the Big Bug Trailhead, the singletrack only got rougher, rockier, looser, and more technical. Where the trail drops into the canyon, the narrow tread hugs the steep canyon walls, twisting and turning constantly, making it really difficult to build any momentum.
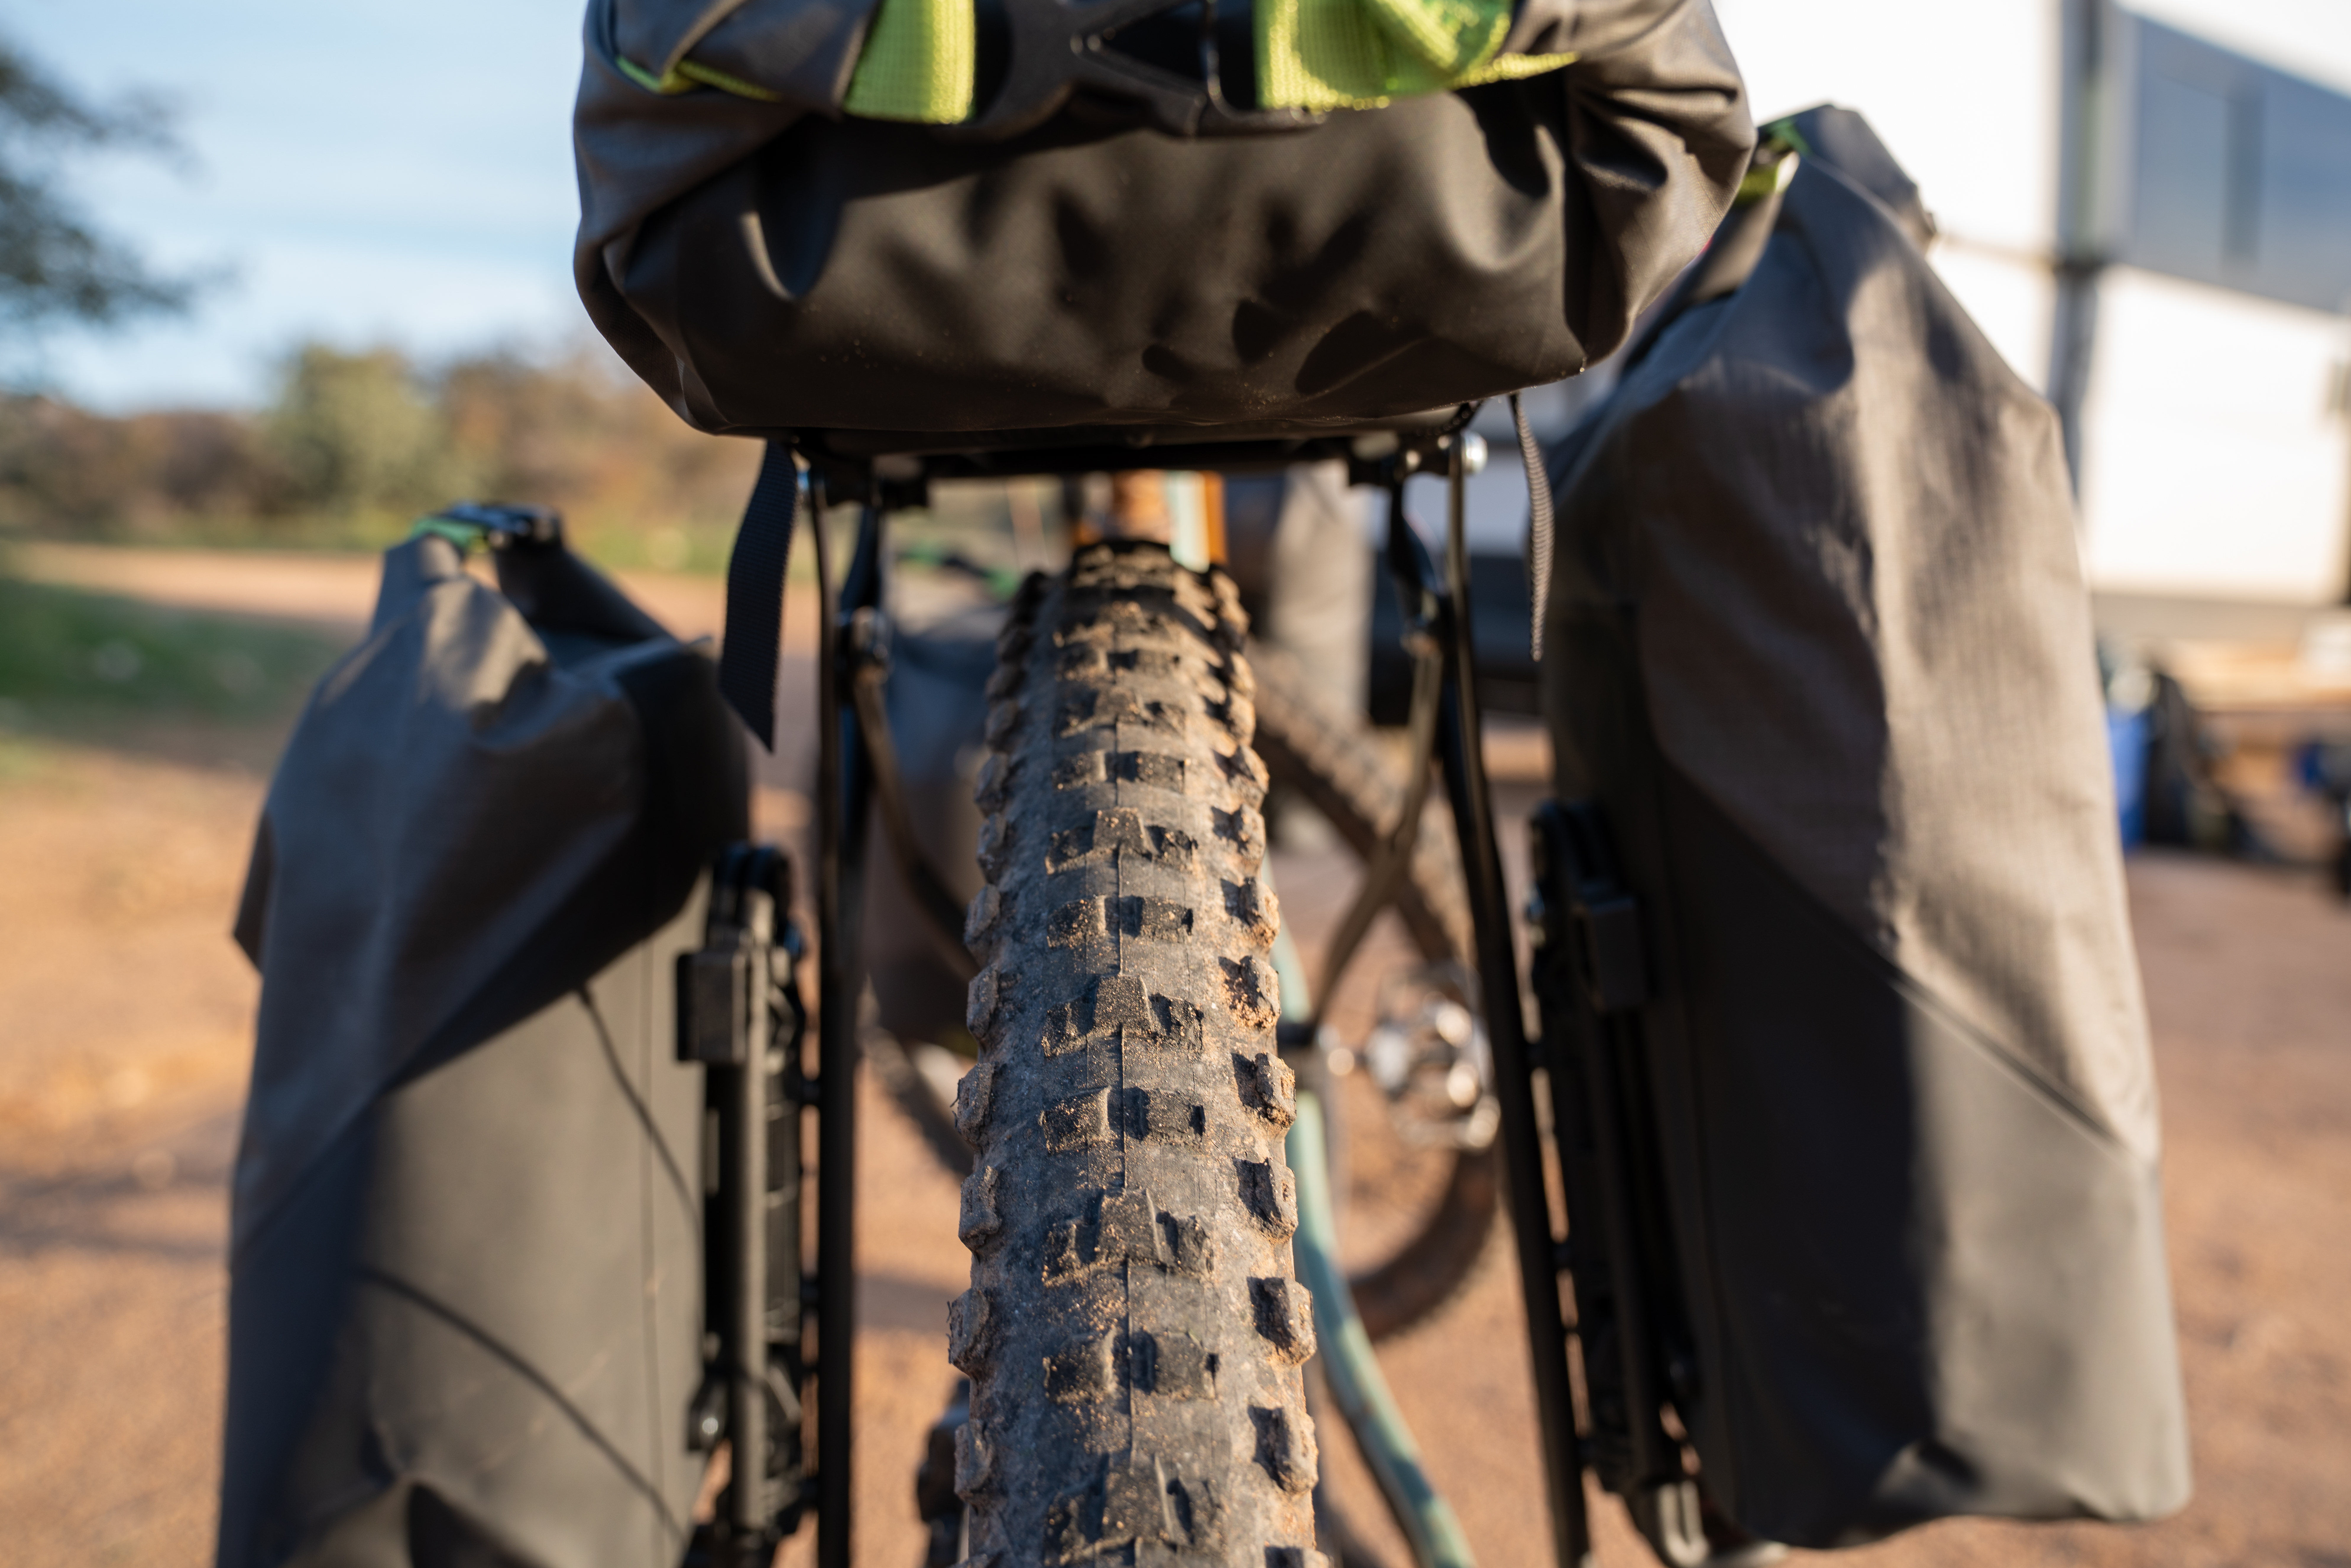
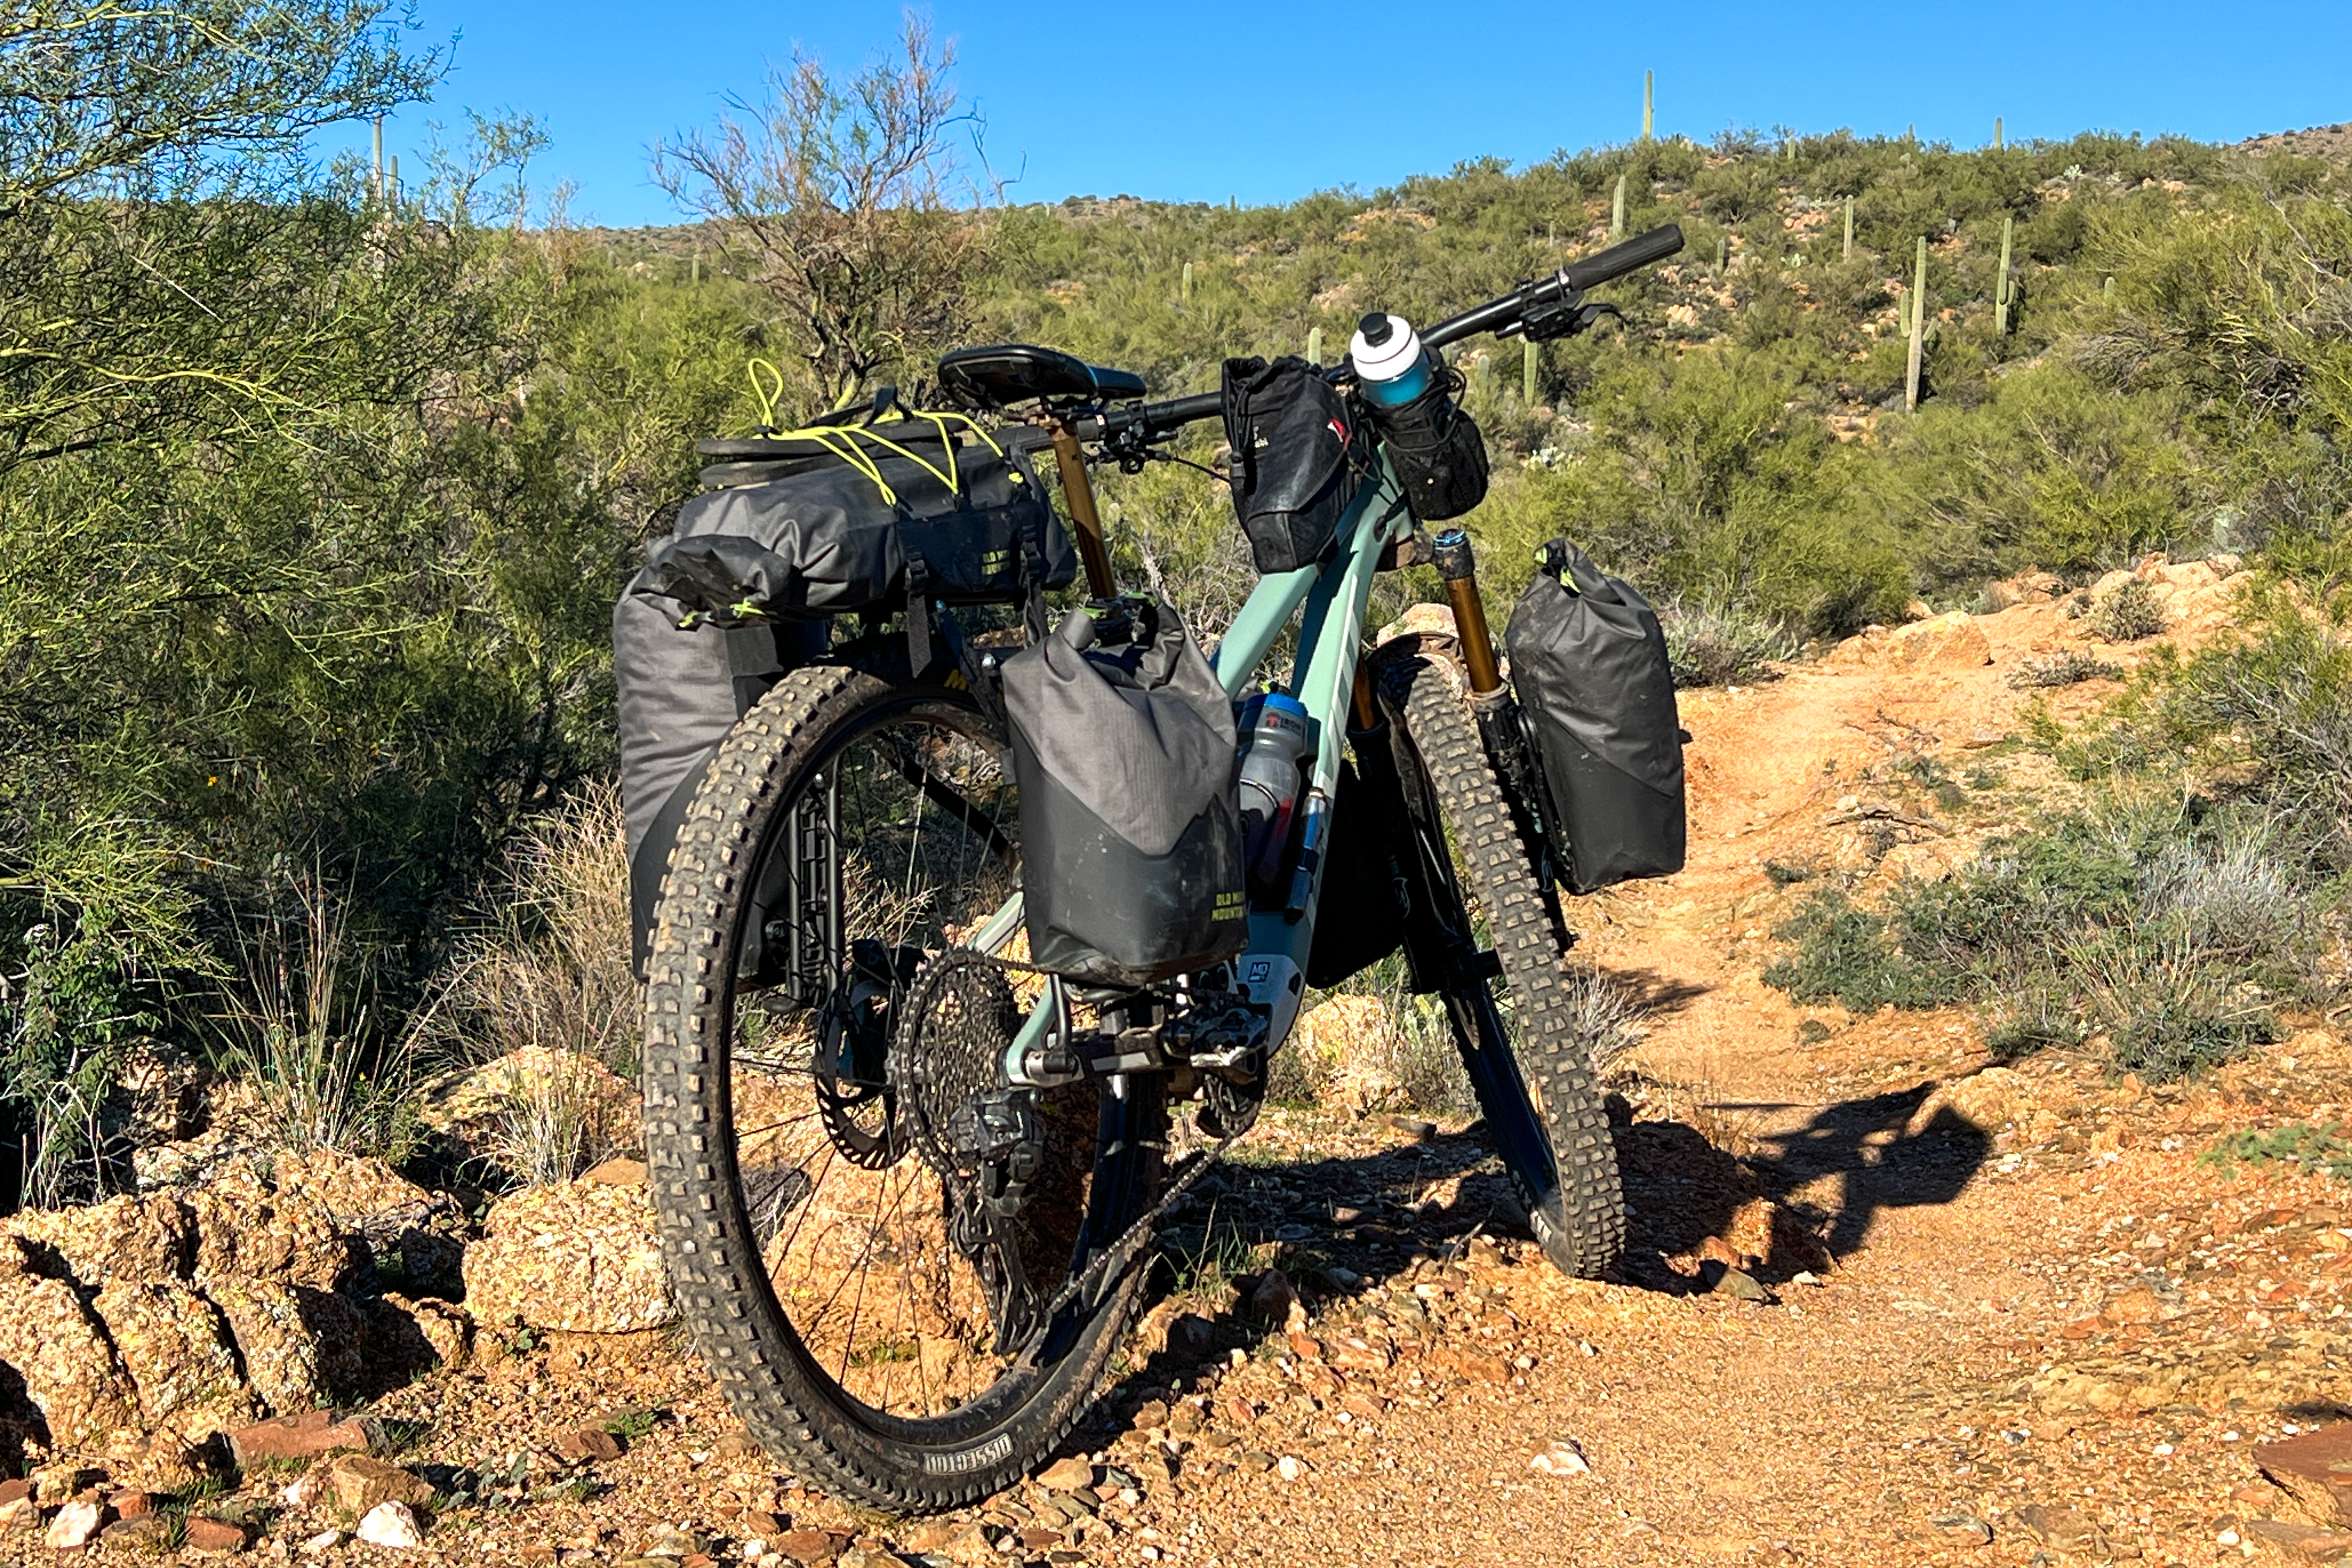
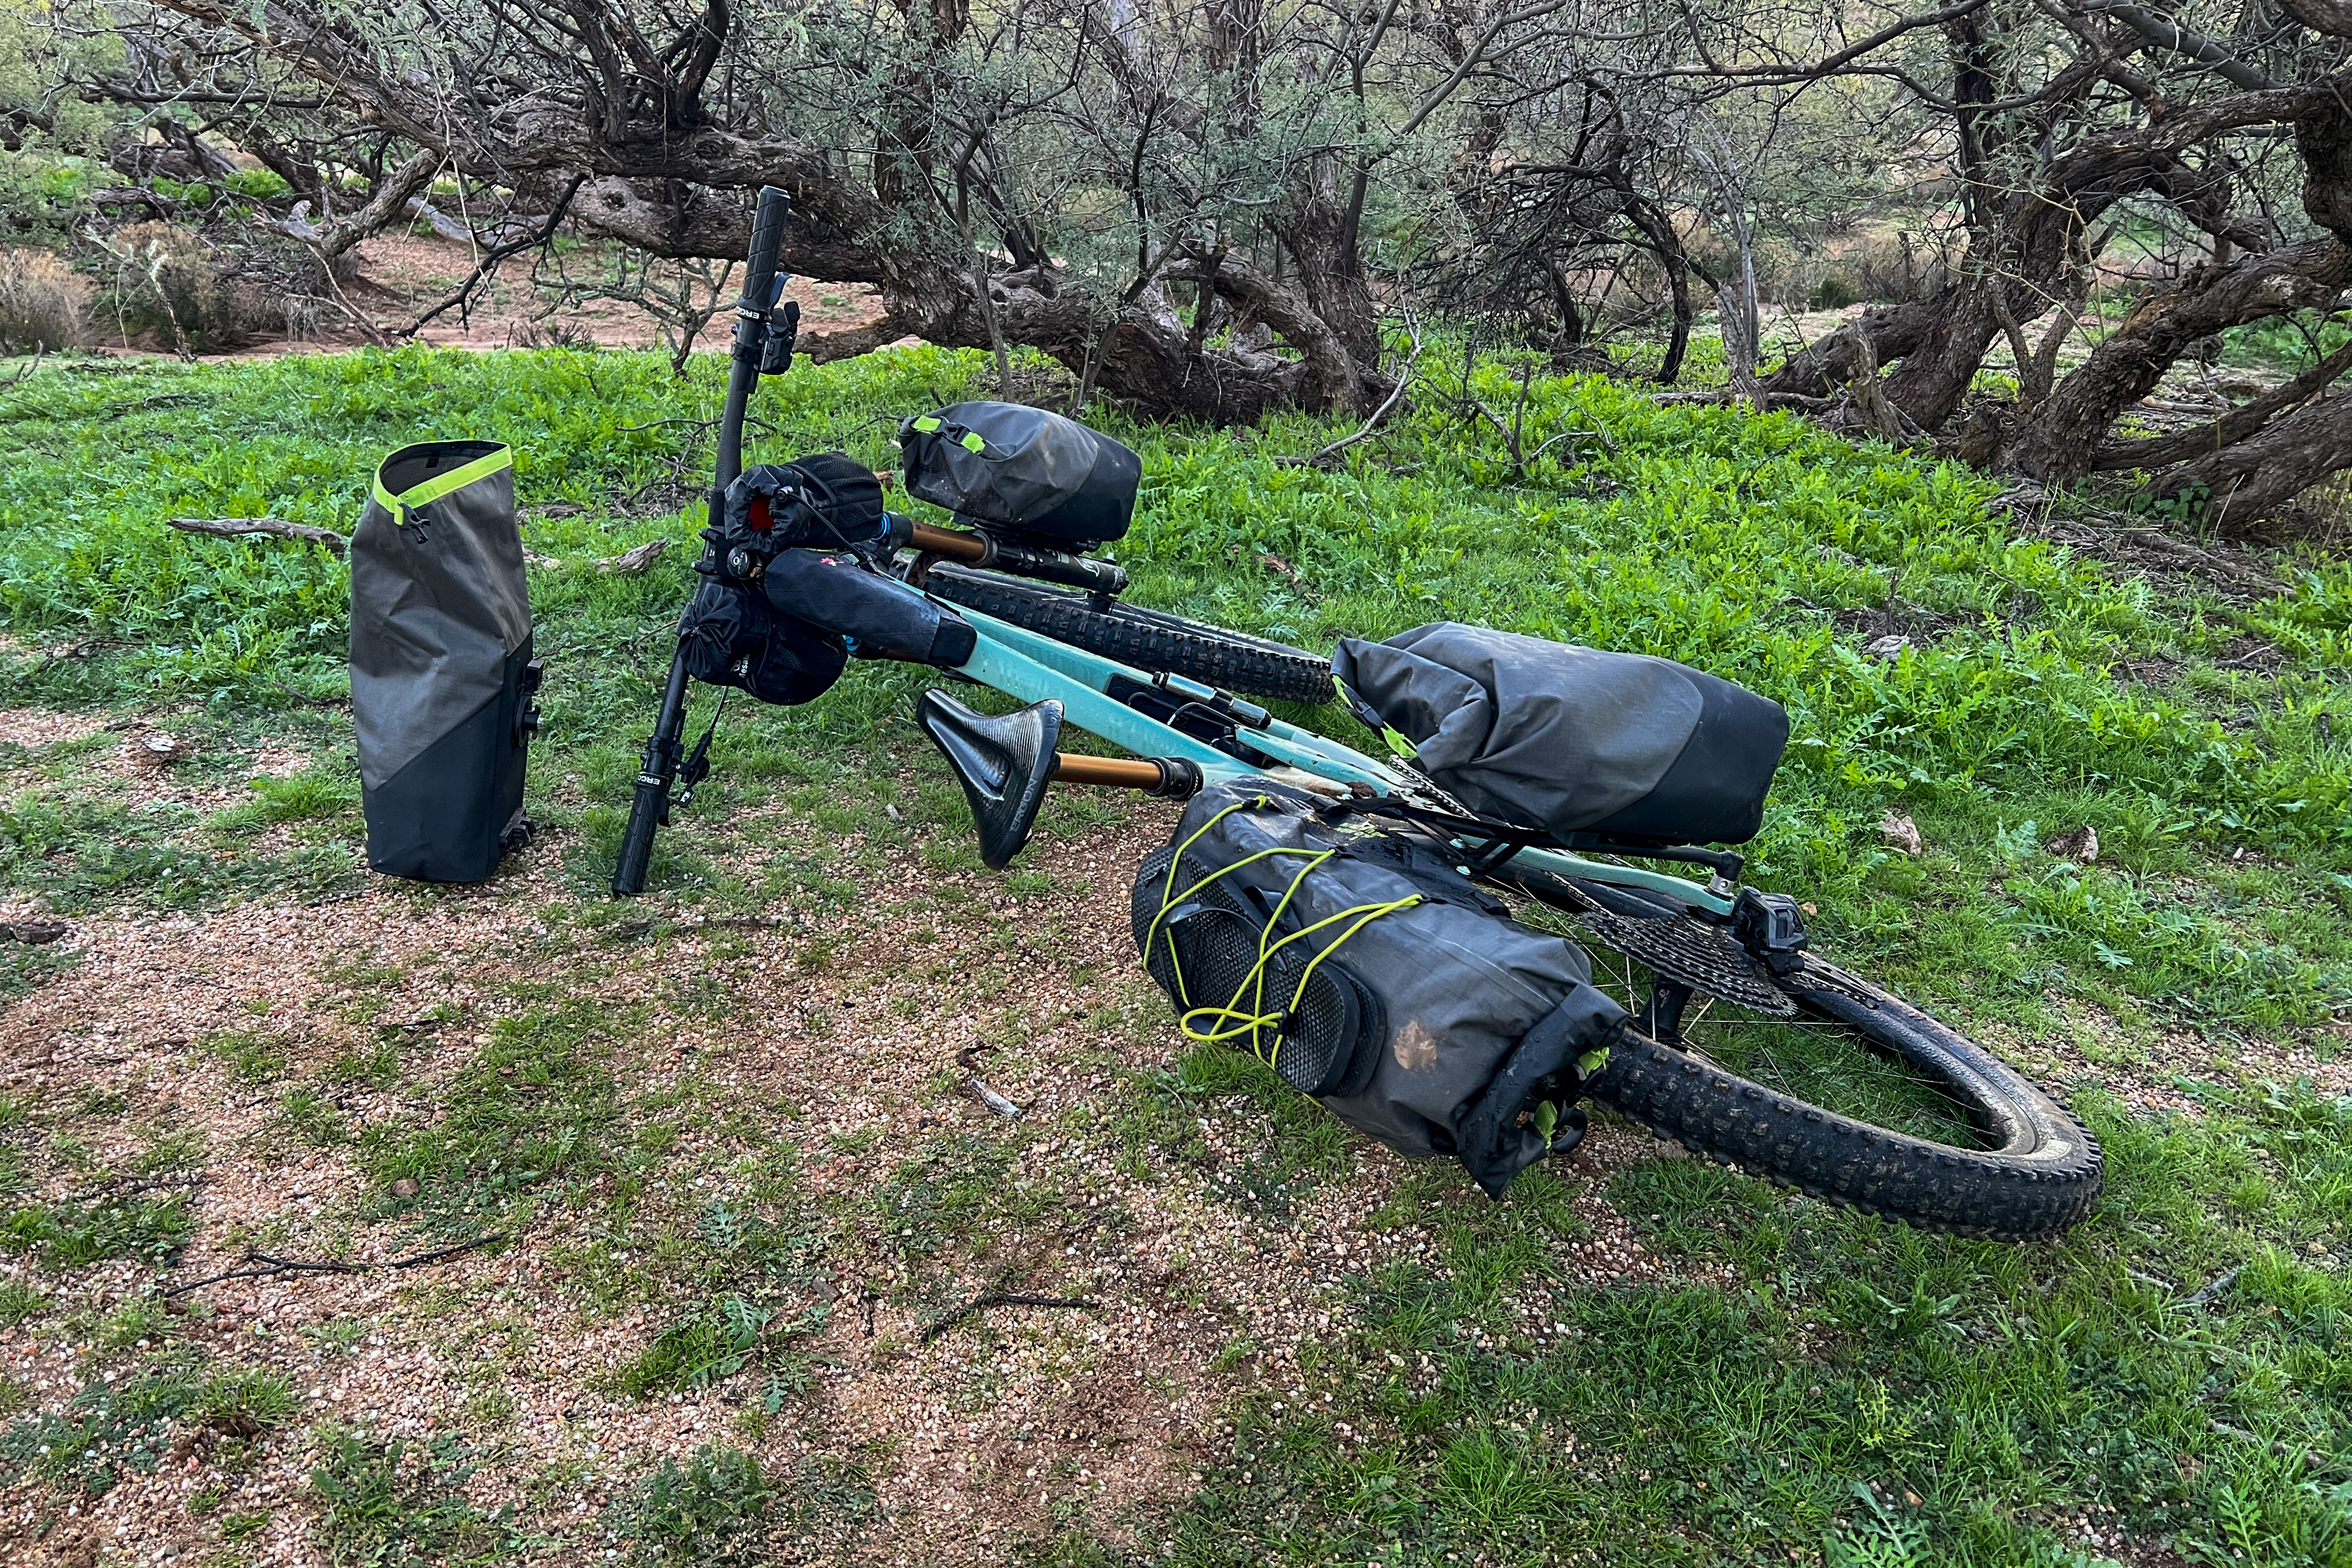
The momentum took another hit from the trail’s serious overgrowth. Since the Hemlock bags are mounted on the sides of the bike, they create a very wide profile. On a super narrow trail tread that was overhung with countless prickly pear cacti, cholla, mesquite bushes, sagebrush, and even the outstretched arms of saguaros, I spent most of two full days just dodging the poky things. Thankfully, the OMM dry bags are extremely robust, and they deflected countless thorny mesquite. I only stabbed one cactus spine straight into one of the bags; the rest of the desert, they deflected.
At first, I attempted to only stop in places where I could lean my bike and keep it upright, but in a desert filled with spiny saguaros and largely bereft of trees, these spots were few and far between. Eventually, I relented and began laying the bike down on its side, which meant that it was lying on two dry bags, pushing upward on the rear rack. I was concerned this would hurt both the bags and the rack, but without a viable alternative, I just went with it. Thankfully, I didn’t notice any bending of the rack or any additional impact on the drybags — again.
As I noted above, at 350g each, these dry bags are heavy. Could you attach much lighter-weight dry bags to the flip cages using Voile straps and save weight? Definitely… but I am almost certain I would have torn every single one in the unforgiving Sonoran Desert. The weight of this system paid off in durability and performance in the harshest conditions.
The challenge continued through the rest of the ride. While a friend had recently ridden the BCT and didn’t even get his feet wet, I was faced with 4-5 river crossings (they began to blur together), including one where I was forced to wade through a backed-up pool of dank water that was up to mid-thigh, while trying to keep my bike from getting submerged in the muck.
Cacti, rocks, hike-a-bikes, and a long 11 and a half hour ride on day two, and finally, I made it out of the canyon and back to civilization!
Despite being a well-known IMBA Epic, I didn’t see another human being for the first day and a half. I saw a total of three day riders near Black Canyon City, one of the most accessible parts of the trail — and those were the only humans I saw during my entire ride. I saw just as many wild burros, as well as endless birds and a coyote. While the BCT was undoubtedly way tougher than I anticipated, the rugged beauty of the Sonoran Desert is breathtaking, and the OMM kit was the perfect companion for this solo adventure.
Learnings from my first run
Use Loctite for certain bolts
The installation materials recommended applying a thin layer of synthetic grease to each bolt before installation, which I did religiously. While this helped me easily remove the rack and fork mount once I was done, on my first day of riding, one of the Flip Cages loosened and began rattling. Thankfully, I caught it before I lost a bolt, cranked all the bolts back down, and none of them loosened again for the rest of the trip.
Going forward, I think I will remove the Flip Cage bolts, clean them, and apply Loctite instead of grease to these bolts. The Flip Cages mount to both the rack and the fork Axle Pack, and then both of the front and rear systems can be removed from the bike and reinstalled in their entirety. Since the Flip Cages can stay mounted indefinitely, I think Loctite is a better solution here.
Packing is key for heavy, hard items
The dry bag that I packed with my stove, fuel, pot, and food rattled aggressively during the ride. The hard items rattling against the food and the bolt heads from the Flip Cage lever wore through several bags of food and electrolytes, creating a mess in my bag. The bolt heads are covered with smooth plastic and don’t have any exposed metal, but even so, the rattling caused troubling damage. In the future, I’ll try to pad around these hard, heavy items with a piece of clothing (maybe a base layer) and pack the bag more tightly to reduce rattling.
Rattling isn’t a problem when packing in most bike bags, so this is a new challenge introduced by the rack system. However, some friends I’ve spoken with shared that when they pad their bags and pack them tightly, they’ve been able to eliminate rattling issues.
Gear access is a winner
One major benefit of the OMM system I didn’t expect is how easy it is to access specific gear while out on the trail. Since I had different types of gear and clothing sorted into different dry bags, I could easily unclip the dry bag I needed and access that gear mid-ride. In contrast, most normal bikepacking bags are difficult to access. If you have any gear that you need to access during the ride, it’s best not to haul it in your seat bag or handlebar roll and instead relegate that gear to a lunchbox, snack bag, or frame bag.
While sometimes you can’t avoid hauling some clothes in your seat bag, unbuckling a seat bag, digging around in it, and then re-rolling it and cinching it down is a PITA. And don’t get me started on handlebar rolls.
The OMM system makes getting to the gear you need quick and easy, even mid-ride.
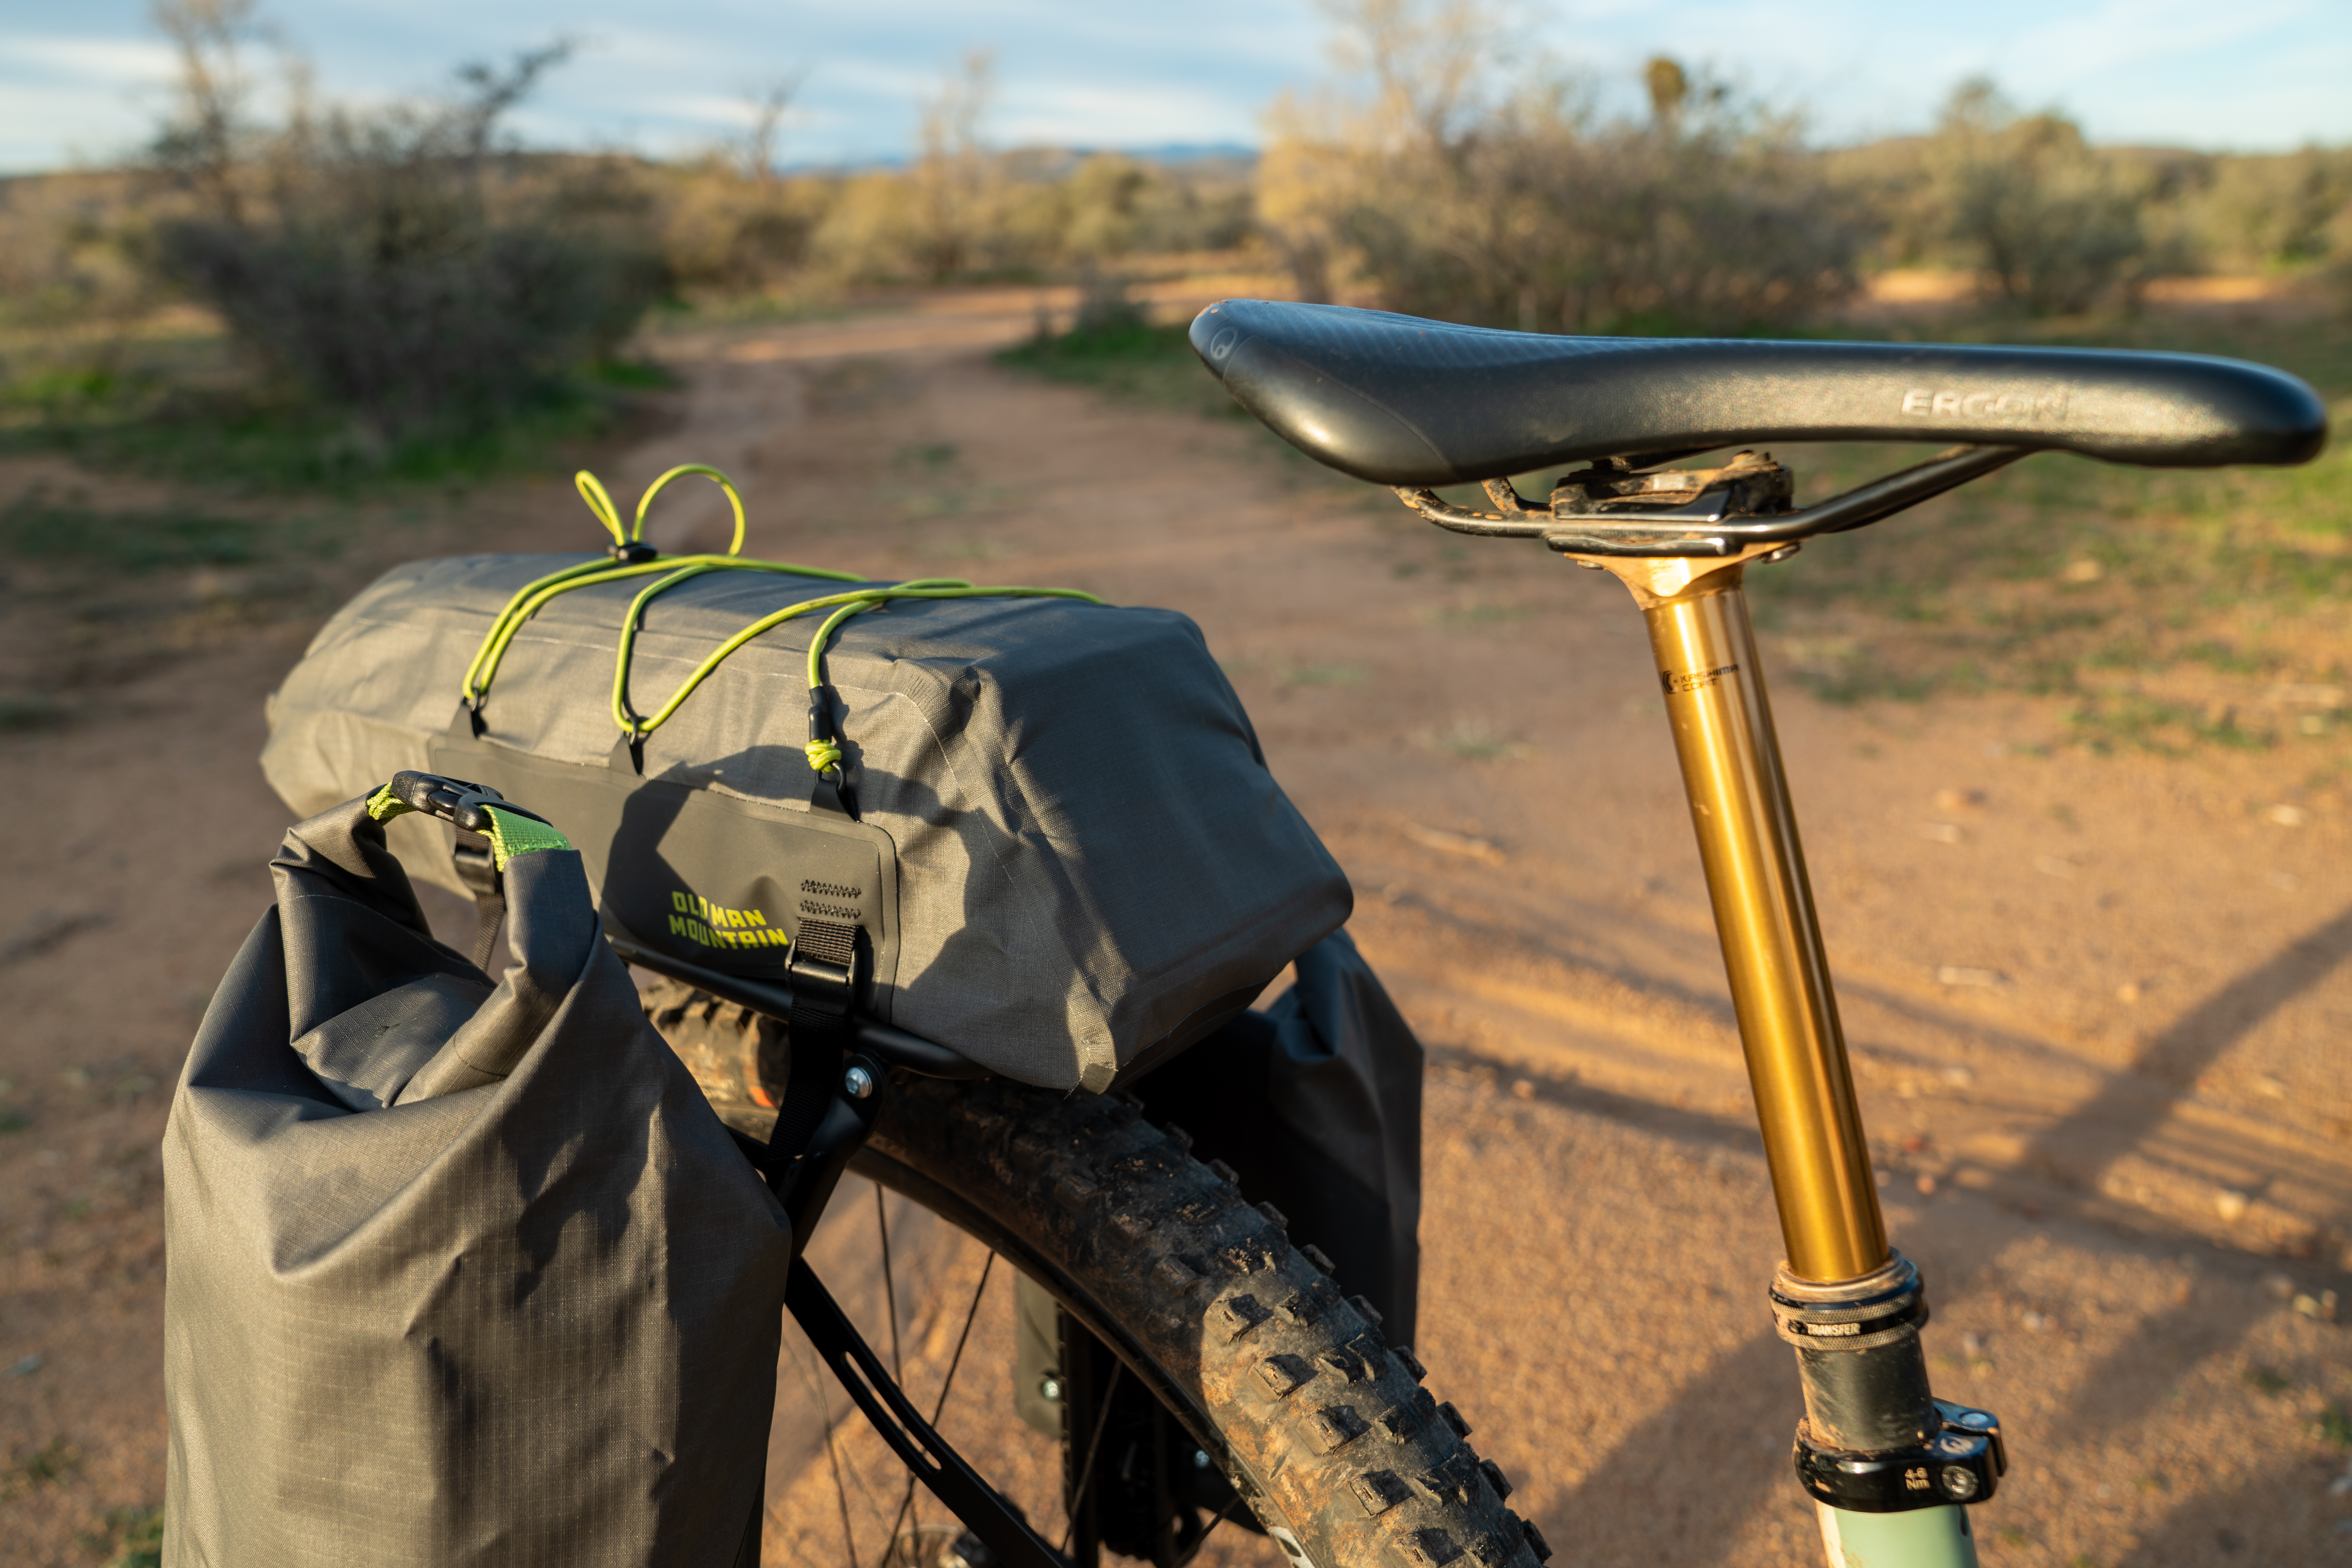
Seat clearance
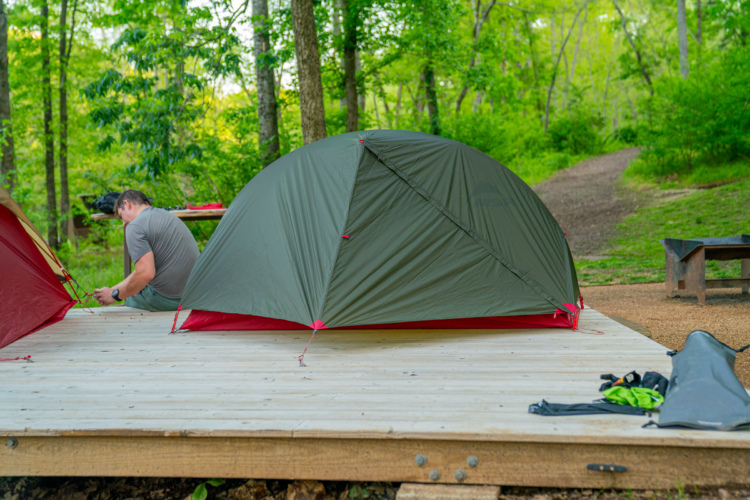
With the longest part of the Elkhorn Rack mounted so it hangs out over the rear tire, I found that my seat easily clears the rack during suspension compression. However, it can hit the Deck Pack, depending on how full the Deck Pack is and how far forward it’s mounted on the deck. I placed the Deck Pack as far back as possible, and on this ride, I used it to hold my tent.
Since the tent didn’t fully fill the Deck Pack and since it was also soft on the end near the saddle, when the saddle did hit the pack, the pack gave enough that it wasn’t an issue. OMM had warned me that the clearance of the Deck Pack was uncertain, but it turns out that it barely works for me. If I was just a couple inches taller and the seat was just a bit higher when the post is all the way down, there probably would have been no contact.
For my purposes, I do think I could have used straps to attach the tent straight to the rack, thereby saving weight and increasing rear seat clearance. Also, for more gear storage on longer rides, I’m considering carrying the tent on my bars and putting heavier food in the deck pack. And perhaps that would be a better place to store the stove and fuel?
Pros and cons of the Old Man Mountain bikepacking rack system
Pros
- A great gear hauling solution for shorter riders on full-suspension mountain bikes
- Durable construction and rock-solid mounting
- Home mechanic-friendly install
Cons
- Heavy
- Bolt head inside the Hemlock bag requires thoughtful packing
- Bags mounted to sides of bike can create a very wide profile — problematic on narrow trails
Parting thoughts
I went looking for a bikepacking setup that would work for my relatively short stature on a full suspension mountain bike, and I found one. The Old Man Mountain System does indeed work as advertised, allowing me to haul copious amounts of gear on technical singletrack while still enjoying the comfort and performance benefits of full suspension.
While I believe most of the learnings and observations shared here are useful to prospective buyers, many are personal insights gained through trial and error. Undoubtedly, you’ll have your own trial-and-error period. Getting an overnight backcountry setup dialed is a complicated process, as every single part of the system affects the others. For example, the type of tent chosen affects where it can be mounted or hauled, and where the tent is mounted eliminates that space from carrying something else… each micro decision cascades, affecting all the others.
This is exactly why I started experimenting with the OMM setup some eight months before my big excursion on the Colorado Trail. I plan to bikepack with the gear multiple times before I set out on the big adventure, so I can continue refining my gear choices, my packing system, and iron out any small issues before I cast off.
While the OMM setup might be heavy, I’ve been convinced by its durability and performance that this is the right system for my Colorado Trail adventure.


3 Comments
Jan 2, 2026
Dec 27, 2025
Dec 29, 2025
For me it seams to heavy and bulky to take such a bike on a single trail.
Bike starts to look like touring bike and not mtb