


After moving into a new, larger office in February, Singletracks finally had the space for a proper bike repair workbench. I wanted a workbench that could be used as a work surface but also had plenty of storage for tools and supplies, so I set out to design one as simply and cheaply as possible. The result: a proper bike repair station that cost me about $70, which is super cheap considering a decent repair stand or basic tool set will set you back at least a hundred bucks.
Materials List
- 8 – 2x3x8 pine boards (you can use 2x4s if you can’t find 2x3s)
- 1 – 4×8 sheet of pegboard
- 1 – 4×8 sheet of 1/2-inch thick MDF (or plywood)
- Fasteners (I prefer screws but you can use nails)
You won’t need the full 4×8 sheets of pegboard or MDF, so share with a friend or hang on to the scraps for another project down the road. My total bill of materials at the local Home Depot came to less than $70.
Cut List

- 4 – 2×3 @ 18-3/4″
- 6 – 2×3 @ 36″ (shorter or longer, depending on how tall you want your bench to be)
- 4 – 2×3 @ 57″
- 2 – 2×3 @ 72″
- 1 – 60″x36″ sheet of pegboard
- 1 – 60″x24-3/4″ sheet of MDF
- 1 – 57″x23-1/4″ sheet of MDF
Assembly

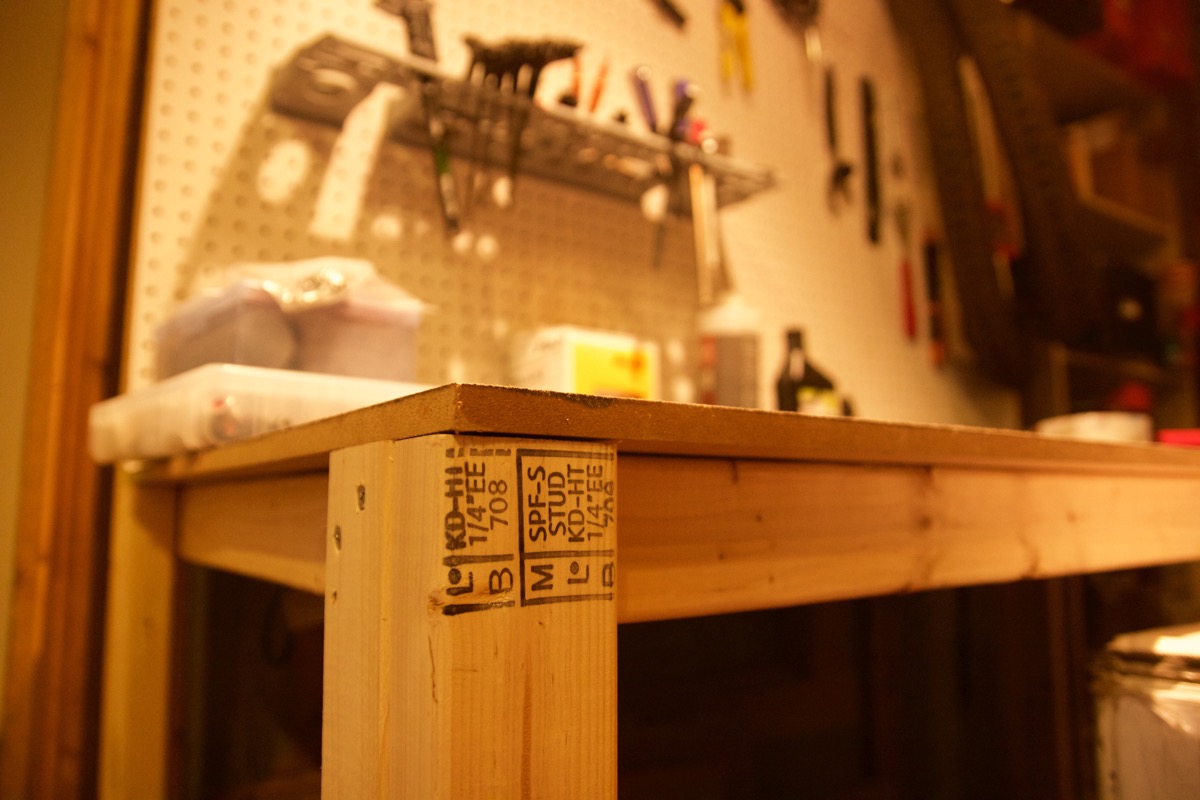
Start by attaching one 36″ 2×3 to another lengthwise (if you stand the boards on their ends, the profile should resemble an L). This is the first of the front legs; do this again for the other front leg.
Now, lay the legs down flat on the floor and attach one of the 57″ 2x3s to the top of each leg on the inside of the “L.” Do the same toward the bottom of the leg; placement is up to you–I left about 3 inches. This will support the bottom shelf.

Next, attach the 18-3/4″ 2x3s perpendicular to the legs that are still resting on the floor. I used a clamp since I was working alone–plus this also keeps everything nice and tight as it’s being fastened.
Attach the last two 57″ 2x3s to mirror the 57″ boards below. The work surface and shelf supports are now in place! Fasten the remaining 36″ 2×3 side legs to the 57″ supports you just attached. Finally, attach the longer, 72″ rear legs/pegboard frame. The frame is complete.
Now, turn the workbench frame upright. Attach the lower shelf (the 60″x23-1/4″ MDF) and work surface (the 60×24-3/4″ MDF) and the pegboard.
Finishing

You’ll probably want to seal the MDF work surface to avoid staining from grease and dirty hands. I stained mine and added a couple coats of polyurethane. I don’t think it’s typical to stain MDF, but I did it anyway and it looks kinda cool. One weird side effect was that the texture became really rough, which makes for a nice no-slip surface. Less chance for tiny bits to roll off the bench while I’m working = score!
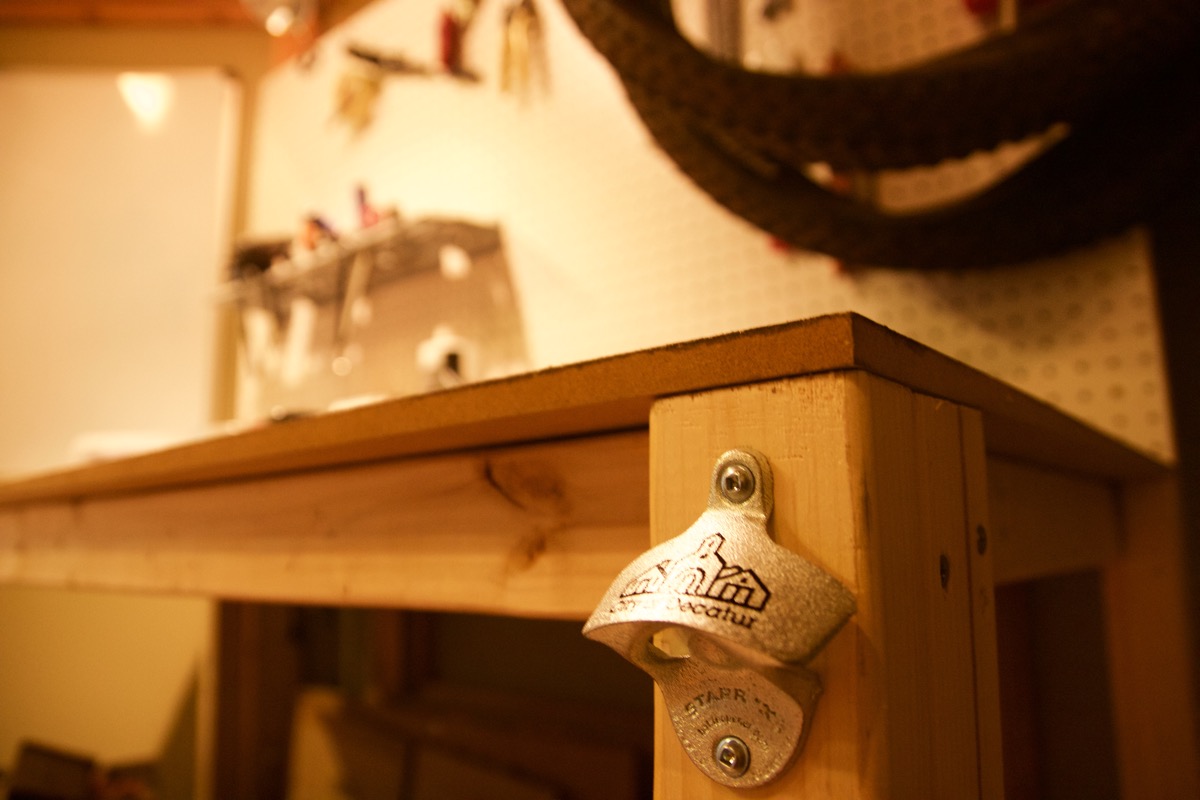
You may also want to add a bottle opener to your bench like I did. There’s nothing like cracking the top on a cold Coca-Cola while working on your bike (this is an office, after all). I added a couple clamp lights ($7 each at Home Depot) for additional lighting, and also pegboard accessories like hooks and a nifty tool shelf.
Upgrades / Modifications
The great thing about building your workbench is that you can customize it to fit your space and work style. For example, if you have a lot of heavy tools you plan to hang on the pegboard, you may want to frame out the pegboard supports a bit more.
If you have extra wood you could also build a second shelf underneath the bench. You might also want to add hooks on the side to hang stuff like tires and wheels you’re not using.
Building your own bike workbench is easy and cost effective. What bike-related DIY projects have you tackled lately?


