


A broken chain is a surefire way to turn an epic ride into an epic hike. Fortunately, with the right tools, it is a quick and easy fix, getting you cranking again in no time.
What to Carry
The only tool needed for chain repair is a chain tool. Here is what I carry:
- Crank Bros Multi 17, with chain tool
- SRAM Power Linkor KMC Missing Link
(they come in 8, 9, or 10 speed models. Make sure to get the right one)
Unlike some issues, a broken chain is immediate and obvious. Depending on what you were doing when it snapped, it may fall off into the dirt, wrap around the bottom bracket, or most likely, just hang in place. Either way, get off the trail and find a clean place to work in case any small parts get dropped during the repair.
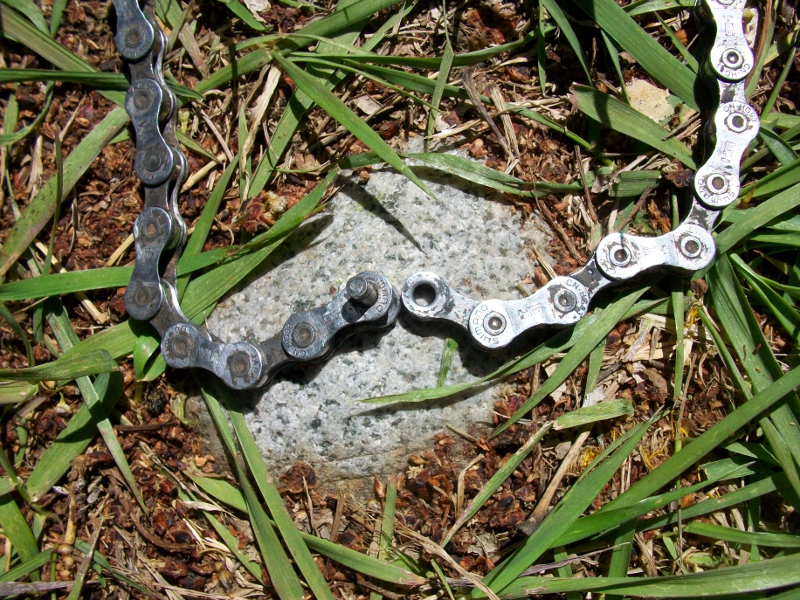
ONOZ! I broke my chain!
Repairing the Chain

The first step is to remove the broken link. This is where the chain tool is needed. The tool will have a recess shaped for laying the chain link in, holding the chain firmly while the screw plunger presses the pin out. This step can be performed with the chain still on the bike, or it can be pulled off and laid flat.
(Click the pics for a close-up view)

Remove the broken link such that you are left with the ‘inner’ link of the chain on both ends. Like this:
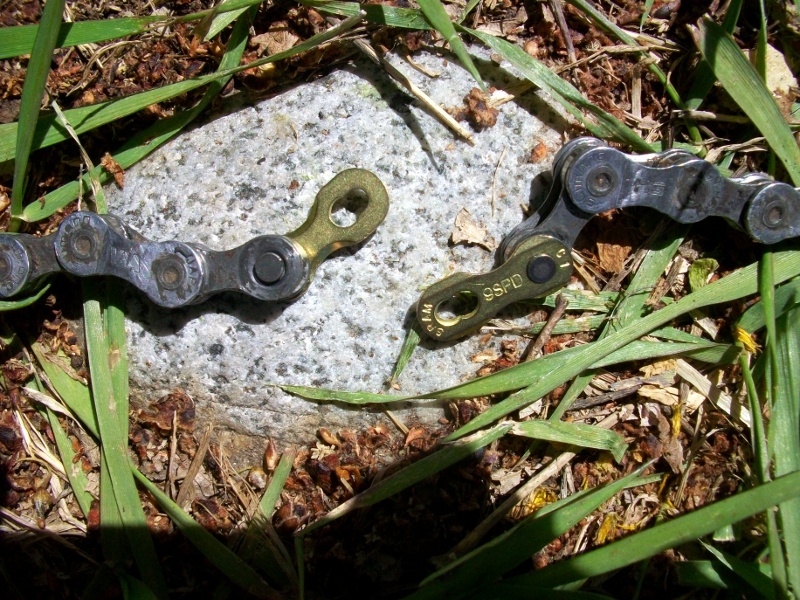
The chain is now ready for the Powerlink. Insert each half into one end of the chain, from opposite sides, so that the pins and plates will interlock:
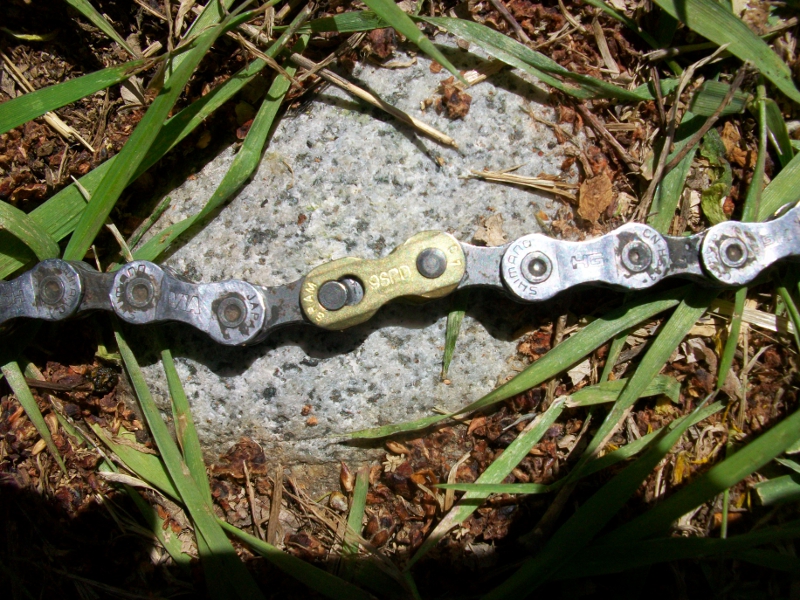
All that’s left is to snap the power link together. Look closely at the two link plates and you will see a slightly oversized opening on each one. Push the pins through those slots and then yank the chain. Done!

Of course if you removed the chain entirely, you’ll want to route it through the derailleur and around the cassette before joining the power link. The photo to the left is areferencepic of the path the chain takes through the rear derailleur.
Basically when the chain comes down off the back of the cassette, it goes over and in front of the top idler pulley, and then behind and under the bottom one.
With your chain repaired and back in place, pick up the loose links you removed, make sure to grab your multi-tool, and resume your ride!
Also, if a chain breaks out on the trail, it’s generally a good idea to replace it as soon as possible, making sure to keep your power link for future emergency use.


