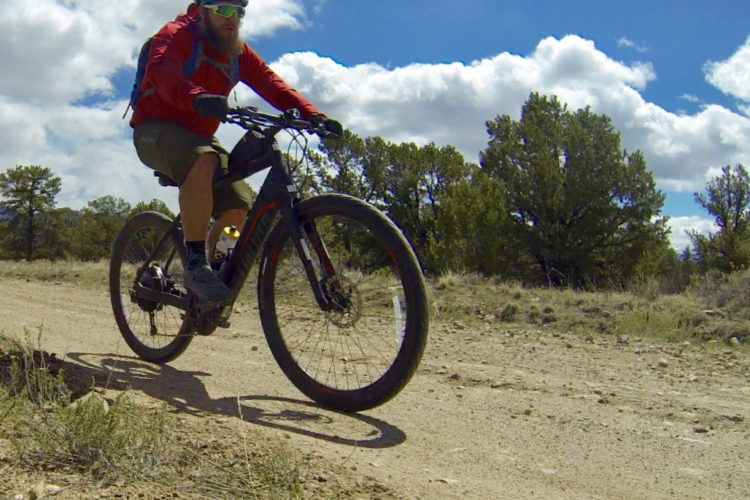
After upgrading to that shiny new full suspension, disc brake equipped, 25 pound trail slayer, your trusty old hardtail gotrelegatedto the back of the garage. You look at it from time to time and remember the good times you had on it: your first crash, your first all day epic, that trip to Moab where you carried it down Portal Trail…
You think about riding it, but the new bike gets all the trail time and it makes you a little sad inside.
Okay, so that’s a bit over-dramatized, but what if you could re-purpose that old hardtail and get regular saddle time on it again? One option is to convert it to a singlespeed;another is to turn it into a dedicated commuter bike, which are not mutually exclusive options, by the way.
When I started bike commuting about 5 years ago I thought I needed/wanted a road or ‘cross bike. I even started shopping around for one, but I soon realizedthat another bike was not in my budget at the time. I took a hard look at my Specialized Rockhopper and realized several things about it:
- The frame is very well built.
- It has excellent geometry.
- I knew for a fact that I could ride it long distances comfortably.
- It has pannier rack mounts.
- It has bosses for two water bottle cages.
- It can easily handle a load consisting of me, a laptop, clothes, etc.
- It can drop off curbs, hit cracks, and even survive detours into the dirt when the bike path is under construction.
- I paid $150 for it, so if it ever gets stolen, it’s not the end of the world.
The perfect commuter bike was sitting right there, ready to go!
At that time it was still my mountain bike, so I swapped tires twice weekly and removed the rack for trail use. This article, however, will cover what I learned when I did get that shiny new trail bike and turned the Rockhopper into my full time Curbhopper.
First you will need to assess your bike’s current condition, any parts that needupgradingor replacing, and any options you might already have installed.
Maintenance
- Replace the chain and cassette.
- Get the wheels trued.
- Check the headset, bottom bracket and hubs for proper adjustment. Re-lube if necessary.
- Replace the brake and shifter cables.
- Replace the brake shoes.
- Check all bolts and fasteners for tightness, rust, etc.
Upgrades
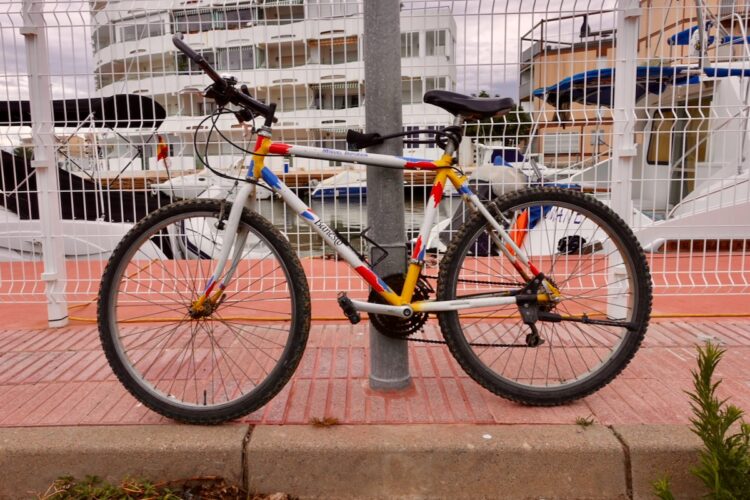
Knobby tires and front suspension are great on the trail, but on pavement…not so much. In order to make a truly dedicated commuter bike, these need to go.

There are a number of rigidsteel forks on the market. These are sized to allow for the travel your bike used to have, and can come with V-brake or disc brake tabs.
Here are some decent models to consider:
eBikeStop carries Dimension steel forks in both V-brake and disc brake configurations. They range in price from $35 – $55.
When I converted, I spent $45 on a Tange steel fork, with V-brake tabs, but these seem to be getting a little scarce.
Surly makes a great steel fork for $100 with both V-brake and Disc tabs.
Whatever fork you choose, just be sure to match the brake mounting tabs to your intended brake type, and pay attention to 1 1/8th inch threadless vs 1 inch threaded steerers.

For tires, the issue is not so much the tread or the width, but more importantly the maximum air pressure. On pavement, a firmer tire rolls easier and you want as many psi as possible. I have 1.5″ wide Bontrager Hardcase Comfort tires that will take 85psi. Loaded with me and work stuff, these hold up great and roll fast. Here are some tire choices that are currently available:
Kenda Kwest (100psi 26×1.5 model) $20.50
Schwalbe Marathon $41.95
WTB Slick (with Flatguard) $19.99
Bontrager H2, H4 or H5 $20.99 – $46.99
Racks and Bags
With the fork and tires sorted, the next step is to give your newly created urban assault bike the ability to carry stuff. A luggage, or pannier rack is the first item to decide on. Most older mountain bikes have pre-drilled and tapped mount points for just this purpose. Topeak is the leader in this segment and their rear racks integrate seamlessly with their own line of bags while also supporting bags from other brands. The center of the rack acts as a de facto fender, and they have a built-in tab for mounting a tail light. One model is even disc brake compatible.

If you don’t have rack mounting tabs, you will need to use a seatpost rack. These don’t support as much weight as the frame mounted type, but they are suitable if it’s your only option.
Next you will need to choose a bag fortransportingyour stuff. If you do not need to transport a laptop, there is a huge selection of bagsavailable. Make sure to allow room for a change of clothes, lunch, and personal items. Better quality models have compression straps, bungee cords and built-in rain covers. If you also need to transport a laptop, not to worry: there are bags designed specifically for this purpose. The Delta Metro Eliteis an affordable choice that can hold a 17″ laptop with plenty of room left over for clothes and files, and it has an integrated rain cover. I have this model and it works ok, but the mounting system is a little weak. The mounting hook broke after about a month of use, but Delta replaced it for me without a hassle.
 If you’re serious about bike commuting, the primo line of bags to check out comes from Arkel. These high quality bags are pricey, but they are very well made and can hold up over years of commuting. The Bug model is fairly compact and can hold a small to midsize laptop via an optionalpadded sleeve. Off the bike, it quickly converts to a backpack. The aptly named Commuter is the workhorse of the line-up. It swallows larger laptops and a ton of stuff and includes the laptop sleeve.
Lights
Whether your whole commute is in daylight hours, or if you stretch into dusk in the spring and fall, a good set of lights can be a valuable purchase, and they may even be required by law in some places. A good quality ‘blinky’ tail light is a good idea regardless, as it helps motorists see you, even in bright sunlight. Here are several good models:
Planet Bike BRT-3Can be direct-mounted on theDelta rack above. This is the light I use.$9.99
Niterider TL-5.0Convenient seat post mount.$6.98
Blackburn FleaSmall, light-weight, rechargeable and insanely bright. This is a popular model among full time bike commuters.$29.99
 As for a headlight, there are a number of decent models in the $30 to $50 range from the above vendors, but if you already have one for nighttimemountainbiking, you can just use that. If you don’t have a light, I would still recommend a mountain biking light such as the MagicShineMJ-808 P7 for $89.99, the CygoLite Pace 350for $149.99 or the Light & Motion Stella 400 for $269.99. Any of these lights will work well for commuting, as they all have Hi, Medium and Flash modes for night time illumination or daytime visibility, as needed. I have the MagicShine and I love it.
This how-to is intentionallycomprehensive and results in a well appointed, full-time commuter bike. You can start with the basic maintenance, street tires, and a backpack and make the rest of the modifications as time and money permit. Hopefully this helps you get that great old hardtail out of mothballs and back into circulation!
If you already have a converted commuter bike, go ahead and drop a link to a photo of it into the comments.