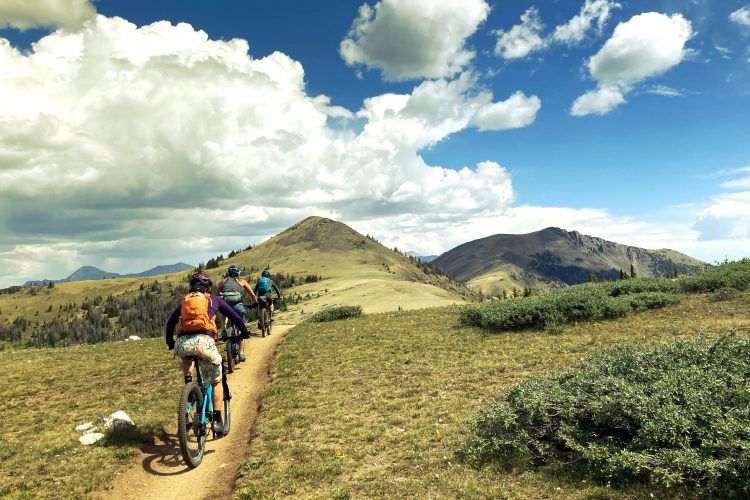
If youve been following the singletracks series on trailbuilding, youve read Trailbuilding: Work Smart Not Hard, Choosing Your Line Part 1 and Part 2, and Trailbuilding 101. Now youre ready to put your knowledge to work and start building your trail! But how do you build a trail that is sustainable, fun to ride and maximizes flow? The answer: build a rolling contour benchcut trail.

What is a Benchcut Trail?
Benchcutting is to trailbuilding what beer is to a Canadian: essential. Benchcutting is the fastest, easiest way to build a sustainable, low maintenance trail.
Benchcutting new trails is great because it allows for relatively easy removal of organic topsoil, provides good drainage, and makes the most out of elevation drops by traversing the hill rather than going straight up or down it. Trails that go straight up or down a hill will eventually become rutted out. Rutted trails are difficult and not fun to ride plus they’re environmentally unfriendly.

An integral part of building a benchcut trail is marking the new line. To mark out a benchcut trail, visualize the line and plant flags on the downhill side of the future trail. The trail can and will deviate slightly from the original flagging. For tips on how to choose your line, check out these articles: 1 and 2.
How to Build a Benchcut Trail
A benchcut trail is created by removing material from a hillside and broadcasting it down slope. This removal of material is best done with a mattock, a Pulaski, a mini front-end loader, or a mini skid steer/earth mover. When built properly, a benchcut trail provides a stable surface allowing riders to traverse the hillside. It sounds straightforward but there are a number of elements that are necessary for the trail to ride and drain properly.

Camber is defined as the angle of the trail perpendicular to riding direction. The camber is always sloped downhill to allow water to run across the trail rather than down it. Without the proper camber, water would channel down the trail, creating unwanted ruts. Rutting can also occur if the camber angle isnt steep enough or the trail itself is too steep. IMBA recommends a maximum trail grade of 15 degrees. Of course this maximum grade isnt always possible and will increase or decrease depending on the type of trail youre building and the soil type. Loose, sandy soils erode more easily than clay based trails, so youll be able to create steeper, less cambered trails if you are working with clay soil.

IMBA recommends grade reversals on benchcut trails to facilitate drainage and avoid channelling. Grade reversal is another way of saying a change in trail pitch from downhill to uphill or vice-versa. This works well because even if water does start to channel down the trail it will collect and drain at the lowest point, the point of grade reversal. The more grade reversals that a trail has, the better it will drain.

Avoid building benchcut trails on extremely steep slopes. The amount of earth you need to remove from the hillside increases as steepness increases. If you remove too much earth, you can jeopardize slope stability and cause land slumps or even landslides. The slope stability depends on the number of trees and the type of soil on the hill. Hills with a low number of trees and clay soil are particularly susceptible to slumping, while hills with a high number of trees and sandy soil are not.

Once the new trail is cut, you need to finish it. Finishing involves removing roots, big rocks, organic material and loose soil. A McLeod is the best tool for finishing a benchcut trail because the rake end is used to remove sticks, roots, and rocks while the flat end is used to move loose soil and create proper camber. If you cant find or afford a McLeod, make do with a rake and a hoe. After finishing a benchcut trail, you will have a smooth, flowy, rolling trail that will last for years.
Whats Next?
Now you know what a benchcut trail is, how to flag it out, and how to build it. To incorporate some serious speed and flow, you need to know how to build berms. Stay tuned because my next article will give you helpful berm building tips and quality photo examples.
About the Author
Kevin Johnstone is an avid mountain biker from Vancouver, Canada. He has been building trails across Canada for 4 years. He has worked with the worlds #1 bike park builder, Jay Hoots, to build a mountain bike park on the Sunshine Coast of British, Columbia, Canada. He spent 2 seasons improving the trails at Kelso Conservation Area in Milton and has a passion for building downhill-specific trails. Kevin can be reached via private message.
Kevin Johnstone and singletracks.com will not be held responsible for the consequences of illegal trailbuilding. Always get permission and build legally.