Trails
Gear
Community
Tips
Deals
Latest
Support
Trails
Find trails
Best bike trails
Destinations
Trail news
Add a new trail
Gear
Mountain bike reviews
Components
Tires
Clothing & shoes
Helmets
Accessories
Repair
Product news
Community
Forums
MTB Clubs
Races & Events
Bike Shops
Tips
Skills
Fitness & Training
Health & Nutrition
Beginners
Repair
Latest Articles
Podcast
Deals
Support Singletracks
Sign in
Create an account
Merch
About us
Newsletter signup
cassette
budget
Improving "Old" Tech: The Microshift Advent X 10-Speed MTB Drivetrain Review
news
Shimano Claims New Linkglide Cassette is 3-Times More Durable Than Hyperglide
repair
Quick Question: What Can I Do When my Chain is Stuck Between the Cassette and the Spokes?
Drivetrain
The 12-speed Shimano Deore Drivetrain Delivers Incredible Value [Review]
Drivetrain
Lucky 13? We Put the New Rotor 13-Speed Hydraulic Drivetrain to the Test
Drivetrain
The e*thirteen TRS Plus 12-Speed Cassette Keeps an Ace in the Hole With Its 9-Tooth Cog
Enduro
A Summer Spent Pedaling Aboard Shimano XTR 12-Speed Group Set [Review]
drivetrain
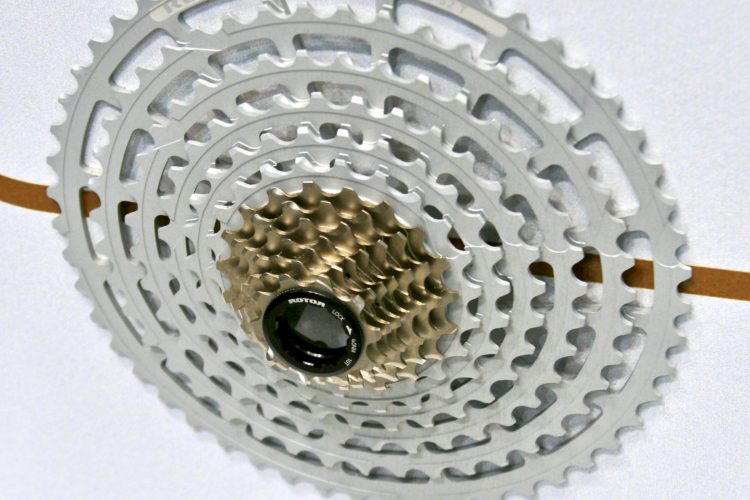
Rotor's 13-speed MTB Drivetrain Inches Forward, New e*thirteen Cassette Boasts 556% Range
Drivetrain
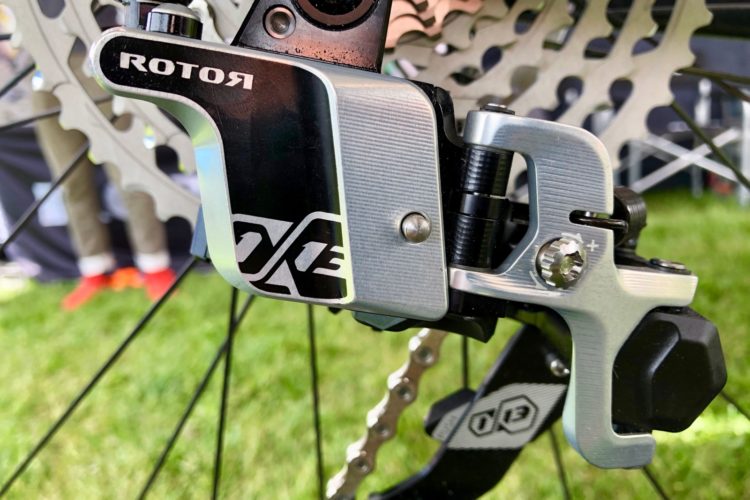
13-Speed Hydraulic MTB Drivetrain From Rotor at Eurobike
news
Upgrade Your SRAM 11-Speed Drivetrain To 12 Gears With A Kit From E*Thirteen
sram
Where Mountain Bike Drivetrains Are Going, in 2 Charts
DH
SRAM Announces Affordable Downhill Group: GX DH
MTB Drivetrains 101: What's the Big Deal About 2x10?
SRAM X0 2x10 MTB Drivetrain Review: Part I
How to replace a mountain bike cassette
This article is a step-by-step procedure on replacing a mountain bike cassette and chain.