So you did the unthinkable and forgot to clean up your bike for the coming riding season. Now youre stuck, and the shops are all backed up for weeks.
Well you could panic, cry, curse or all of the above. Or you could try your hand at bike maintenance and do it yourself. Overhauling a bike may be a daunting task for some but if youre one who has regular doses of dirt under the nails and knows which way to turn a wrench, a modern bike shouldnt be too much of an issue.
Not too long ago one of my good friends needed to have some work done on one of his bikes. He wasnt in a rush, but the bike did have a whole season of hard riding and was due for its annual service. This particular ride is a Yeti 303 RDH, a somewhat complex single-pivot bike with a unique slide mechanism for the rear damper. This is a pretty cool ride to talk about, and your bike, more than likely, will not be more technical that this.
Supplies Needed, Plan of Attack
Begin by gathering all the tools, oils, cleaners, and replacement parts (or at least the parts breakdown diagram) necessary for your bike. Things that typically need to be replaced are:
- Inner shift cables
- Outer shifter cable housing (if wear is present)
- Headset bearings
- Suspension pivot bearings
- Fork seals
- Brake pads
- Tires
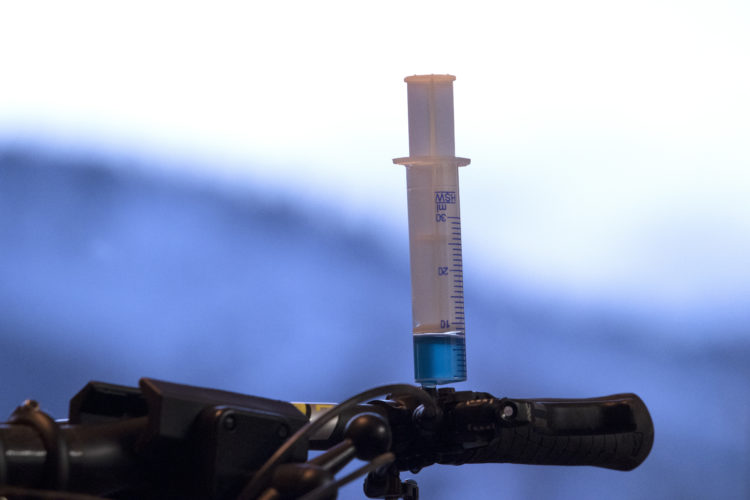
- Brake fluid
- Fork fluids
With a parts diagrams in hand and a good understanding of what you may need, the next step is to degrease and clean up your bike, which is always a good idea. I typically take the entire bike apart, and have it broken down into assemblies. I will go over the procedure in just a bit, but you will want to remove the handlebar (with shifters and controls attached), front triangle, rear triangle, wheels, and fork as complete units.
Washing
If possible, a good spray-down with a quality bike cleaner is the first step to getting things under way. Do not use a high-pressure wash, but rather a mist or low-pressure setting on your garden hose to rinse things off.
Having recently spent some time at a Fox seminar, the information that I gathered confirms what I just mentioned. Most of the failures they see are due to water contamination from people spraying down their forks with a high-pressure spray. Keep that in mind when spraying down your bike.
If you can afford it, use a bike-specific brush kit or a used toothbrush to loosen up the grime and dirt, then follow with the low-pressure water spray to remove any remaining residue.
The purpose of this cleaning is to remove the major chunks–the finer work will be done step-by-step as you further disassemble the bike.
Don’t forget to towel off the bike when you’re done!
(For more on washing your bike, be sure to check out this blog post.)
Wheels and Bar Removal


Start off by removing the wheels. Place them out of the way for a while as tearing down the bike is the main objective.
Next, cut all the cable ties and start to remove the bar as an assembly, keeping the brakes and shifters attached (front and rear). Set that assembly aside. If you have a double clamp such as the Fox 40 you will have to remove the small clamp that holds the brake cable and remove the brake as well.
Fork Removal and Maintenance
Next, carefully remove the front fork. Start by loosening up the top clamp bolts. I use wedges like the ones supplied with brakes to carefully spread them away from the stanchion tubes to prevent any scratching. If this is your first time, take a picture of the orientation of the headset bearings so you don’t have an issue replacing everything. Now, carefully lower the fork and collect the headset upper and lower bearings.


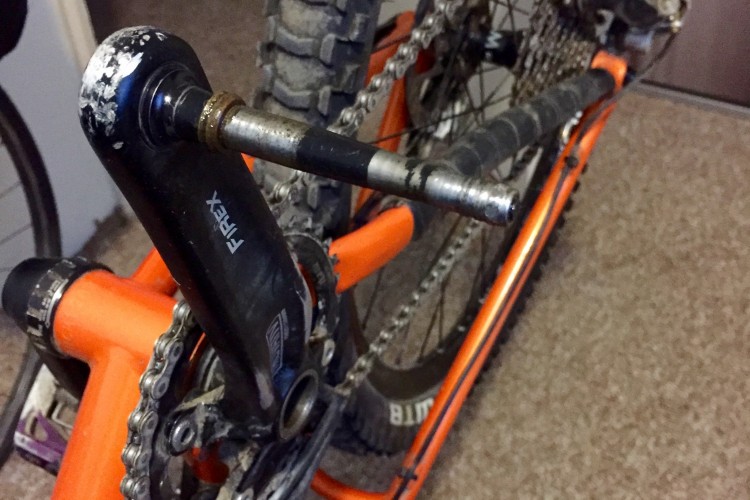
If you have ridden your bike for over a hundred hours like the fork pictured–it’s time for service. Believe me, it is much cheaper to spend the time now to replace seals and oil than to replace an entire fork due to lack of lubrication.
Spray down and brush away any grit or grim from the bottom of the fork and the arch. Pay close attention around the main dust seals – you do not want any contamination to drop in here.


With a Fox 40, start the procedure by writing all of the settings down on a sheet of paper. Note your rebound and compression settings. Also note the number of turns on the preload cap on the spring side. Then turn them to full open / no preload.
The fork pictured here is a 2010 model (no Kashima coating, older Fit-style damper), so taking a look at the damper cartridge is a must.
Unscrew the compression dial cover and then use a 2.5mm hex key to carefully remove the two compression dials. Have one of your hands underneath at all times to catch any detent balls if they fall out.
Loosen the lower nut a few turns with a 15mm deep socket, then using the same socket, tap it to release the rod from the housing. Have a container handy to catch the oil.
Now move on over to the spring side of the fork. With a 10mm socket, first loosen the nut, then tap the shaft free. Once the shaft is free, turn the bottom nut fully off the spring shaft. Allow the spring side oil to drain away.


Once all of the oil has drained out of the lowers, pull the lowers off and give them a good once-over with the cleaning spray and a tooth brush. Spray the lowers down and dry them off as best you can.
With a wide screwdriver and a cloth, wrap the screwdriver end with the cloth and then carefully pry off the dust seals. Follow that by removing the foam rings. A further cleaning ensures there is no grim or hidden debris under the seal and foam ring.
With a flashlight, take a look at the upper bushing and check for any discoloration or scratches. If everything looks OK, you can now install the new foam ring and seals. A small tip I picked up from Fox: remove the packing grease that comes installed on the new SKF seals. A lint-free cloth and a wiping motion removes grease easily enough.
Ensure the foam rings are lubed up (using the Fox float fluid) and install them in place (they do not have to be dripping wet). Now carefully install the new seals. I use a tool that I machined myself to do this task (Fox sells something similar for $35) which is designed to squarely tap the seal down without damaging it. This step is new for the SKF seals, and is necessary for proper operation.

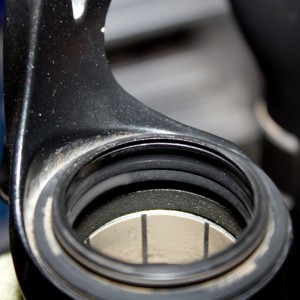
Now inspect the damper side. If it looks like the image above, you need to get it repaired. Basically, the diaphragm has pushed its way past the lower nut and is damaged. Have a certified tech look at it, or send it to Fox for repair. Do not continue until that has been repaired or replaced (now would be a good time to upgrade to a newer damper cartridge as well).
Turn the fork with the legs pointing up at about a 45 angle and slide the lowers back in place. Making sure you have enough room, add 50ml of Fox green fork oil in each leg, then slide the lowers all the way down to engage both the damper cartridge and spring.
Make sure you’re using new seals and then install both the 15mm and 10mm nuts. Torque them down to 5.6Nm each.
The fork seal service is now done.
(For an even more detailed article about servicing and upgrading a Fox 40, check out this article. For a very detailed explanation of how to service a mountain bike fork with a Manitou as an example, be sure to read this article.)
Stay tuned for Part 2: Drive Train, Frame, and Brake Maintenance.