


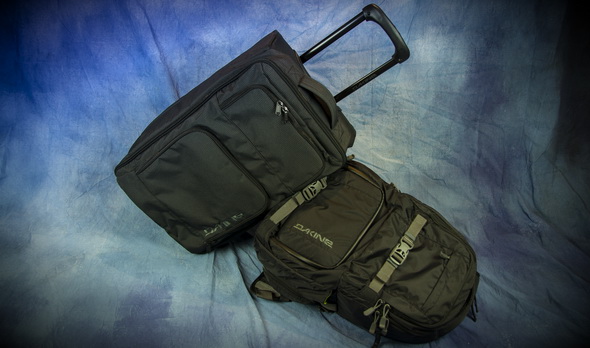
Heading to Interbike was much more pleasant for me this year, partly due to a set of bags that arrived just in time for my trip. I knew I had to pack as light as I could in order to go strictly carry-on and not check any bags. Well, the new Dakine Overhead and Quest 28 camera bag fit the bill perfectly!
Overhead Bag
Seeing that I had to fly, I wanted to make sure that all my gear was legal carry-on size, and for West Jet it was, as well as most other airlines. In case you’re wondering if this bag will fit, the true dimensions of the Overhead are 22 x 13 x 9″ [ 56 x 33 x 23cm ]. Just go online and double check the dimensions with your favorite airline.
Now, I don’t over pack, but I still did need some organizational space to keep clean clothes, dirty clothes, and other gear separate. That wasn’t a problem, thanks to the interior mesh pockets. In fact, this 42L bag holds quite a bit of clothing!

I could even fit an open face helmet in there if I had to, along with other articles of clothing. Now, when you’re traveling you don’t necessarily want to open your carry-on in the airport to get something. The exterior pockets hold things that you may need access to during your flight. I tend to keep phones, keys, or other items in the exterior pockets.
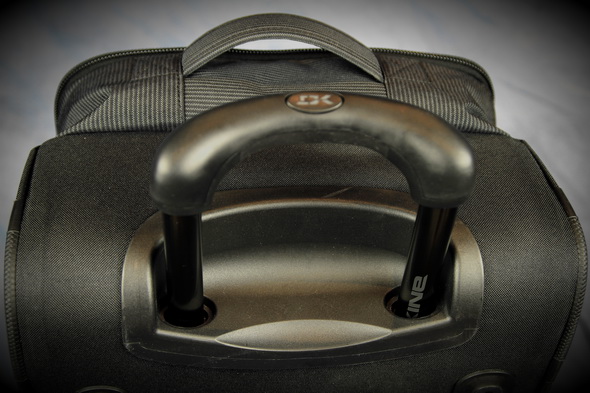
From terminal to cab and cab to hotel there is going to be walking (and at Toronto International airport there is a lot of walking)… so rolling is a must. Good thing the Overhead has a retractable handle and high-quality replacable urethane wheels!

At 6 lbs empty, the Overhead is a nice, light weight, allowing for more stuff inside! Made from durable 600D polyester, this bag should last some time.
Quest 28 Camera Bag

The next important part of my travel gear is my camera bag. Since I’m pretty serious about my photography, I have to be prepared for many different situations. Consequently, my kit has grown considerably in recent years. Now, unlike my travel bag, I need a pack that I can carry my equipment in when I am traveling and that I can also use while riding to shoot on location. Seeing that almost all of my riding is of the enduro / gravity persuasion, I needed a stable pack that doesn’t shift around. The new Quest 28 fits the bill perfectly. At 4.5lbs empty, this bag contains a lot of neat features that really help when it comes to packing my gear and keeping things from clattering around.

Unlike the Sequence 33L, the Quest does not have a separate padded sleeve, but instead features a separate side and front entry zipped flap. The main compartment is totally padded and customizable, with enough slots for at least 5 lenses and a camera. I would have to say that a 70-200 F2.8 lens is as big as you would want to try and fit in here–my big Sigma barely fits. So keep that in mind.
Other than that, I have enough room to carry all the other fast lenses and my Canon 7D body with no issues. My other gear fits nicely in the other upper, non-padded compartment, easily holding two flashes, chargers, lens hoods, remote triggers and other gear. If needed, you could probably fit another lens if you had a carrying case with it.
Smaller internal pockets hold spare filters, batteries, cleaning fluids and, in my case, filter gels and snoots. An added bonus that I found really useful was the 15″ padded laptop sleeve for my PC. With the sleeve, I don’t need to carry a laptop bag: the laptop, mouse, and power adapter all fit nicely in the Quest. Perfect example of killing too birds with one stone!

Externally there are even more key features that help make the Quest 28 shine, the most important of which are the straps. Made from 420D rip stop nylon, the straps are nearly 3 inches wide and rival almost all that I have tried. They’re comfortable, adjustable, and once the sternum strap and waist belt are set, rock solid. For me, that is what makes a pack like this totally useable. I cannot afford to have a pack move on me when riding DH to take pics. The security of the sternum strap and the pre-curved waist belt also help make for a steady, sway-free pack.

Other important features that make life that much easier when you’re out on the trail include the deployable rain cover. In Ontario, the weather doesn’t change minute to minute, but in places like BC, I can definitely see the importance of this feature. On the lower half of the pack, waterproof zippers are employed around the photo pockets. This is pretty important for me, as I have done a few stream crossings with my pack while riding. A water bottle pocket, tripod holder, and two vertical board-carrying straps complete the outside features. Overall dimensions are 19.5 x 12.5 x 9″ [ 50 x 32 x 23cm ]. Inside camera block dimension is 12 x 11 x 5.5″ [ 31 x 28 x 14cm ].
Impressions
The Overhead holds about 4 days of clothing for me. If you’re really good, and know how to pack, you could get even more items in there. On my three-day trip to Interbike I had enough clothing for the entire show and then some. There was still plenty of room to bring back a bunch of swag.
In the airport, running from terminal to cab and around town wasn’t an issue. Those little wheels spun like mad and worked great! The collapsible handle was sturdy and worked as a makeshift support for my camera bag.
I’ve used Dakine bags on plenty of bike trips and photo ops and I’ve come to really like their gear. The Quest 28 really works well and can carry a lot of equipment. Some of my friends do think I am nuts, carrying around a fully loaded camera bag on the trail, but they don’t complain too much once they see the rad pics of themselves.
The padding really is a life saver considering what I am doing. Some of those rock gardens and rooted paths really shake things around! Luckily, the dividers and compartments work well.
As far as accessing everything, with this pack you could (in theory) reach to the side and slide your camera out to take a pic. But reality is another thing altogether. I found that with my set up, I had to remove the pack and open up the compartment and pull out my camera and slap on the battery. If your kit contains a 70-200 F 2.8 lens, you may want to keep that on the camera, and then use the compartments for all the other lenses. If not, you’re storing the 70-200 in the lowest compartment.
Everything else on the pack was flawless as far as I am concerned. I love the added rain cover… that did come in handy more than once when taking pics on the trails.

Dakine hits the mark with two bags that I really appreciate for their ease of use, ruggedness, and style. The Quest 28L retails for $210 while the Overhead retails for $140.
I would like to thank the folks at Dakine for sending down the gear for review. Stay tuned for more from Dakine in the near future!


